This Autarch dates from April 2013, so I think it will probably take the trophy for the longest time between being started and finished at a hefty 8 years (oddly, nearly to the day as well.
8 years ago I used to document my modelling on my Warseer Eldar project log, which over time became a popular modelling thread on the forum, I believe because I kept it going for so long, because I was doing some pretty in depth kitbashes, and was experimenting with moulding and casting, especially on my converted/scratch built Eldar jetbike design which was being worked on before GW updated their kit. Anyway, one of the mentioned involved kitbashes was an Autarch who is the subject of this post. When I picked up the model in my “box of half finished stuff”, it was half way through being painted. I went back to Warseer to dig out the old pre-paint WIP photos of the model and was pleasantly surprised to find that Warseer and my project log is still alive and kicking, and that most of the images are still working too.
I wanted to grab the WIP photos for posterity and also because it’s been so long since I made this model that I legitimately couldn’t remember how I did it. Looking back over the photos and reading the words of my 31 year old self was nice – it really does pay to write things down.
I think my painting has improved quite a lot since 2013 but looking at these photos one thing’s for sure, my sculpting has gone backwards and my kitbashing has, at best, stayed much the same. I wouldn’t be at all surprised if this model ends up being my best ever conversion.
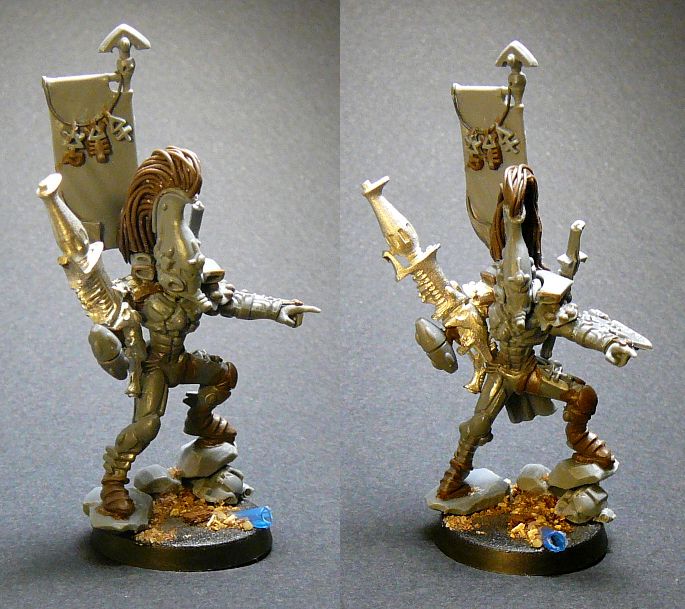
The base model is a Dire Avenger Exarch. I’ll work from the bottom up, skipping the rather lovely scenic base which I have since lost (I had to make a new one this month). The legs received an ambitious repose with all the gap filling and sculpting this necessitates. The shins and boots are up-armoured, Striking Scorpion style. A subtle detail is the addition of a 3rd “tag” at the ankles (I call those things that all Eldar have at ankles and wrists tags, I have no idea what they’re supposed to be).
I used a dire avenger sash at the back and later added a tabard to the front to balance out the model.
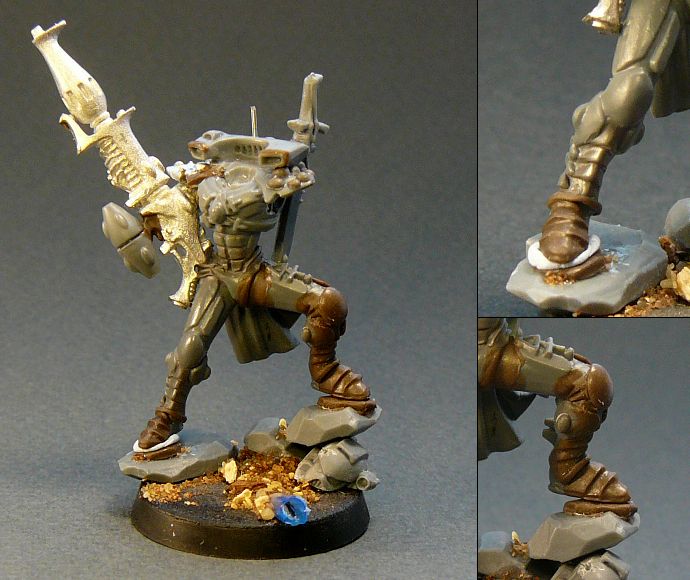
The torso has extra armour sculpted at the belly, turning what is normally a “4 pack” into a proper 6 pack and giving more height to the finished Autarch.
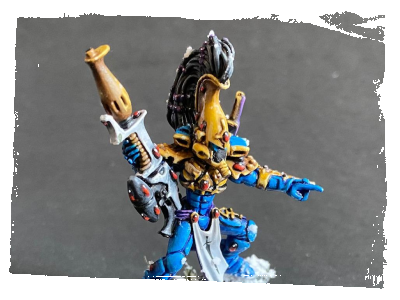
The right arm is the dragons breath flamer from the Fire Dragon Exarch. I added extra detail to the left shoulder pad to mirror the detail on the Fire Dragon shoulder pad. The flamer canister was swapped for one from a different Eldar gun to look more like a melta gun. The left arm is a Dire Avenger Exarch arm with shimmer shield. The left hand, I’ve just realised, is also sculpted to some extent (see first photo). It has a pointed finger added and some of the distinctive finger armour detail resculpted.
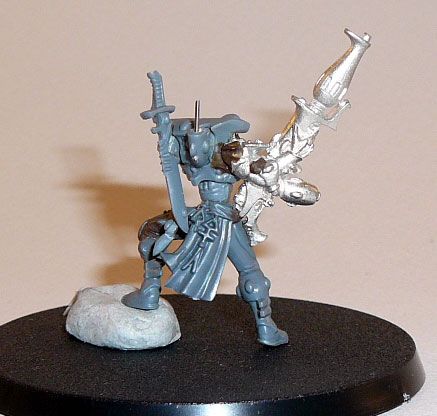
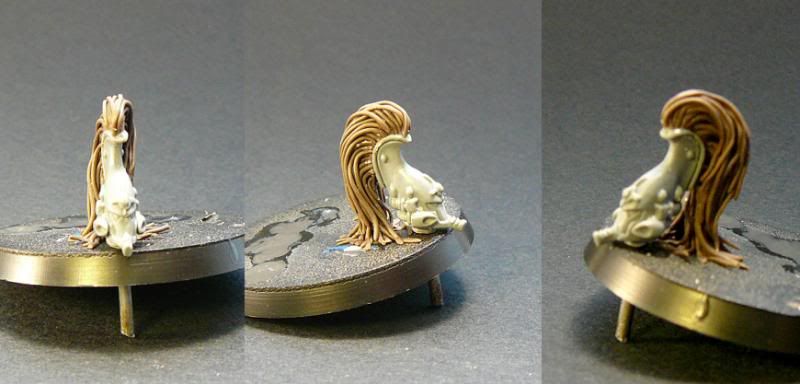
The helmet was a very involved task. It’s the Dire Avenger helm with the two lower intakes on the sides replaced with some small parts from the bits box – to act as mandiblasters. I removed the normal crest and then painstakingly added dozens of individually rolled thin sausages of putty. Reading back, I had originally intended to place the helm on the floor and use an unhelmeted head, but the good folks on Warseer made me see the error of my ways, and I retrofitted the helmet to the model itself (redoing much of the bottom end of the braids). I later added beads to the braids too.
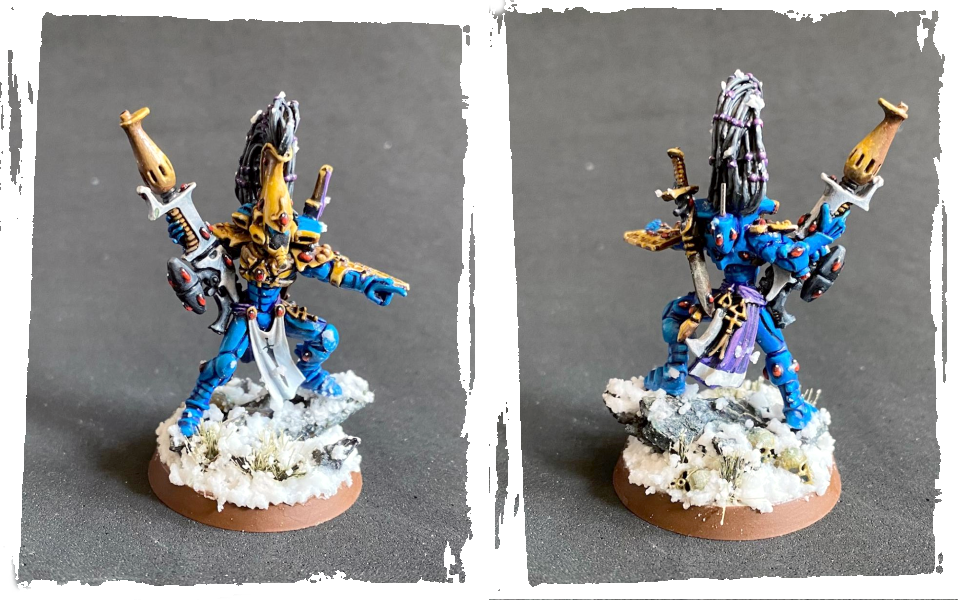
With a Dire Avenger sword and shimmershield, a melta gun and a set of mandiblasters, my idea was this Eldar had walked the warrior path through Avenger, Dragon and Scorpion shrines before becoming an Autarch. As a nod to this I somehow managed to create the 3 shrine symbols as trinkets hanging from the back banner. Tragically, this banner didn’t survive to see completion – I ended up painting it badly several times, got frustrated as the paint got thicker, dropped it into a pot of paint stripper, and promptly forgot about it. By the time I remembered little remained apart from a sludgy blob of molten plastic. So, that remains to be revisited at a future date.
When I picked up the model this month the majority of it was painted, though I didn’t photograph it at this point. It was then that I realised how far my painting had come on. As such a cool conversion I had poured everything into painting it too, but my layering and in particular my NMM has definitely improved in the 8 years since (not that my NMM is particularly good, still). I did go over some of the old paint to tidy things up, changed some colour choices here and there and redid some areas (like the gun nozzle) entirely, but on the whole this is a model painted in two different time periods.