
Building terrain, making bases, converting and painting models… it’s a messy affair. You know the drill… you keep pushing back the encroaching tide of scrap, always seeking a patch of clean, empty desk space in which to work, but eventually your work area becomes overwhelmed by plasticard offcuts, empty sprues, filings and scrapings, cast aside kit components, blobs of dried glue, paint pots, brushes, half buried tools, that patch of superglue you keep sticking your hand to, and much more besides.
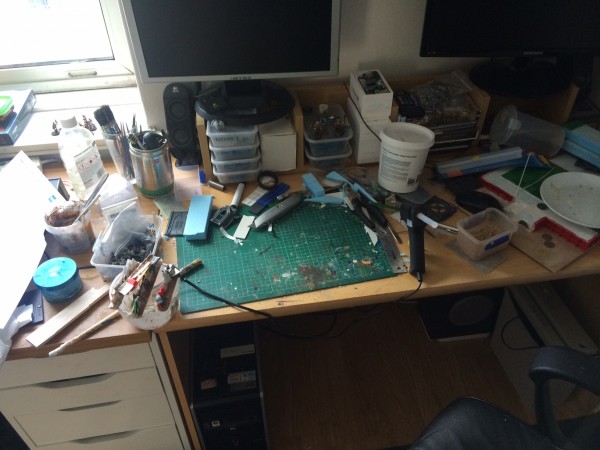
Eventually when you’ve lost your pliers for the fourth time in as many minutes, and it’s become impossible to move your mouse or find your keyboard, things become so bad that the only option is to hit the reset button on your workspace. First you comb through the detritus looking for any obvious bits or parts that look like they might be useful one day, and add them to a bits box. You put your tools, brushes and paints away, then, with a vague sense of regret, you sweep everything else into the bin, hoover and wipe down your work top, and start the cycle again.
Today I’m going to talk you through a (sort of ) alternative. Next time you’re about to hit that reset button, consider making some scrap barricades instead.
Tools & Materials Required
- Desk detritus
- Hot glue gun
- Pliers and knife
- Sandpaper or file
- Filler
- PVA
- Sand
About the only “specialist” item here that you may not already have is the glue gun. It is an absolutely essential item for building these barricades quickly (or indeed for making most terrain). Hot glue guns are cheap and you can buy a near endless supply of glue sticks on ebay for pennies each.
—
General Guidelines
As these are scrap barricades, most pieces you attach to them should be battered up in some way. To assist with this, for most material I tear it with pliers rather than trying to cut it neatly, before attacking it with the knife to rough up the edges and add bullet holes. Also think about bending or twisting poles and sheet material with your pliers. The more battered it is, the more texture and interest there is later to pick up with washes, weathering and dry brushing.
Hot glue guns aren’t neat, but don’t worry too much about glue splurging out when you glue bits down, particularly on the base where you can be very liberal with the glue as it’ll be covered up later anyway.
The best results are achieved not trying to make the barricades too evenly constructed or high. Keep things varied so that some parts provide soft cover, some hard, and some hide modes entirely.
—
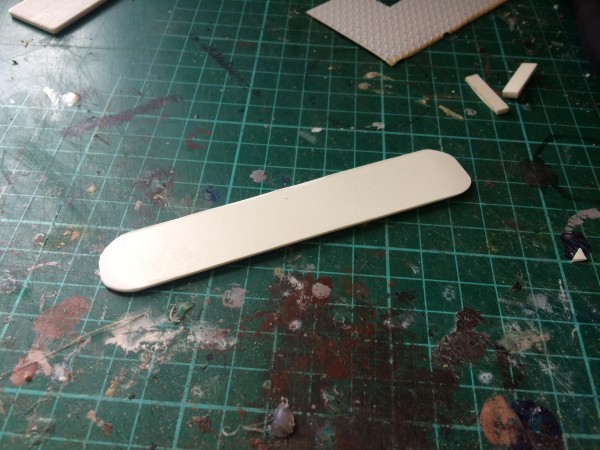
Step 1 – Base
Take an offcut of 1mm plasticard about 2cm wide and as long as you want your barricade to be (or as long as your off cut is). Roughly round the corners with a knife and sand paper.
Step 2 – Spine
Plasticard is obviously flexible so you need to reinforce it to stop it flexing or warping. Any reasonably long and stiff material works here, glued along the barricade as a “spine” – sprue is a good one. Failing that, another piece of plasticard glued edge down.
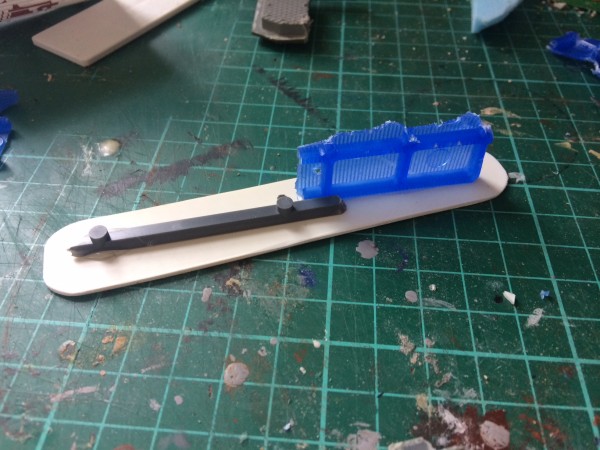
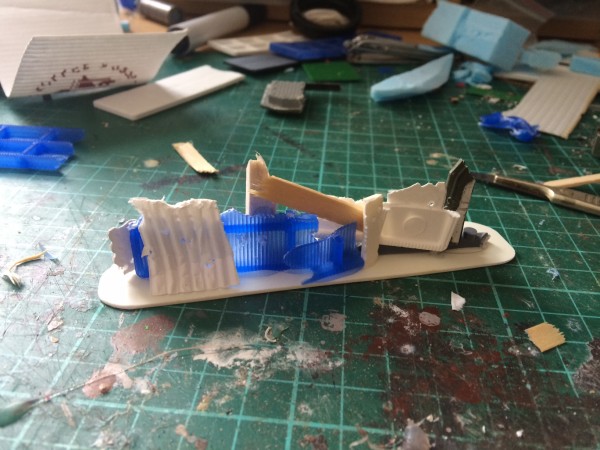
Step 3 – Verticals
There really isn’t a “right” method to follow from here, but I find it useful to next glue some vertical “posts”, irregularly spaced, along the barricade. These posts could be sprue, balsa wood, coffee stirrers, pipes or anything else vaguely vertical. The verticals are handy for gluing panels of card and plastic to in the next step.
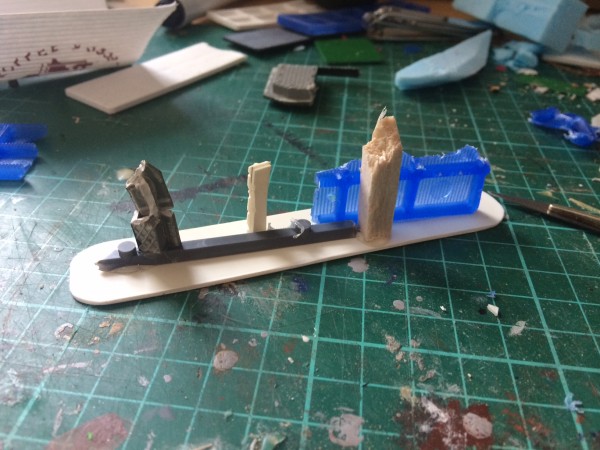
Step 4 – Panels
Now we add offcuts of card, corrugated card, textured plasticard, granny grating, MDF girders, ladders, mechanical bits from old kits or whatever else happens to be in your junk pile on your desk. Remember everything gets some sort of roughing up. Keep adding panels (much like the Necromunda gangers who have put together these makeshift barricades) until it looks convincing, and don’t worry about things being a bit flimsy early on – the more you add, the stronger the barricade becomes, particularly when you add some cross beams…
Step 5 – Cross Beams & Finishing touches
It helps to reinforce the barricade and add to the visual interest by slotting in some cross beams. Coffee stirers, sprue and so on works here. Make sure to take a look at the barricade from both sides, as you want it to look good from all angles! Glue more bits wherever there are areas that look a bit empty or “samey”.
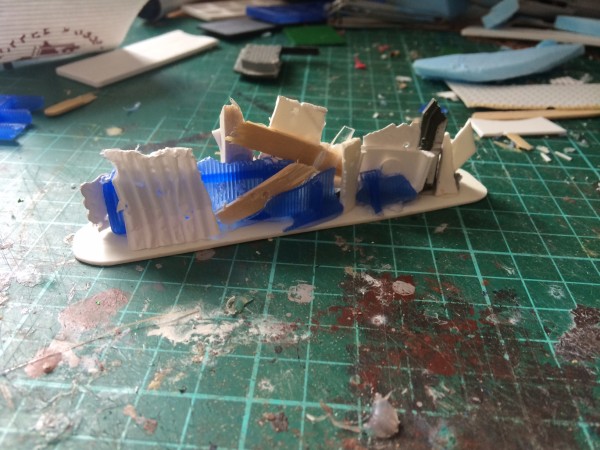
Speaking of finishing touches, here are some ideas I’ve had for more interesting or idiosyncratic details you could add to some of the barricades. Discarded weaponry; the odd rat; chains; spears; warning signs and banners to mark gang territory; spikes/spears; barrels and
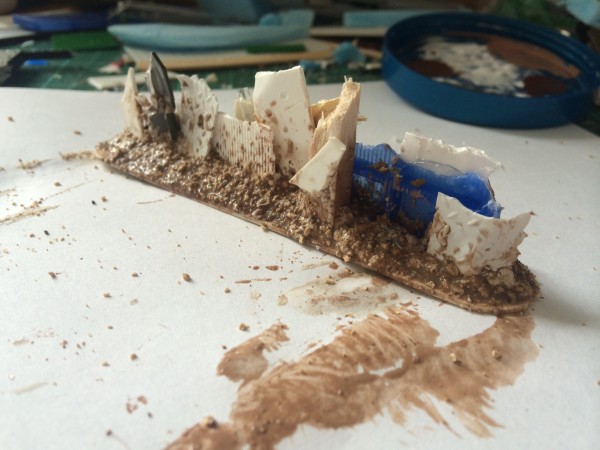
Step 6 – Filler & Texture
Apply some filler to the base to build up a bank around the bottom of your barricade. I find it quick and easy to roughly apply this with my fingers (it doesn’t have to be neat or smooth). With the filler still wet, apply some PVA (again roughly) and sprinkle sand over the barricade. Then take a wet brush and tamp down the base of the barricade, quickly achieving three things – smoothing out the base to a more natural finish, pushing the texture into the filler and glue for a firmer bond, and washing excess sand, glue and filler from the panels and other details where you don’t want it.
—
This completes construction. As these are so quick and easy to make, I suggest you make some more, before letting them all dry and proceeding to paint. Make enough of them and you too could have a clean, sparkling desk space like mine, without having thrown away any of that useful scrap!
Clockworkorange
Great blog Fold, imagine what we could build together!
Admin
Cheers Clockwork, glad you managed to find your way over here! And I imagined, and it’s glorious!