For my Necromunda terrain I wanted to have several of the base layers for the modular sections,or “risers”, built out of brickwork. It’s not a typical finish for Necromunda terrain but I have reasoned that as it’s at the bottom of my terrain it is probably very, very ancient indeed. Over time, the underhivers have reinforced the brick buildings and platforms and used them as foundations for towers, processing plants and other industrial buildings, the original purpose of the brick buildings long forgotten. Besides, the opportunity to model grimy, moldering brickwork at scale was too good to pass up and the finished effect should lend a real feeling of decay to the table. The approach I came up with is quick and effective, so I felt it worthy of a dedicated tutorial.
Brickwork of course is in danger of being very tedious to model but the following process makes it very quick and easy to achieve a convincing effect and can be used for many miniature wargaming or model train scale scenery/terrain applications. You will need a wall or surface either made from hard extruded polystyrene (insulation foam) or coated in at least 10mm of the stuff.
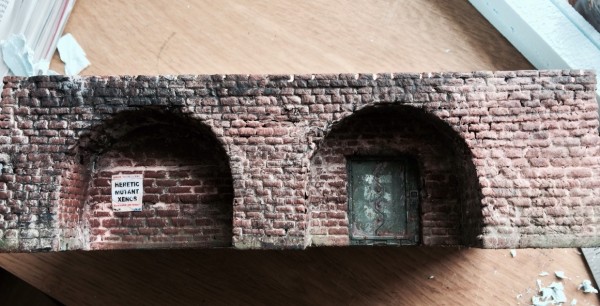
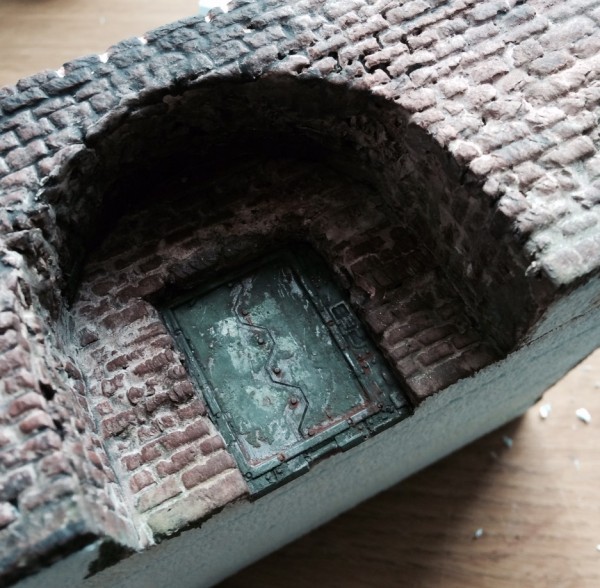
In this tutorial I’m making the inside surface of an arched wall facade, so I only need to finish two arch shapes and then glue the previously made arches on.
—
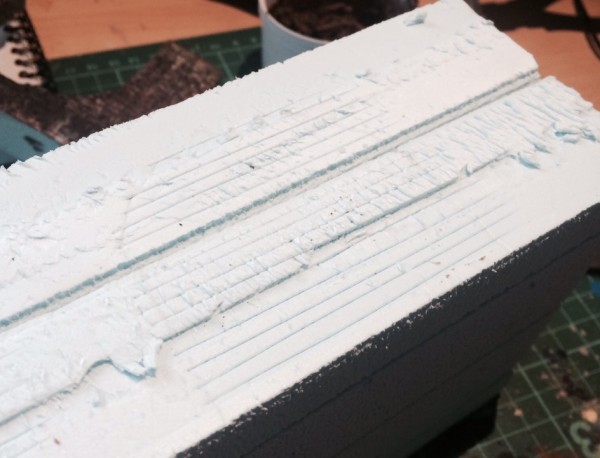
Step 1 – Scoring Horizontal Lines
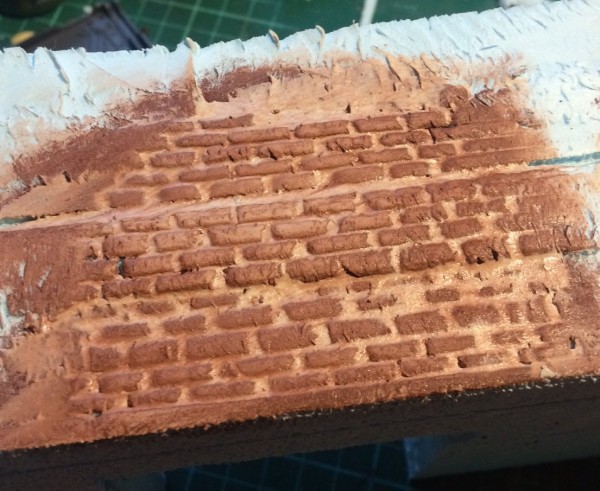
First, score the parallel lines in the brick wall with a sharp knife to a depth of 1mm or so. I do this freehand because I like the aged, haphazard look it gives the final wall. If you’re building a wall in better condition then you’ll want to use a ruler. Consider the scale you want your brick wall to represent. For 28mm scale gaming, a typical modern day brick in scale would be barely 2mm high. For me, that’s too small – mostly because it would take too long. So I accepted larger scaled bricks for the sake of speed, and spaced the cuts 3-4mm apart.
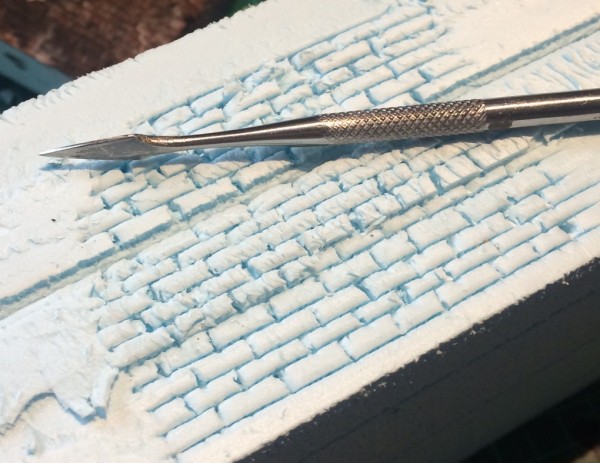
Step 2 – Widen the Gaps
Take a blunt implement – I use a trowel shaped sculpting tool- and quickly run it down the cuts you just made to widen the gaps and make them a bit irregular.
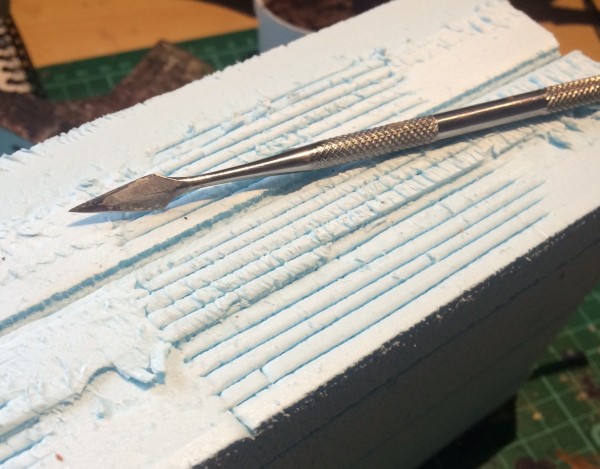
Step 3 – Create Vertical Gaps
Using the same tool I now half cut, half crush the vertical gaps between the bricks. Obviously for a convincing scale brick effect you need to offset the “courses” of bricks so no bricks are aligned directly above each other. For simplicity I stick with a very straight forward brick laying style (or “bond”), which is called “stretcher bond” but there are lots too choose from if you want to get fancy. Again, here I’m not too careful or precise and the bricks end up quite irregular, which suits my purpose and makes the job faster.
In this wall I’m also adding a bulkhead door which is quickly primed and hot glued in at this stage.
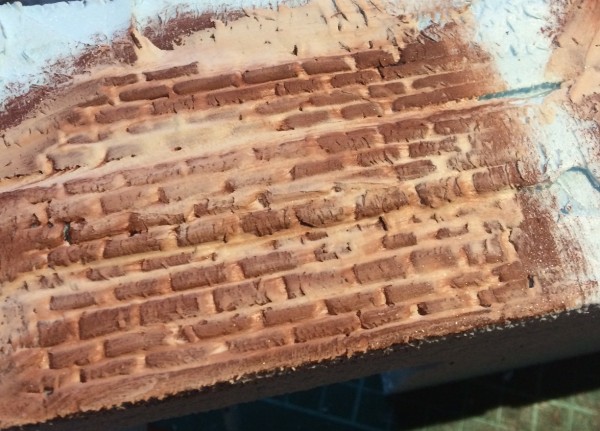
Step 4 – Paint the Wall
Your scale bricks now need a quick coat of paint in a suitable brick like colour. This colour should be somewhat darker than the finished effect that you want because the next step will lighten it quite a lot. I use a mixture of PVA and MIG rust pigment, which has good coverage and adds a bit of strength to the wall surface. Do not bother trying to paint in all the gaps – it is a futile and rather unnecessary endeavour due to the next step.
[I did not photograph this stage but one can imagine what it looks like – brown, with lots of blue polystyrene showing through the gaps!]
Step 5 – Pointing
After a real brick wall is laid a mason must “point” it by filling in the gaps with mortar, and we now replicate this on our scale model as well. Take some ready mixed skimming/finishing plaster, and with your finger smush it across the surface of the wall, pushing it into all the gaps between the bricks. This is why you don’t need to worry about painting all the gaps in the previous step. Don’t worry, the plaster will also coat the bricks to some extent, but we take care of this in the next step.
I like to do this before the paint layer has fully dried and still has a few damp patches. This causes the overall tone of the bricks and our mortar to change as the two blend together in places, leaving a wall with a more naturalistic, mottled effect. For a brand new scale wall you may want to wait till the paint is completely dry.
Step 6 – Cleaning
Before it dries, take a damp cloth and rub the plaster off the majority of the brick faces leaving it in the gaps between the bricks. You now have a convincing miniature brick wall!
Step 7 – Weathering
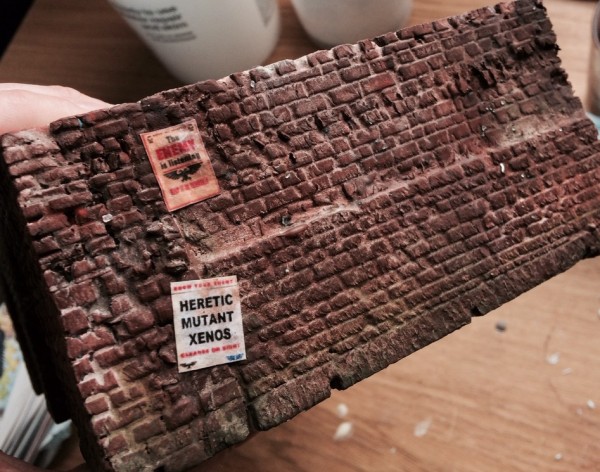
You may skip this step if you want a clean wall but for my purposes extensive weathering is required. For this I use water (often very dirty water from my brush cleaning pot) and a combination of black, beige and green paints. Wet the wall to encourage your washes to spread and then apply watered down black paint to any areas you want to darken, green paint for any areas of lichen or other discolouration (particularly effective if you let it seep up the wall from the base), and beige paint for limescale effects or to redefine the mortar in places. I’ll often apply the wash to the top of the scale wall and let gravity and chaos do it’s thing so the paint seeps down the wall in interesting ways. This step is a lot of fun, so experiment and enjoy yourself.
On this piece I also added a blast door with rusted, flaking paint and a few 40k themed posters. Numerous ready to print 40k posters can be found using a simple Google search and I just paste them on to the wall with scenic cement or watered down PVA.

I hope you found this tutorial useful and if so, please comment below.
Adam Smale
brilliant! i’ll give that a go. looks fantastic