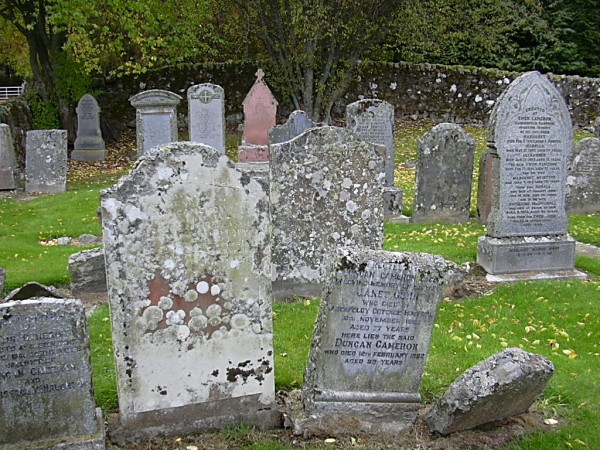
Any photo of an old cemetary shows that gravestones discolour with age and become covered with lichen. I had bought a couple of sprues of Renedra’s excellent value headstones to go with the GW gravestones that come in the Garden of Moor kit, and I was keen to replicate this aging effect.
I could not find any modelling tutorials online to achieve this effect, so decided to trial and error a technique and then write my own. The steps that follow are illustrative of the technique I invented, and good results can be achieved by using the techniques in various orders and amounts. Basically, keep going until you like what you see!
I recommend painting many headstones at once, so varying colours and effects can quickly and easily be applied. I blutacked the headstones to a small sheet of MDF then randomly applied each stage to only some of the stones, or varied the colours. In this way a natural variety of finishes is achieved.
Apart from the base coat it is often not necessary to wait for everything to dry completely before proceeding. I usually proceed almost immediately – the gravestones in this tutorial took about 45 minutes to complete.
Step 1: Base Coat
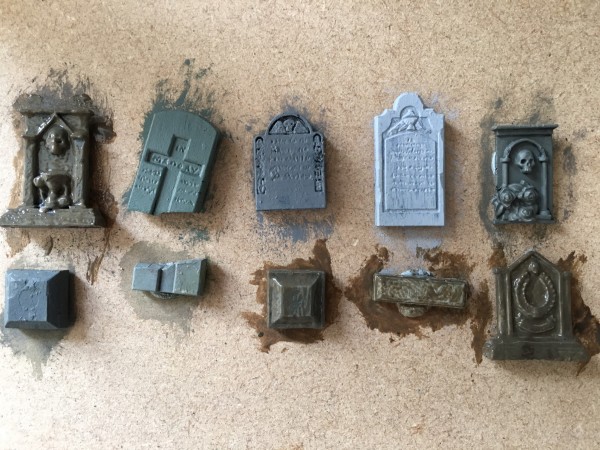
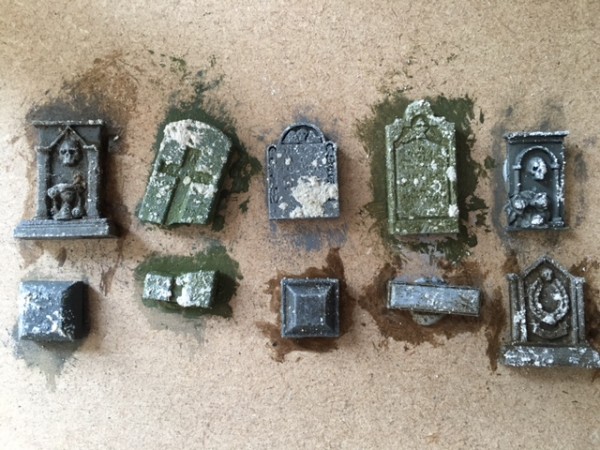
After cleaning up the parts and undercoating them, paint the headstones with a few different base shades of grey, green grey or brown grey.

Step 2: Toning & Texture
Mix PVA with a few different brown and green shades of paint (dark yellow works well too). This layer is a toning layer to alter the base colour. The PVA is there to make the paint stickier. Apply this goop all over the base, then remove the mixture from the headstone by repeatedly dabbing it with toilet tissue. The result is two fold; a random application of the toning colour without completely covering the base coat, and small fibres of tissue end up stuck to the headstone, which starts to provide some useful texture.
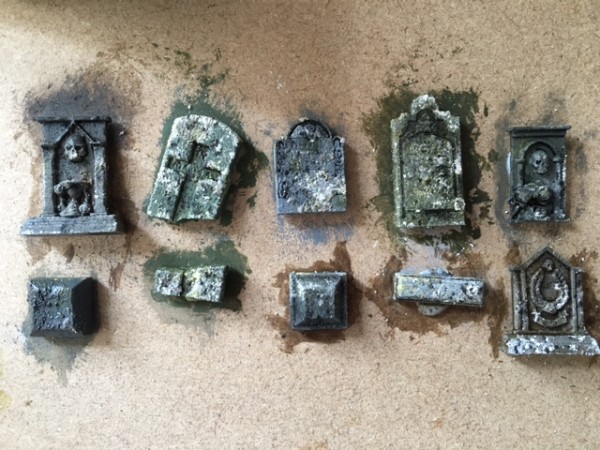
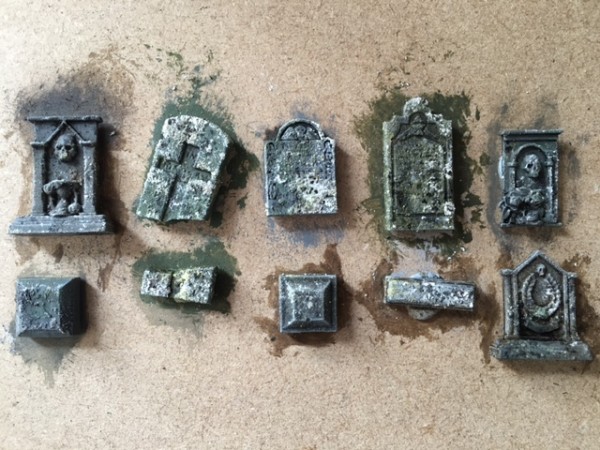
Here I applied a brown PVA mix to the top left and 3 bottom right stones:
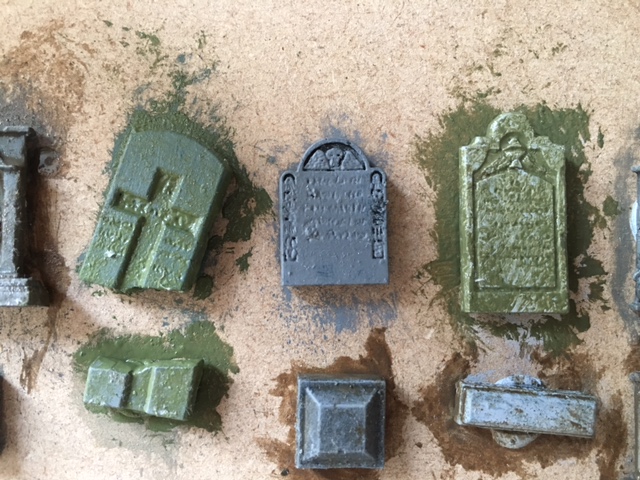
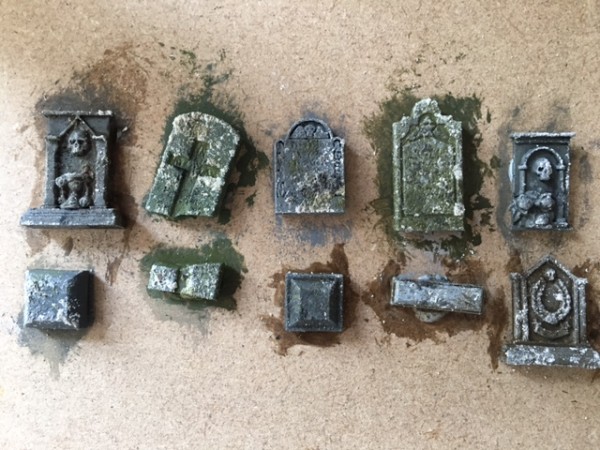
A green mix applied to a couple of other stones, with the excess dabbed off:
Step 3: Lichen
Take a scourer sponge, and dab it into some thick plaster. I use ready to use skimming plaster. Use this to repeatedly dab/press the headstones. Some of the plaster should adhere to the headstones in various small specks and built up clumps.
This is roughly the amount of plaster that should be on your scourer:
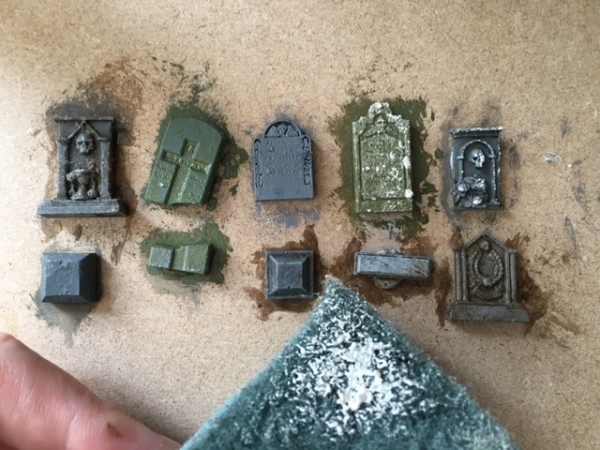
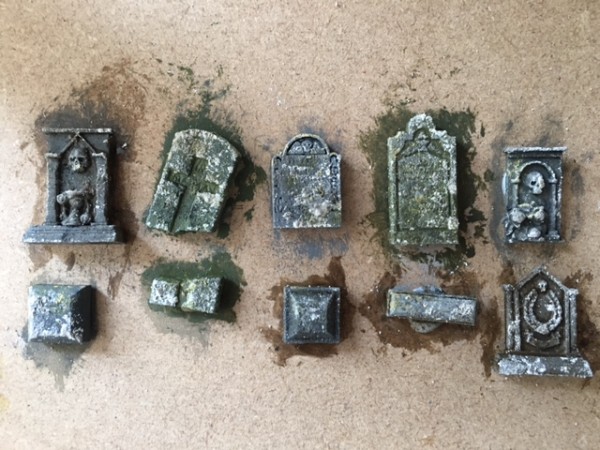
Below, after applying in various amounts to all headstones is the effect I’m after. Note the large clump on the top middle headstone, an effect I was particularly pleased with. I should have stopped here, but ended up covering it up somewhat. Sometimes the trick is knowing when to stop.
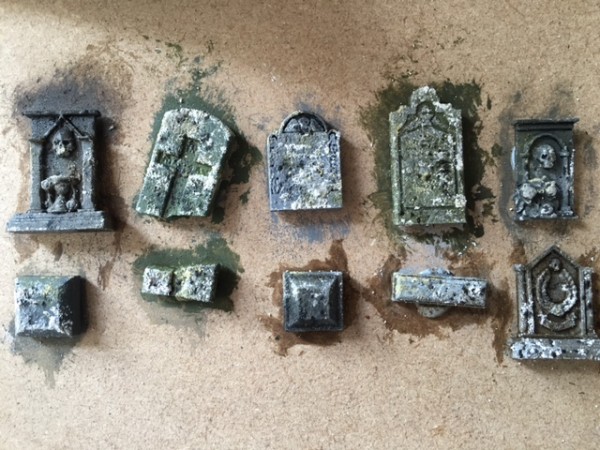
Next mix some plaster with some black paint to create some dark grey lichen, and repeat the process. Then do the same with some green plaster.
With a smattering or yellow coloured plaster and a repeated application of the raw stuff:
This is the key step for aging the stone, so keep going if you want a really old effect, or use it sparingly or not at all for newer stone.
Step 4: Oil Washing/Stippling
Mix up some oil with turpentine or another oil thinner. I use this for four things:
- to shade recesses and under any overhangs.
- stippled sparingly to represent the darkest patches of lichen.
- thinned even further to blackline any detail such as engravings.
- the thinnest oil wash can be applied to the plaster to knock back the brightness if necessary.
Dark lichen patches applied to the stone with an old split brush, along with deep shading:
Below, black lining the detail with very thin paint. Just dab the brush into the detail and let the paint flow around the lines. Also using a very thin glaze to tone down the white plaster in places (e.g. the two gravestones on the right). Keep a tissue on hand to lift off any excess paint.
Step 5: Drybrushing
Lightly drybrush the headstones, from the top downwards, with various mixes of white, grey, and beige.
Step 6: Streaking
On some headstones, apply some of your very thinned oil paint in light downward streaks. This can be repeated with greens and browns. The idea is to simulate dirt and so on seeping down the headstone due to rain.
Step 7: Finishing Up
Some headstones will be satisfactory at this stage. Others you might feel need a bit more work. On some headstones I keep going with the techniques above, layering them until I am happy with the finish.
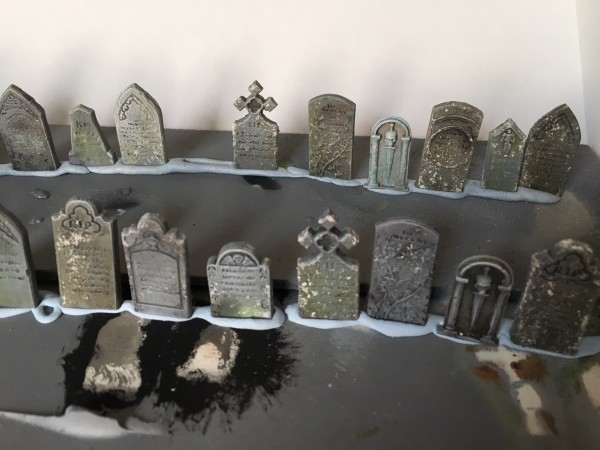
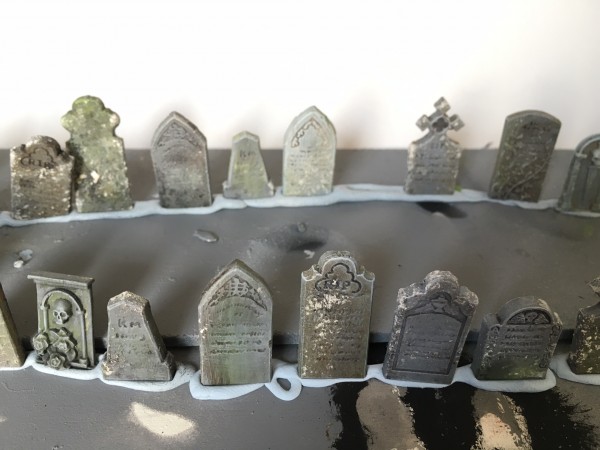
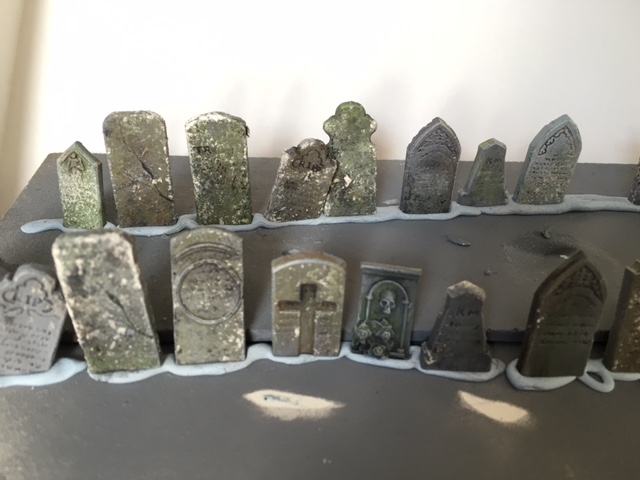
Here are some some other completed headstones:
NEIL101
HEY fold, just wanted to say thanks for this tutorial i have just used it to create a realistic looking sepulcher for my latest diorama narrative. i will credit you and link back when i publish it this weekend.
Admin
Thanks Neil ;). Checked out your latest post (“6th Age of Darthur”) and it is VERY cool. Check out this guys blog, people! (Edit: It appears Neil’s blog has now been taken down, so I’ve removed the links to it. Shame, that).
NEIL101
Hey Mate , glad you liked it , I have just credited you under Eli’s first comment on the new 7th age blog post,
I added it under the comments as the blog post is in character . i will credit you again and do a small tutorial myself adding model mates dark moss to the brilliant tutorial after the series end . i plan on doing a blogpost of wips . thanks again for the tutorial mate , really really helpful .