It feels sensible to document the actual team build as well as the pitch. After all, the team is what prompted the entire project! Over time, I’ve been slowly hording various GW Undead bits. I have always loved the imagery of the Undead (specifically the Old World variety, rather than Khemri) and if I ever had played Warhammer for a consistent time I have no doubt I’d have collected an Undead army. So I was very keen to get stuck in to converting this team.
There are no fewer than 5 positionals on the Undead Team (wights, mummies, zombies, ghouls and skeletons), plus opportunities for side line staff and star players, so lots of variety. This is another big reason why the team would be so fun to build and paint. In this post I’ll start to describe how I converted the skeletons & ghouls from base GW kits.
A Note on Team Numbers
Sometimes it’s difficult to find places to paint team numbers on a Blood Bowl team. The usual locations are shoulder pads or a badge located on the back. Failing this, some coaches resort to painting the number on the base rim or using small stick on numbers there.
The shtick on this team is that each model has a headstone on it’s base with his team number engraved into the stone. That’s an “on theme” way to display team numbers, it matches well with the team name (remember they are the “Hel Fenn Headstones”) and as many Undead models are kind of spindly, this also helps to give each model a stronger presence on the pitch.
Skeletons
I mostly used the modern skeleton warrior kit which is very nicely detailed. But a small problem with this kit is all the legs are in the same striding pose. On some skeletons I replaced the left or right leg to get a variety of poses. For example, swapping the left leg with a straight from an older skeleton kit results in a static, “stand firm” sort of pose like the skeleton is on the line of scrimmage.
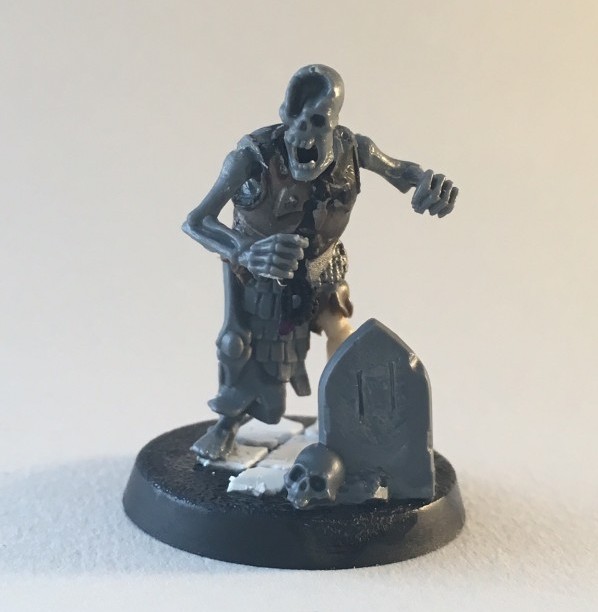
The hip joint is strengthened and concealed with some sculpted scraps of cloth and this skeleton is completed with an old Grave Guard armoured torso, a skull and arms from the warrior kit, and a gravestone from the Spirit Host kit.
I began the project with the idea of having unified heads among the Skeletons and bought a lot of Tabletop Arts Fantasy Football undead heads from Comixininos for this purpose. In the end the variety of cool skulls from different kits made me change my mind. On the right below is one of the heads from Tabletop Arts. On the left is a sweet smoking/flaming skull by GW – sadly I’m not sure where from but as soon as I found it in a bits pile, it HAD to be used!
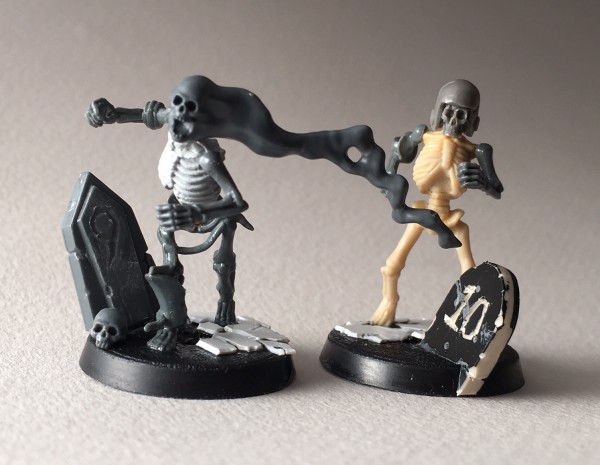
The rest of the parts are from the modern skeleton warrior kit except the legs, torso and headstone of the right hand skeleton, which is from a pretty old GW kit, but fits in scale wise and offers some more pose variation. This skeleton later got some sculpted tattered sports shorts to liven the model up a bit.
—
Hack N Slash
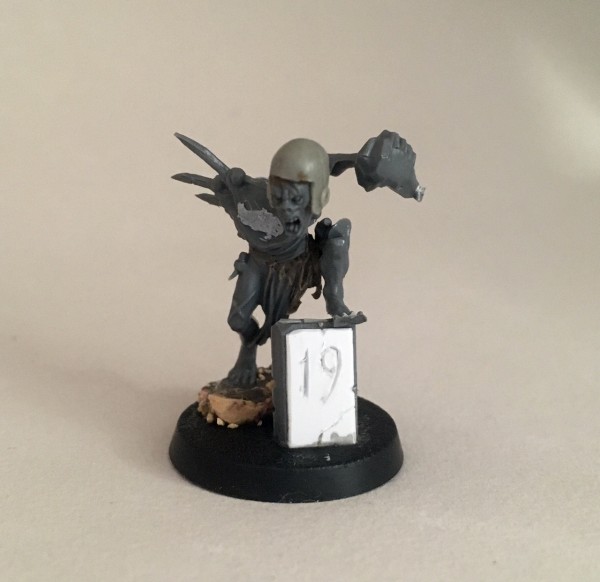
While I was on skeletons it seemed like a good opportunity to build star player “Hack N Slash”. 40k Orc choppas make really mean chainsaws (I’d first used this trick when converting my Goliath Necromunda gang). The difficulty here was getting the arms to hold the thing. The trick seems to be to build up the model in stages. In order, I first glued the left hand to the choppa and let it dry, then the left arm and chainsaw to the torso and let it dry, then dry fit a number of different right arms. The perfect one was an arm holding a sword in an extended position – when turned 90 degrees it was in exactly the right pose to grip a theoretical top handle on the chainsaw. Once all this was in place and dry, I sculpted the handles.
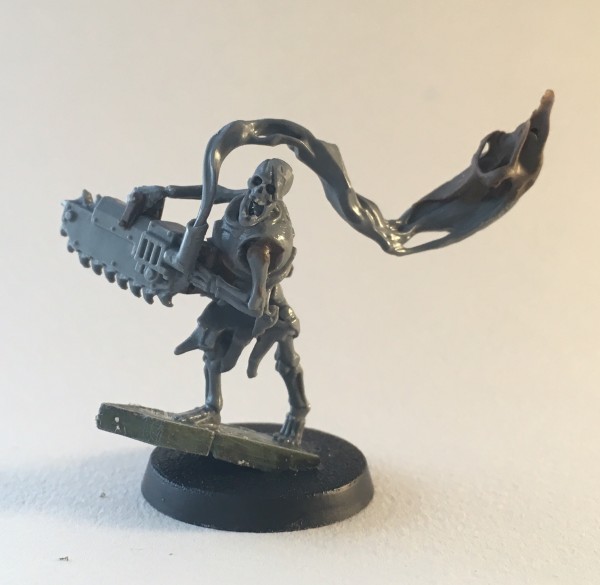
The head is from the ghoul kit (it is normally mounted to a skeleton that the chief ghoul has tied to it’s back). It’s suitably crazed and I was waiting for a good model to use it on. Of course the most notable part of the conversion is the stream of smoke which comes from the Spirit Host kit finished off with some putty, glued into the exhaust, which will be painted as ghostly smoke. This makes the conversion quite delicate. It will need to be stored and played with carefully!
—
Ghouls
I think the ghoul kit is great (as an Inq28 modelling afficionado I’m used to seeing it appropriated for twisted denizens of the 41st millennium) and with some cutting and filling the ghouls can be converted into very dynamic poses. For Blood Bowl this is perfect since the ghouls are the closest thing to agility players the team has access to. I decided I wanted to make ghouls in various Blood Bowl action poses – intercepting, dodging, sprinting, catching, diving for a touch down, that sort of thing. As agile players the ghouls would also be interacting with the headstones on their bases in more inventive ways, like leaping off them, standing on them or twisting around them. I looked up photos of real sports players for reference with these poses.
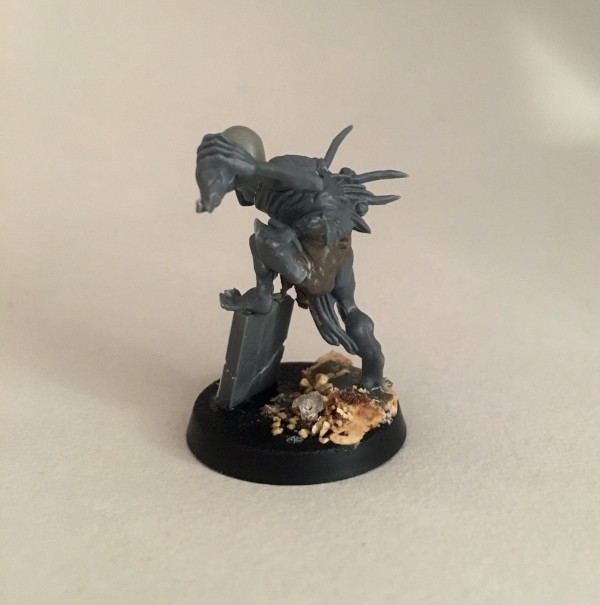
The first ghoul I made is the intercepting ghoul, using a gravestone as a leg up. I started from the ground up with the gravestone itself (which is from the Spirit Host kit) and experimented with a few leg arrangements. The left leg is chopped at the knee and ankle and straightened out using wire pins to reassemble it and putty to re-sculpt the joins. The torso was then glued on at a much more upright angle, necessitating some sculpting work at the belly and waist to fill the resulting gap.
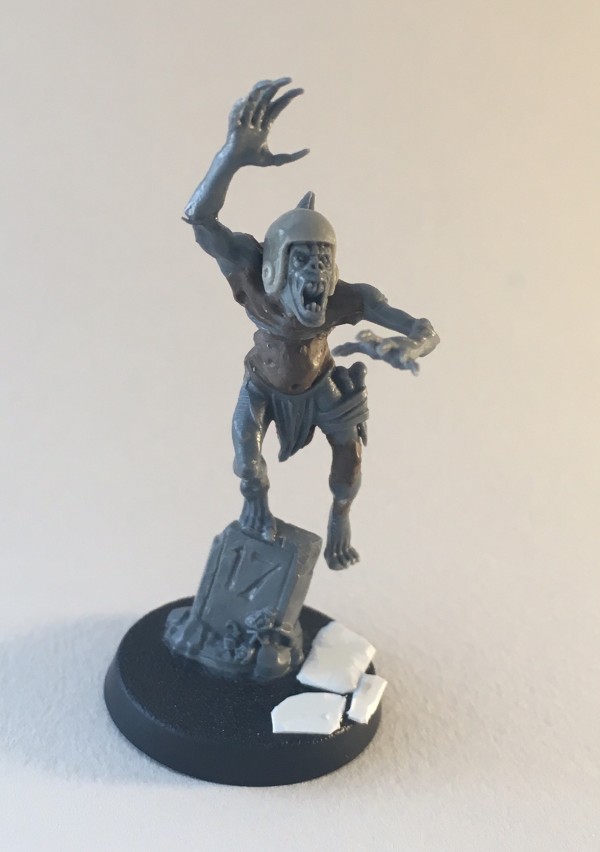
As with most of the ghouls I drilled out a skeleton head leaving just the helmet and then cut a ghoul head to fit inside. The arms and head were then positioned, taking account of the theoretical position of the ball in the air to make sure that the direction the ghoul is looking and the grasping hand in the air match up, before filling in the gaps in the shoulders and chest.
The second ghoul is sprinting and dodging through the opposing line. To achieve this pose one leg should be raised in mid stride with the arm on the same side extended back. The other leg is just lifting off the ground and the corresponding arm is extended forward. The big downside of this pose is it leaves quite a weak contact point with the base and the model will be susceptible to bending and breaking at the ankle. I tried to remedy this somewhat by putting an extra plug of putty under the foot, which will be concealed behind some grass tufts.
There is less sculpting work on this ghoul, with the main job being to re-sculpt the knee and hip after the raised leg has been cut and re-glued in it’s bent position. For the hip/waist joint, I decided to add a pair of tattered shorts to the model rather than just fill the gaps. To do this I used a large flat clay shaper to smoosh a blob of putty into the general area and wrap it around the leg. I compressed the edge of the shorts at the waist, leaving a small “rim” to function as a waistband, then push in the broad shape of the creases. I refined and smoothed the shape and and the creases with a round shaper, then created a tattered look with a cocktail stick, sticking it into the material and literally “ripping” it outwards to create the tatters.
Again the shoulders need filling but that is comparatively simple. Usually I will “roll” a blob of putty into the gap with a cocktail stick (the rolling motion is a quick way of getting the putty off the cocktail stick and onto the model and to start shaping the putty – a cocktail stick is firmer than a clay shaper so for getting the putty in roughly the right place is much quicker) then refine and smooth with a round tipped clay shaper.
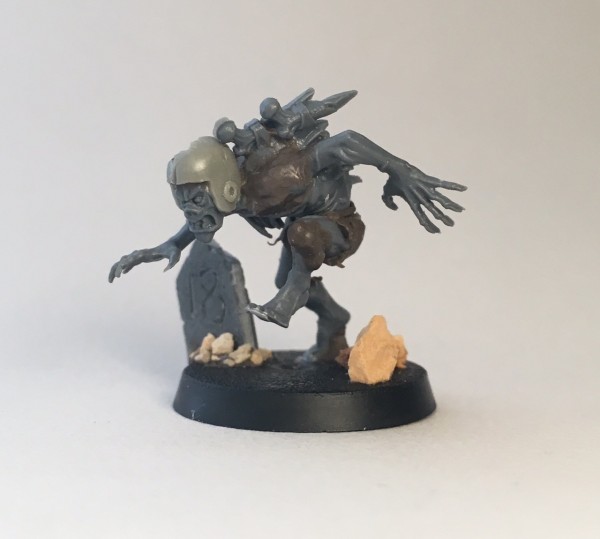
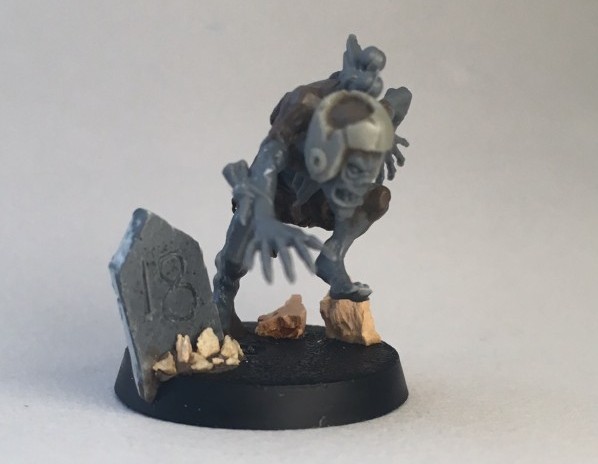
The third ghoul was the most ambitious repose. On this one I remembered to take some photos half way through so it serves as a bit more of a useful record of how to repose these models (or indeed any model, I suppose).
The ghould is clambering over/on top of the headstone and is in the process of battering an opponent with a rock. In these photos I’m about half way through patching up the ghouls hip and midriff with putty. The process to get to this point is one of building up the model bit by bit. I started with the headstone – this is three bits of sprue glued side by side to form a bevelled block, then cut to size before being fronted with a strip of thin plasticard, weathered with chips and scratches and having the team number carved into the face. I sized the headstone alongside some ghoul legs then stuck it to the base.
Next I cut the ghould legs into left lower leg, left upper leg, and the remaining right leg and groin. The first bit to go on to the model was the left lower leg, by sticking the foot to the headstone. This seems to be the only fail safe way of getting the foot to convincingly be planted on the headstone. Once this was dry, I blu tacked the upper leg to the lower leg then glued the right leg to the base. A raised platform was necessary to get it to just the right height – a simple strip of 1mm plasticard that I built around and over with cork rock detail and small stones.

Finally for the legs I trimmed and glued the left upper leg in position so that it connected loosely to the hip. The join was not good enough to hold for any length of time, but that doesn’t matter.
An important part of making this pose convincing was to twist the torso quite sharply to the left. The advantage of building up the model piecemeal in the way I did was that this became very obvious while playing with the position of the torso once the legs were in place on the base, and eminently possible, as I just needed to glue it in at a wonky position, then start filling the gaps with putty.
This represents a “first fix” of putty. It’s about half complete, but I have mostly focussed on filling the main gaps and blending the putty into the plastic at this point to get a stronger model, only actually finishing detail where it was easy and convenient to do so (consider that the model is not very strong yet, so pushing putty around a lot risks breaking it or deforming other parts of the putty). The next layer will complete the putty work around the midriff and then I can move on to fixing the arms, one of which will be grasping the headstone to hopefully result in a very complex but natural miniature pose that looks like it is sculpted from scratch rather than kitbashed.
To be continued…