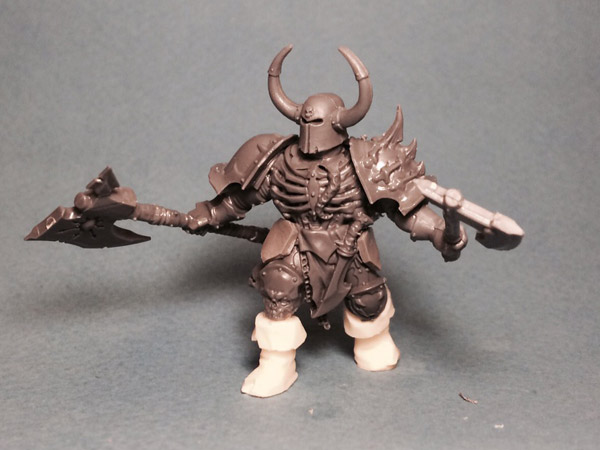
In the last post I mentioned that one of the Chosen sculpts already has Chaos Warrior style hip armour which I would need to replicate on the other Warriors, as a reminder here he is:
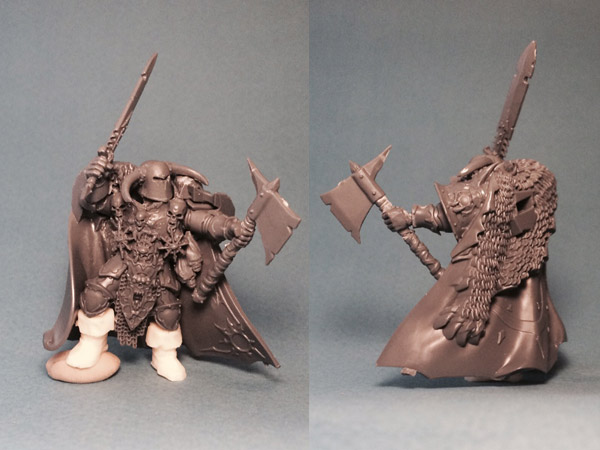
These armour plates I’ve since discovered are called “tassets” or “tuilles” (tuilles are now most commonly seen on Masterchef where they take the form of thin, often curved wafers. I wonder if the eytymology is related…). The tassets are an important part of making the models look less like Chaos Marines and more like medieval warriors. Clearly I would have to sculpt, mold and cast some for the rest of the warband. Today I thought I would make a tutorial for the process. As far as sculpting armour goes, these plates are quite complex as the surface has a compound curve (in other words they curve in two directions at the same time – both convex around the leg and concave into the hip joint ).
I attempted to take photos of the process but as the tassets are so small and the curves quite subtle they weren’t much good, so instead I’m going to try and draw the process.
In steps 1-4 below we will create the basic shape required.
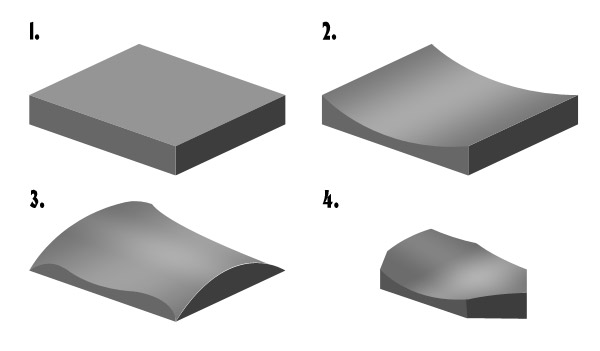
- Start by pressing a piece of putty onto a flat surface. It doesn’t need to be square but it does need to be even. For reference my piece of putty is about 10mm x 8 mm leaving plenty to be trimmed off later.
- Take a smooth cylindrical object and press and roll it cross ways on the putty to form the long concave curve of the tasset. I used the handle of a sculpting tool. Ideally one end of the curve should be higher than the other (not illustrated).
- This is the hard part to both sculpt and illustrate. You need to apply the length-wise convex curve here, without losing the concave curve of the previous step, to end up with the eventual compound curve of the armour plate. To do this, use your sculpting tool to push the long edges of the putty away from the centre of what will become the armour plate. You should create most of the slope on the corners and ideally use a clay shaper to refine the curves so they look as even as possible from multiple angles.
- Once dry, trim the tasset to the shield like shape required. For my tassets, the top edge should have 2 short gently sloping edges and one flat edge, while the bottom edge is a more acute angle meeting in a point. You can then separate it from the flat surface.
With the basic shape finished we’ll move on to contouring the back of the armour plate so it fits better on the models.
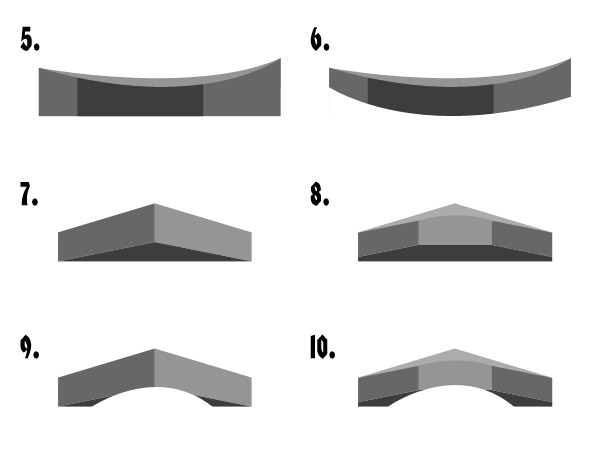
- Here is a side profile view of what you should have so far. The left side is the top edge with it’s gentle angled corner. The right side is the bottom edge of the tasset with a more acute angle.
- For the tasset to fit on the model easily you’ll need to cut, file or scrape the top and bottom ends of the back surface so that it mirrors the concave length wise curve of the top surface. You can see how this would now rest better in the hip joint of a model.
- Here is a bottom-on profile view of where you’ll now be.
- And a top-on profile view.
- The last job is to take a round file and file out a cylindrical recess from the back surface. Again this mirrors the convex curve of the top surface and will enable the armour plate to wrap around the models leg.
- And that same recess but viewed from the top of the plate.
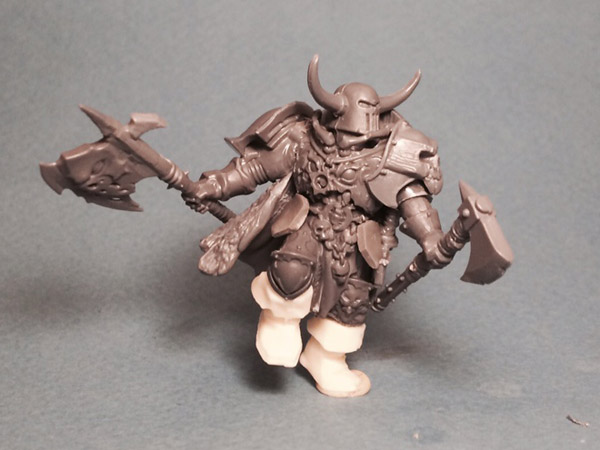
At this stage you should have a plain tasset, you can stop here or detail the top surface of the armour plate before casting. I will be detailing the tasset with an ornate rim and some rivits before proceeding. Updates to follow.
Here are a couple of warriors with the two blank tassets I made tacked in place. I’m pleased with the size and shape, although they are slightly different from each other. That’s not a problem for me as I’ll detail them differently then mould them together so that I can make two different pairs of tassets every two casts.
Steve
This is amazing work, real inspiration. Where can I find photos of them finished and painted?
Admin
Steve, thanks for the comment and apologies for not noticing it earlier. Alas, these have progressed no further in the last 8 years, so you’ll have to imagine them painted! In fact, I abandoned this style of Chaos Warrior for ones built from Stormcast (which are also still mostly grey plastic!).
steviej37@hotmail.com
Oh no, that’d a shame! But I’ve been inspired anyway and will be turning Chaos Marines into fantasy CW. Progress will be slow but I’m looking forward to getting started
Steve
Sorry for late reply, thought I had posted a comment.
That’s a shame, these look great. But I have been inspired to convert so chaos marines into Chaos Warriors. Wish me luck!