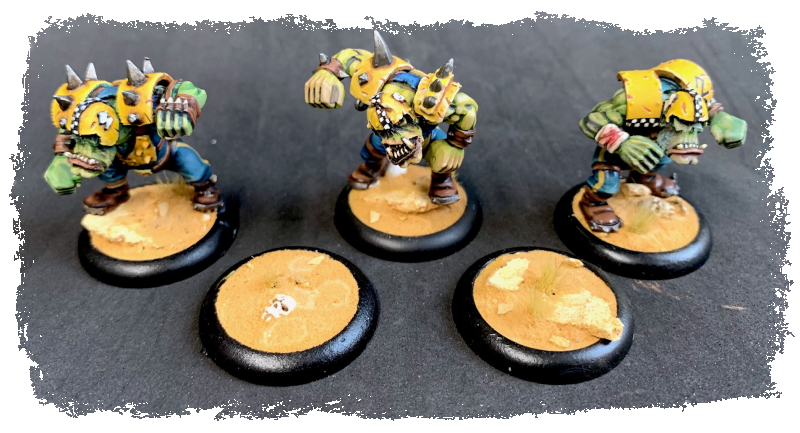
In this tutorial, I’ll write a step by step guide showing you how to make sandy desert bases that look like this:
Before we get to the tutorial, let’s begin with a wordy preamble. Some time ago I took part in creating a “legacy” Khemri team (a legacy team is one where lots of people make one model for a team and the winner of a draw gets the finished team – Talk Fantasy Football, a blood bowl forum, runs one every year). Part of the brief for the team is that they were to be on sandy bases, and I spent a lot of time thinking about how to model a convincing one. Most of the models entered fell into what I see as a trap – either applying actual sand and calling it a day, or applying sand and then painting it brown with a yellowy beige drybrush.
My problem with this is that a grain of sand is the size of a small rock in 28mm scale. Furthermore, painting the sand with normal acrylics tends to result in a, well, painted look , especially if dry brushes and washes are involvee, rather than the dry, dusty look you want for a desert base. My solution at the time was to sculpt the surface of the base with ready mixed plaster which has a very fine grainy texture, applying undulations in the sand, then painting very simply with a layer of watered down yellowy beige. The plaster has the advantage of sucking any gloss from the paint leaving it’s matt surface showing through. My Throw-Ra contribution ended up looking like this:
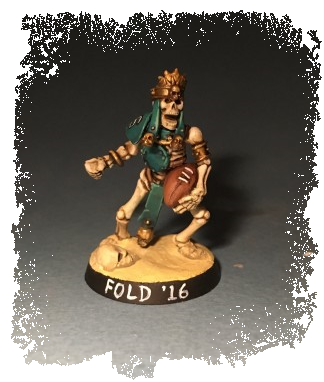
This was okay, but in my opinion a little dull to look at (it needs grasses, small stones etc…) and sculpting undulating sand is quite a painful process to repeat. When it came to my orc team it was definitely time to invent a new way of doing quick and effective desert bases – which is the subject of this tutorial.
What you need is a dusty finish with a grainy appearance that is as close to scale as possible. My method uses bicarbonate of soda, plaster of paris and yellow pigment and the application uses techniques from scenic modelling. I normally use bicarb as a building tool only (it works wonders with superglue to cement joins, roughly fill gaps and build up base texture) and never for finishing bases, as one of the problems with bicarbonate of soda is it tends to yellow slightly over time – but that’s not an issue when we’re colouring it yellow to start with!

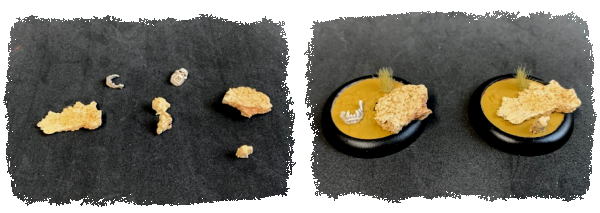
1) Create small stones and rocks
Pour some white plaster of paris into an old tupperware or other container. Once dry, you just need to crumble this up into very fine pieces – some of it will become dust, which is fine, but the goal is to have irregular pieces and shards about 1-2mm in size. These will become the small stones and rocks littering the desert floor. It’s very important to use plaster for this because it readily takes on the colour from the pigment later.
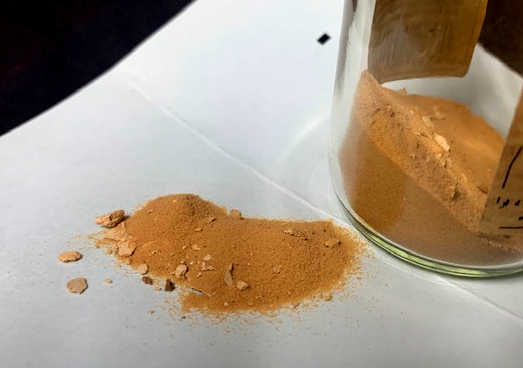
2) Mix up a batch of “sand”
In a jar, combine bicarb of soda with some of your plaster stones and rocks and some yellow pigment (mine is, appropriately, “sand yellow” – a small pot from a cheap weathering pigment set, so nothing fancy). The ratio of plaster bits to bicarb depends how rough and rocky you want your desert to look. As for the amount of pigment, just add a little bit at a time, sealing and shaking the jar to mix it in, until you get a pleasing colour. The bicarb absorbs the majority of the colour and the plaster takes on a bit of the hue too, but not as much.

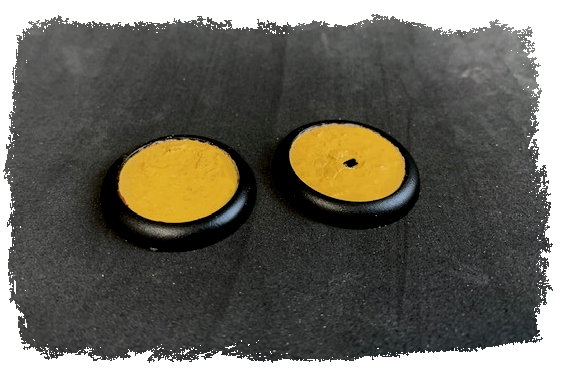
3) Paint the base
This shouldn’t show through, but just in case it’s always worth having a good coat of colour as a base. I used an old citadel foundation paint (Iyanden Darksun) which has a good earthy but vibrant yellow tone and covers really well.
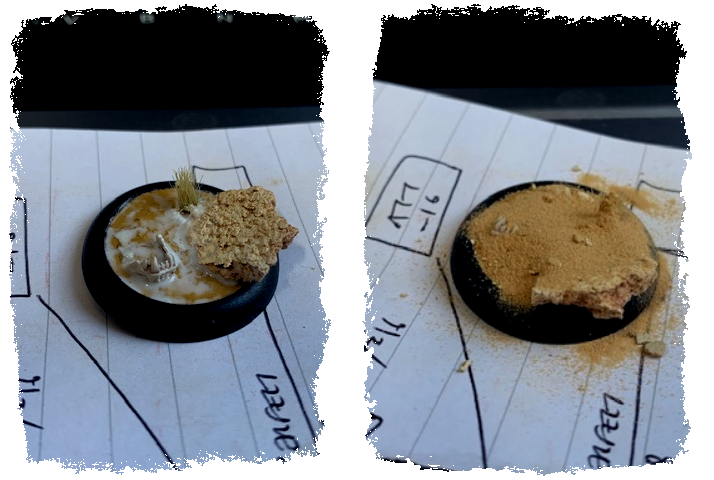
4) Pre-paint any skulls, bones or other features base
These need to be painted and glued down in advance so that the sand can be realistically piled up around them. I painted skulls and bones in quite a light colour scheme so they would stand out from the sand – it’s a solid white primer and undercoat, agrax earthshade wash then highlighted with screaming skull and white. For bigger rocks and ledges, I tore up some cork, undercoated them white, then dust them with yellow pigment – this is so they match the smaller stones. The pigment will be fixed later. Also at this stage, glue down any tufts of grass you’re using.
5) Apply sand mix
Paint the surface with a layer of PVA or other white glue, then pour your sand mix over the base. Once dry, tap most of the excess off, then use a soft brush to dust off any of the bones you don’t want sand on, and pile it up against your base features in a natural way.
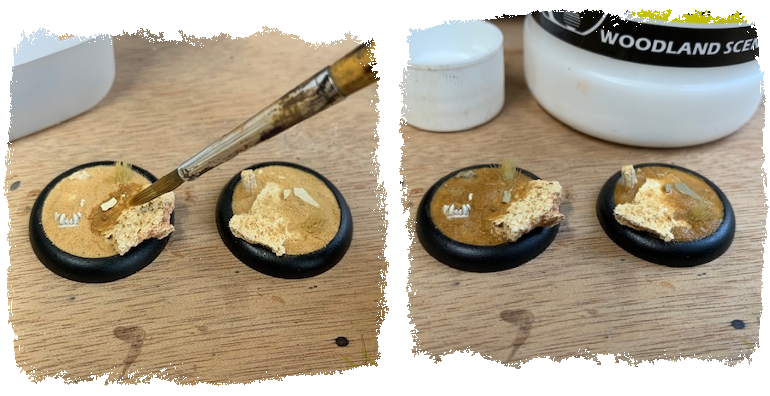
6) Fix surface
Once the sand and small rocks are looking just right, you can fix everything in place. Using a pipette or loaded brush, douse the base in isopropyl alcohol, then douse it in scenic cement. The alcohol has no surface tension so it acts to disperse the glue throughout the entire base surface – it also fixes pigments once evaporated. The scenic cement is a thin white glue from Woodland Scenics, which has a very matt finish – this is key. Avoid watered down PVA as you don’t want to end up with a satin or glossy finish anywhere. I hear that diluted mod podge is very similar to scenic cement.
You’ll note I’ve been careful to keep the base rims clean black plastic. I tried different coloured rims in some of my test bases but concluded the pure shiny black is an important contrast to the sandy matt surface. You could paint the rims black and gloss varnish them, but keeping them clean is easier and looks nicer than a painted rim. Also, I’ve obviously used lipped bases in this case – I like how the lip creates a “container” for the sand.