The bridge is mainly formed from Pegasus IMEX Platformer panels. These come with simple 2, 3, and 4 way clips in a variety of angles that allow structures to be built quickly and flexibly. The main bridge surface was made from 9 panels providing a bridge 6″ wide – enough for a Land Raider to cross. Once additional panels were clipped on at a sloped angle at each end the total bridge length is around 8″ which is about right for crossing our river sections. For the sides after some experimentation a girder strip along the bottom edge and a mesh fence along the top edge seemed to work best.
Once everything had been dry fitted I superglued all the panels together then cut 10mm x 10mm strips of balsa wood as reinforcement under the bridge. These were also glued in place with super glue (after an aborted attempt to use instant grip adhesive). A hot glue gun may have been a better option here. Further reinforcement was provided by coffee stirers glued diagonally between the balsa struts. All this reinforcement would be out of sight during a game so I wasn’t too fussed about making it look perfect or the fact that the wooden texture is not at all right for what is supposed to be a strong metal bridge.
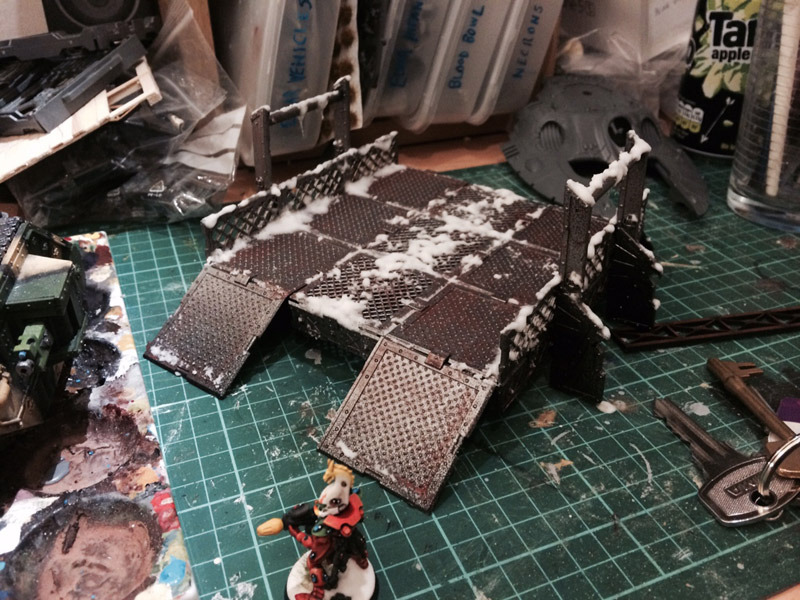
So far so good, but the bridge looked rather generic and could still do with reinforcement as it currently rested only on the sloped end parts during play. I used four buttresses from Games Workshops Cities of Death buildings, and pinned these to the sides of the bridge in such a way that they would take the weight of the bridge and any models on them, as well as providing extra cover for models near or on the bridge and adding some suitably gothic 40k detail. The buttresses had a length of old sprue glued between them for more strength and detail.
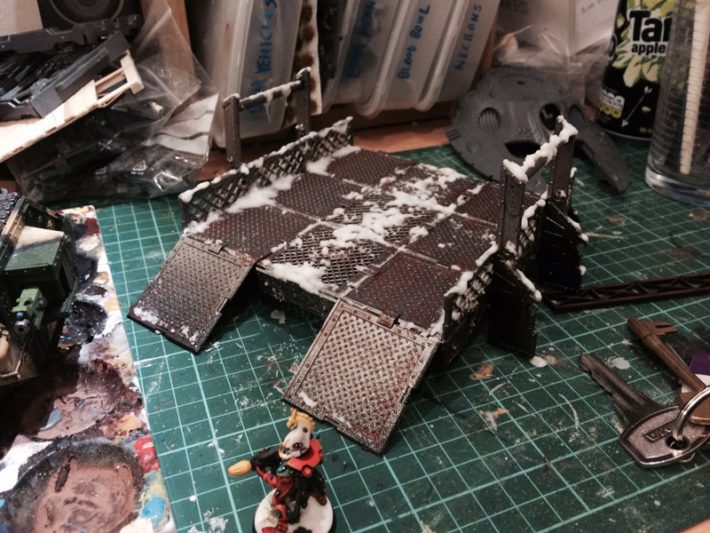
The bridge was then sprayed with Army Painter black spray (tough wearing, so good for terrain if not for models) and then metallic spray. I then washed it with a variety of MIG rust coloured pigments. Once dry it received a spray varnish to seal the pigment then an application of snow mix.
When creating snowy terrain one is confronted with the question of how much snow to add; a realistic coating will often obscure all the detail you worked hard on, meaning in the case of a bridge you may as well just use a flat plasticard panel. So apart from along all the railings and struts, I decided to apply snow sparingly as if in thaw or perhaps the heat of passing vehicles and the churning tyres and tracks have caused most of the snow to melt away on this particular piece of terrain. To that end I also used a more slushy snow mix on the bridge surface itself (with more resin than normal), and worked the snow into the gaps between panels where it would remain most stubbornly. I also added a few icicles hanging from the bridge struts, made by stretching a clear flying base over a candle. These were just superglued on and then had snow mix applied above them.
Click on this image for a full res version:
Datasheets
I am unaware of any datasheets for bridges in 40k but as we all know blowing one up can form an important part of your strategy in a battle. I wrote the following datasheets for my bridges. They require two additional special rules.
Non-Explosive: Count rolls 7 or more on the Building Damage Table as a 6 instead.
Risky Crossing: If this building is reduced to 2 structure points it becomes difficult terrain. If reduced to 1 structure point the Bridge becomes dangerous terrain as well.
—
Bridge of the Imperium
Composition: 1 Bridge
AV: 13
Structure Points: 5
Cover Save: 5+
Terrain Type: Clear Terrain
Special Rules
Mighty Bulwark, Non-explosive, Risky Crossing
—
Wooden River Bridge
Composition: 1 Bridge
AV: 10
Structure Points: 3
Cover Save: 5+
Terrain Type: Clear Terrain
Special Rules
Non-explosive, Risky Crossing