In the last week or so I’ve made a good start on the project. Firstly all my new stuff arrived, including the Reaver bikes, and I set about making an awful mess getting out every bit from my bits box that might conceivably be useful. Eventually I calmed down and narrowed down the selection.
Firstly the bike itself:
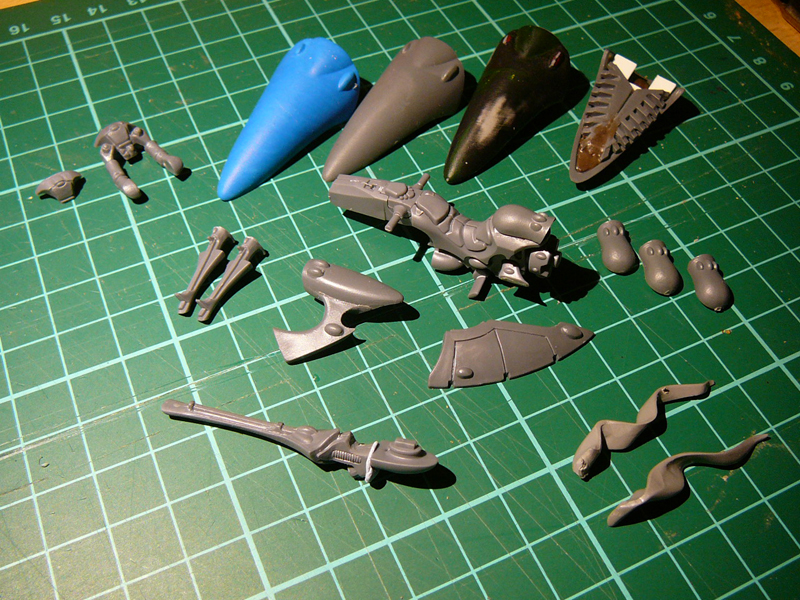
Obviously the reaver jetbike body. Then, from the Eldar jetbike, the canopy and either the engine and fin or just the fin (not yet decided). In addition, the Shuriken cannon piece that I previously used on the other jetbikes (3 of them lined up to the right in this photo) looks literally like it was made to go on the back of the jetbike in place of the usual DE spiky blade (there is one on the jetbike body in this photo).
Flags from an old wood elf kit, and Falcon pilot arms/control panel, with a cut down control panel next to it which I plan to use.
The most notable thing here is the thing I’m building inside the jetbike canopy. It is made from the undersides of a Guardian support weapon platform, on a plasticard/putty base structure. If support weapons have these ribbed vanes, and falcons/wave serpents too, I reasoned they are a fundamental part of Eldar anti-grav technology, so make sense on jetbikes too.
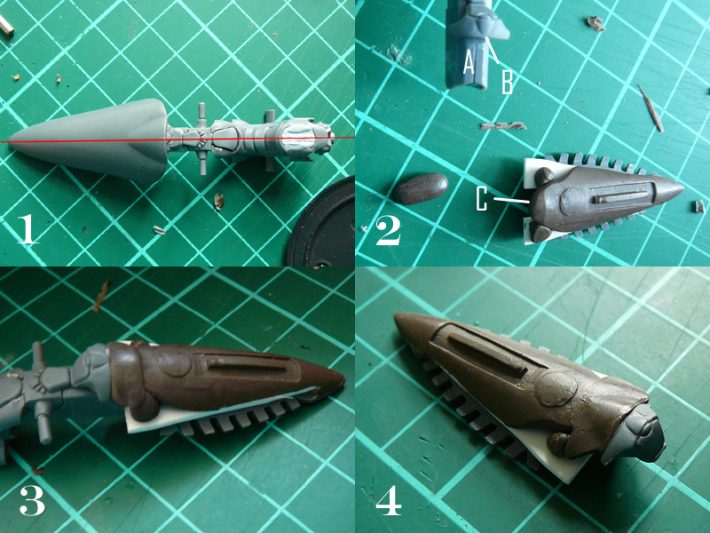
Here are some stage by stage shots from the build of the Jetbike nose interior. This part is going to be the key part I need to cast, as it will allow me to consistently and strongly join the Eldar and Dark Eldar Jetbike bits:

- The part, separated from the canopy itself. I’ve added more putty and started to smooth the joins and overall finish, and cut the shape out of the back that the DE bike body will slot into.
- The part fits snugly inside the canopy (the top is molded to the underside of the canopy).
- This shot shows the allignment I’m going for. It put’s the canopy a bit higher than where the DE canopy would go and higher than I’ve seen other Eldar/Reaver jetbike mashups, leaving space for the extra control panel.
- Here is that extra control panel in test fit position.

- I found it useful to periodically take photos and draw lines on the computer to test allignment. One mistake here and I will end up casting the same mistake over and over again so it needs to be close to perfect.
- Making pieces with casting in mind has required an interesting amount of extra attention to how things are constructed. Since I want to cast the internal piece only, it has to be separate from the Eldar or DE bits but also fit very snugly. This means my usual approach of mashing some brown stuff into the gaps with super glue and then sticking everything together isn’t appropriate! Here I’m adding the control panel to the part to be cast. The Reaver body (A) is coated lightly in oil to prevent the brown stuff sticking to it. The control panel (B) is lightly tacked with super glue in position on the body, to get the right position. Then super glue is added to the back of the control panel and the canopy interior (C)
- Then I push the part into place on the jetbike body, with some fresh brown stuff to adhere to the control panel and fill the gaps, and mould it roughly to the right shape with a moistened thumb.
- Finally, I coat the underside of the canopy lightly in oil, and push it into place on the part. This molds the brown stuff to the right shape. Once everything is dry I take it all apart, leaving me with the control panel in the right place on the part to be cast.
I have lots of Guardian parts, so building the rider is going to be mainly a job of figuring out the best way to blend and then cast the two kits together in the easiest way.
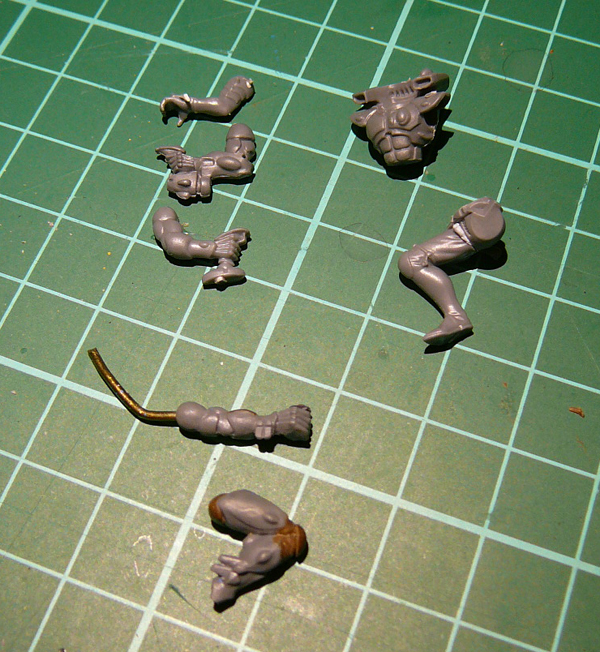
Top right we have a cut down Guardian body, which will be joined to the DE waist/groin. The DE upper legs will then be detailed with guardian armour plates, and the lower legs probably replaced entirely with Guardian lower legs. I can then cast the legs and torso separately, but still have the right pose that comes from the use of the actual DE waist and upper leg parts.
Top left we have some interesting arm options next to the Reaver arm. I think I like the “joystick” option more than the handlebars that the Reavers have, so will likely have a joystick on either side of the control panel. Both Eldar arms are roughly the right position when compared to where the Reaver pilots hands/shoulders are. The bottom Eldar arm is from the Warwalker… and guesses where the middle arm is from?
Finally at the bottom are some of the bits from the old project – a pilot arm and leg – just for the hell of it.