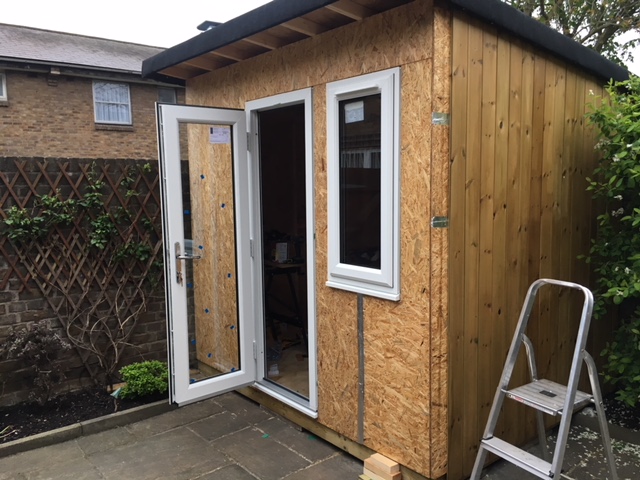
The next day it was finally time to get this thing weather proof. The reason I’d delayed putting the OSB and cladding on the front for so long was because I wasn’t exactly sure how the window and door and the cills would sit in relation to the outside of the building and how the edges would need to be. In the event it was pretty straight forward as we worked out that the window and door could be mounted such that the cladding would be flush with the frames.
My window and door were custom made by https://www.upvcdoor.co.uk/. I have no hesitation in recommending them. You can customise the dimensions to the mm, their customer service was excellent, they delivered on time and to spec and the quality seems good. On top of this I paid far less than you would pay for double glazing off the shelf or from one of the well known companies and unlike the big double glazing companies I haven’t been bothered once by a sales call. I went for a fully glazed window and door for a minimal look and maximum light. I almost went for Anthracite Grey UPVC – the sexy looking charcoal coloured frames you see on many high end garden rooms – but this doubled the price. The door is particularly narrow – deliberately so as I didn’t want to eat into the storage space available on the front wall too much.
When putting OSB around openings you can either measure and cut it to size then screw it on, or just screw full OSB panels to the wall then from inside use a suitable tool to cut the openings (perhaps one person stays inside while the OSB is mounted, or you mount OSB over the door and climb through the window to cut the hole before moving on to cover and cut out the window). The best tool for this is a reciprocating saw which I don’t have. I also felt I would get a straighter finish using a circular saw and a guide fence so I measured and cut the OSB before mounting it. This worked well in all places except below the window where there was a gap between the two sheets that I covered with tape – a bit of a hack job but this area will see virtually no rain so… meh.

Installing double glazing proved to be remarkably quick easy. I won’t go into how – just watch some videos, and follow the instructions carefully.
And then I was free to clad over the front, just working left to right and measuring and cutting the panels as I went. As I mentioned before, the corners were cut and joined separately in a special 90 degree jig so the join is especially water proof and looks as neat as possible.
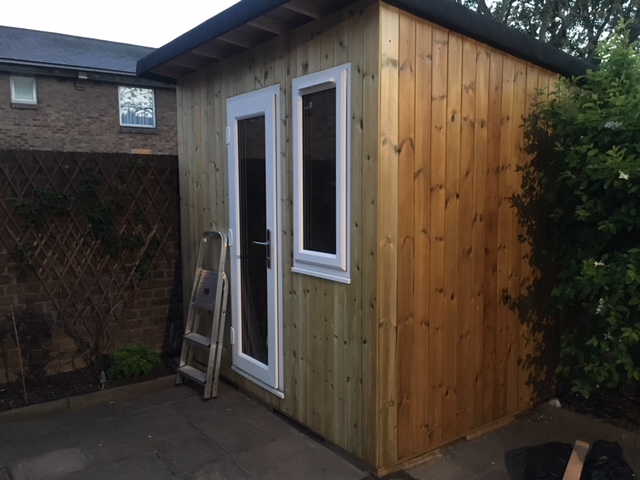
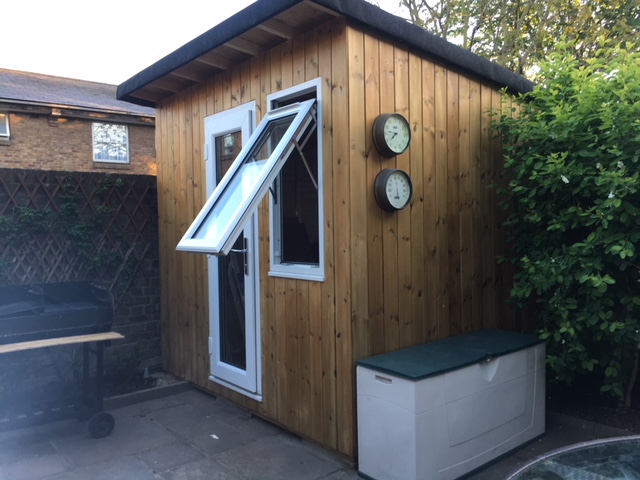
I masked the door and window frames off and then stained the cladding in place. A bead of clear silicone caulk in the gap between the frames and cladding is the final seal against rain and a decorative clock and barometer salvaged from the old shed complete the picture. As far as the outside is concerned it’s just the soffit to go now.
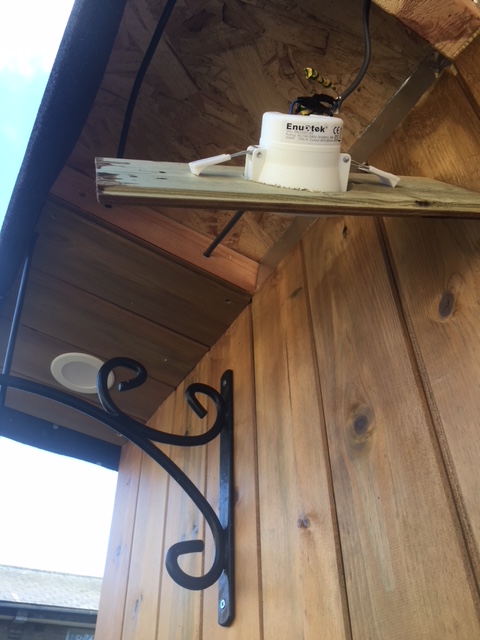
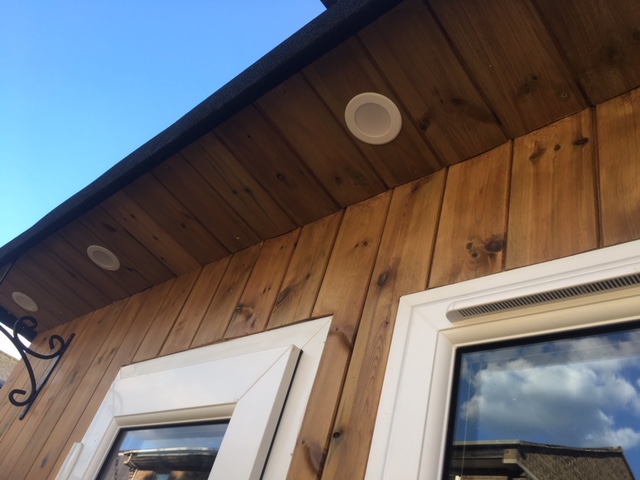
I considered a plain white underside to the soffit to complement the window frames but eventually decided to finish it with offcuts from the cladding and use white framed lights to complement the door and window frames instead. The cladding was simply cut to size, stained in advance and then screwed into the rafters and some additional timbers I added for support between the rafters. Four of the cladding panels had holes cut with a jigsaw to receive outdoor rated LED downlights. Holes were also drilled through the rafters to run the electric cable (left) and a micro irrigation hose (right) that I plumbled in to the garden irrigation system.
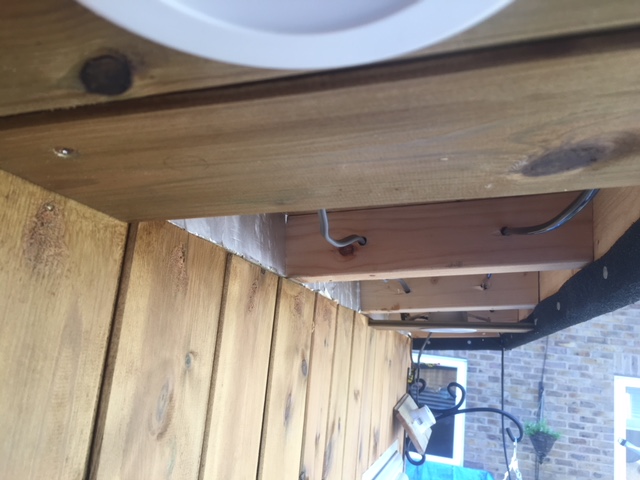
(Prior to this I had already insulated the roof – you can see the silver insulation board in the void between the top of the wall and the roof. I’ll talk about insulation later).
I wired the lights up as I went and passed the cable into the shed for future use by a qualified electrician (the electrician later inspected the wiring of the lights and found it acceptable). This light circuit is dead simple – there is an inline switch (so no need to run power to the lights, then back to the switch and back to the lights again) and all four lights are wired in series.
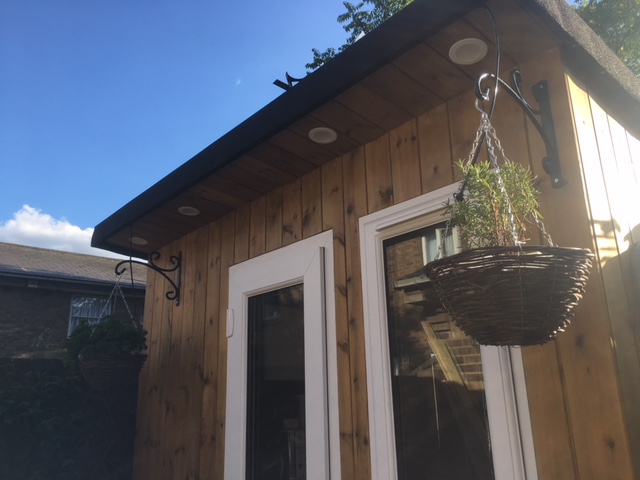
Looking very pleasant. It’s obviously a new day as evidenced by the beautiful blue sky. In fact, I think it’s about a month later than the photos at the start of this post. The intervening time has been spent working on the inside of the man cave.
Completed with some herbs in hanging baskets. The micro irrigation system was left by the previous house owner and is fantastic. I’d never be able to grow anything successfully if it weren’t for this reliably watering everything day in day out.
nick
Hey
I have a similar build where the back and sides is close to the walls so need to clad first and install .
I’m wondering how you did the soffits on the sides and rear as from the pics i cant see one.
Did you fill the gap to stop moisture getting in or bees etc
Thanks for the detailed write up
Admin
Hi Nick
I did’t put any soffits in, there is only a tiny overhang on the other 3 sides. The gap between roof and tops of walls was sealed up with insulation boards from the inside (you can sort of see this in the 5th photo, where you can see insulation in place before I’m adding the soffit boards).