The kit comes with some nice two strut articulated leg servos. Naturally the stock servos are too long for our stunted occupant. To add them you have a few options. The easiest option would be to just cut down the top of the servo so it fits, then cover up the hack job with some armour plates. If I was making lots of these Squats then it’s definitely the option I’d go with and the one I think Mikko chose on his original conversions. An option I didn’t explore is drilling a hole in the bottom of the suit torso and running the servos up into it.
The remaining two options involve attaching the part that the servos normally join to to the model. This is a tubular support that fits around the back of the armour and has a flat joint on both hips. To attach this you will need to cut down or entirely remove the rear armour plate. With the servos, you then have two further options. Depending on the exact proportions of your suit and how long the dwarf legs are you may find that a single strut of the articulated servos is long enough – in which case you could opt for single strut, unarticulated servos. I found that one of the servos would be long enough but it’s not a very pleasing solution to have a strut that can’t bend at the knee.
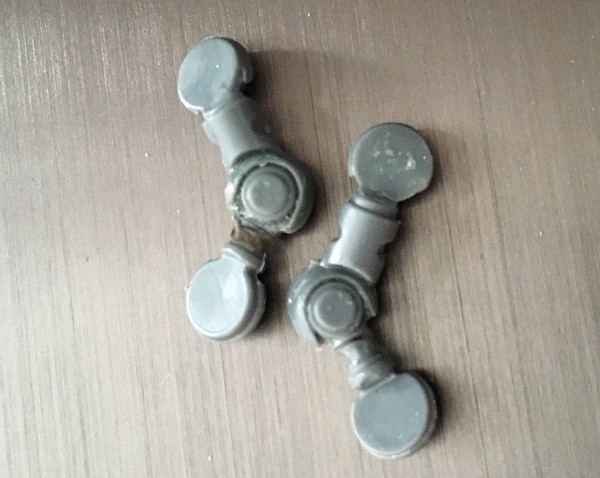
So instead you could do what I did and cut, shorten and reassemble the servos in a shorter but still articulated configuration.
This last option is not easy by any means. You should cut your servo into a top strut, middle joint and bottom strut (it’s necessary to cut into 3 segments, because not only are you shortening but you’ll also need to modify the angles involved). I then trimmed the bottom strut to length. I found it essential to constantly check the parts against the model as I trimmed them. Then, once cut to the right length, tack the top and bottom struts to the model before gluing the middle joint to both struts. This ensures that the final servo properly fits the model. Here are the shortened servos.
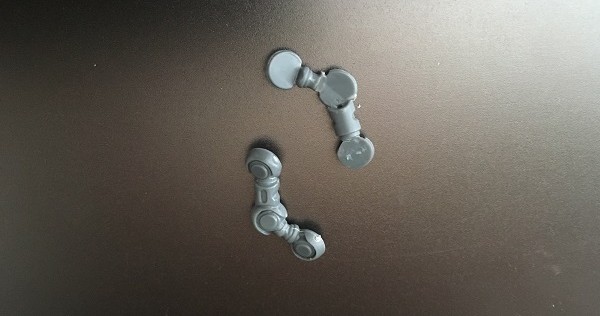
One problem you can see in the top servo is that the inner side is not detailed, something that’s particularly apparent at the middle joint. This is because on the Centurion model the servo rests against leg armour, but for the Squat it won’t so the inner edge will be exposed. You could just live with this, or sculpt some detail on the inside, or take another servo and use one of the joints from it as detail. That’s what I did – it means you use up 3 servos for each Squat instead of 2, but since I’m only making one Squat that’s fine by me.
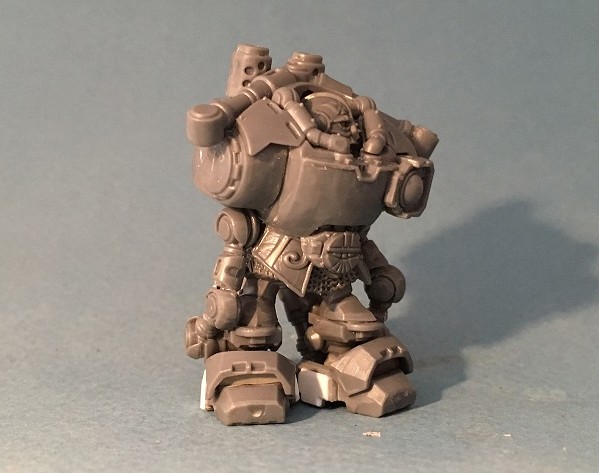
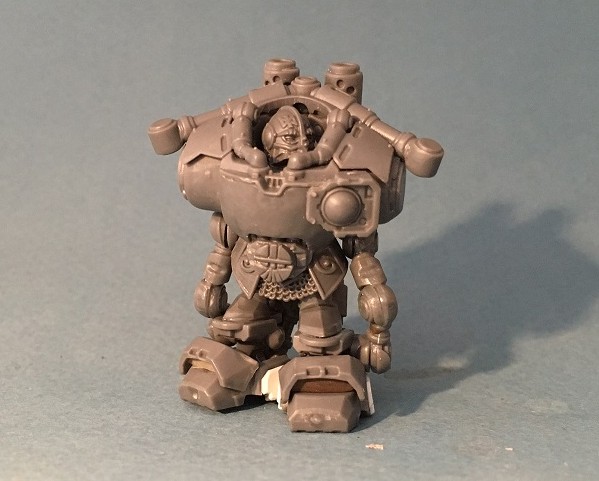
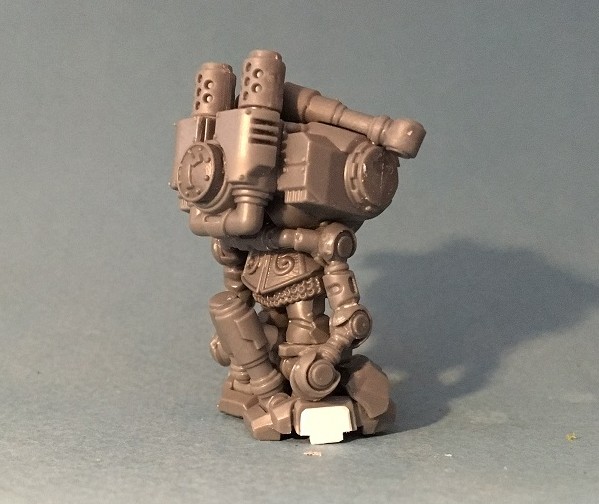
A few more shots with the servos in place and showing the attachment to the trimmed down connector at the hips. I do think it’s essential to detail the inside of the servos considering how prominently those parts show up.