
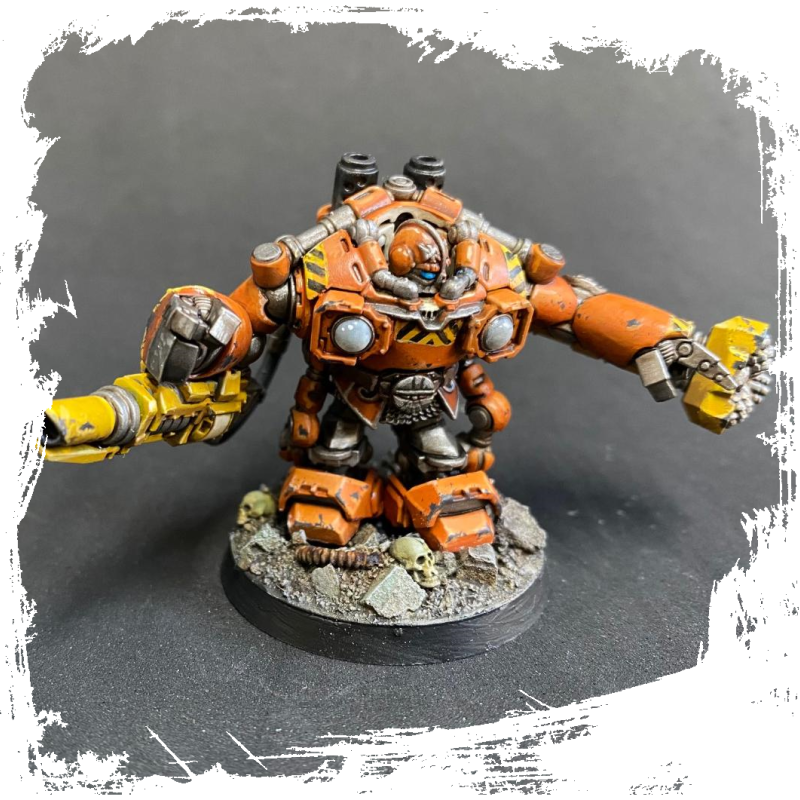
I’ve continued my March painting spree (hey, it’s a spree by my standards) by finally finishing the Squat Miner in Exo Armour. This is another laughably delayed finish, having first been undercoated more or less exactly 6 years ago (one benefit of keeping a blog is the ability to look back and calculate project finishing times with great accuracy).
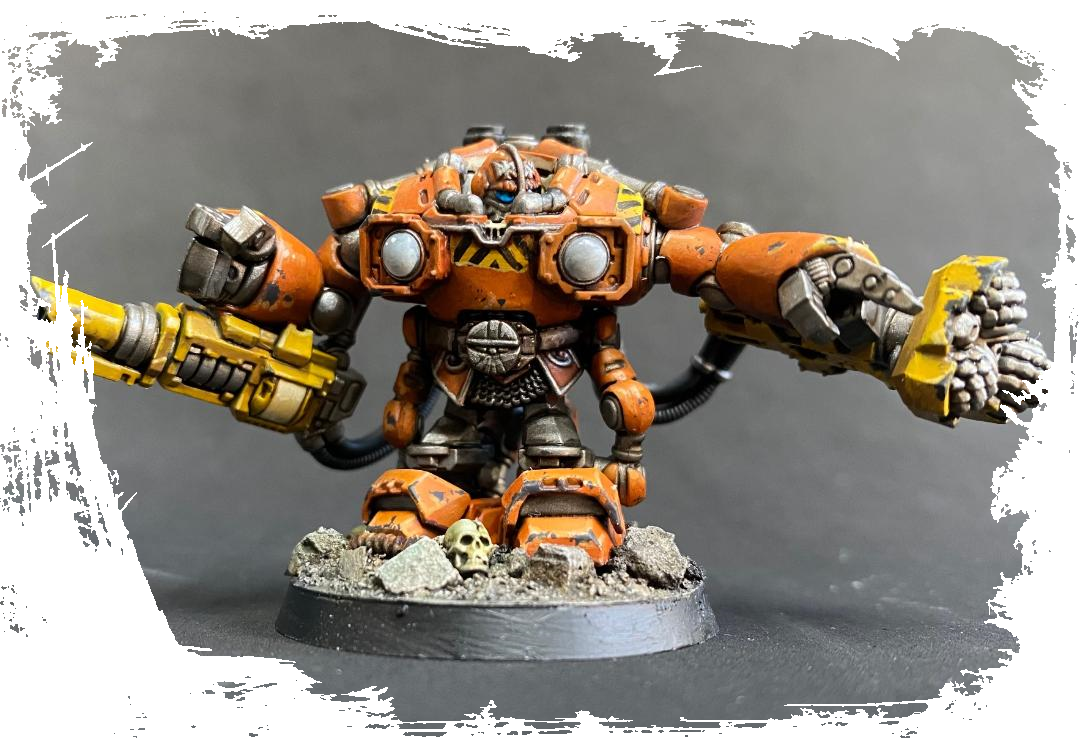
This is a model that I pretty much hated the look of all the way until it was nearly finished. Only in the end stages did I start to think it actually looked okay. This was a lesson/sharp reminder in the power of just ploughing on. Now it’s done, I’m actually really proud of the model and I think the paint job on the whole does justice to all the hard work former me put into the kitbash.
I won’t give an exhaustive blow by blow account of all the stages and colours used, but rather will highlight a few interesting parts about how I painted my Squat.
The most important point for anyone working on anything like this is DEAR GOD HOW I WISH I’D PAINTED IN SUB-ASSEMBLIES. Reaching all the inner bits of this quite complicated suit was at times exasperating.
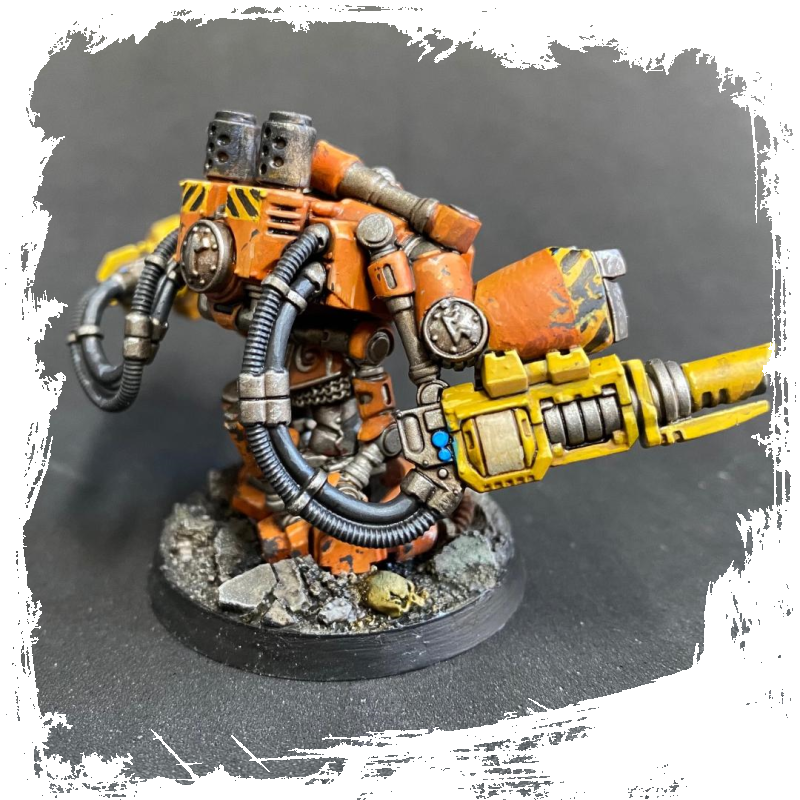
It usually makes sense to paint from the inside out with a model which gives you the best chance of avoiding accidentally covering up your previous work. To that end in general I painted and washed all the metal bits first before progressing to the large areas of orange and yellow colour.

I have never painted a bright orange model before so took the opportunity to do so here. Along with yellow it’s an obviously industrial looking colour. I started by imagining most of the model in orange, then mentally introduced the familiar Necromunda hazard stripes. I progressed to having yellow weapons (or should that be tools?), to vary the colour scheme slightly. To make the head stand out a bit, I opted for a sort of bland beige colour for the inner part of the suit around the head.
I did about 4 or 5 layers of colour for the orange and yellow, and everything was shaded manually with layers not washes.

I usually chip models by using masking fluid or a salt mask. I have rarely painted on chips so this time I decided to try my hand at this technique. It is a bit slower and arguably harder to get a convincing finish, but less crude as well. I used a small sponge for the speckles and a small brush to join some of these up to make larger chips and scratches. Then I highlighted the bottom edge of the biggest chips with a light orange or yellow depending where the chip was.
I considered trying to paint the suit lamps as though they’re “on” with source lighting, but this is a step too far for my painting skills. Instead, I enjoyed using the technique I normally use to paint Eldar gemstones to instead create a reasonably convincing frosted glass effect.
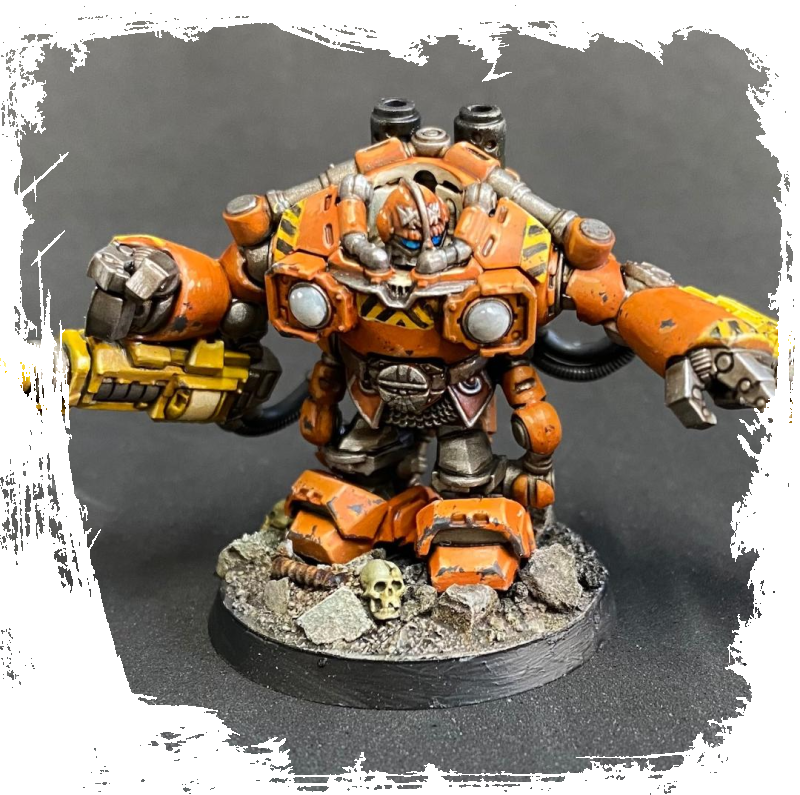
Just a small amount of bright blue for the eye lenses and a couple of buttons was the perfect foil to all that orange. I finished the Squat with a simple base of broken masonry.