After sticking the two halves of the torso together the first job is to remove the Marine detail from the chest armour, ideally without taking off the top rim of the chest plate as this is a nice detail (Mikko removed it entirely and I guess whether you want to keep it depends on the finished look you prefer). It’s worth pointing out that you should NOT attach the top shoulder plates and shoulder actuators before finishing this work or you will risk damaging the shoulder plates.
For this you will need a very sharp fine knife – I use a scalpel. Take fine layers of the detail off at a time, don’t try and cut it all off at once. Once you’re close to perfect, switch to using the blade to gently scrape down any remaining imperfections.
Mikko also rounded the sides of the armour, removing the flat plates where you would normally attach the frag launchers, bolters or small missiles that the Centurions have. Start by using a stanley knife to take off layers of the model until the shape is roughly rounded, then move to your scalpel and sand paper to refine the curve and smooth the armour.
Below is a side comparison between the finished piece and an original torso.
At this stage I was unsure what would need to happen with the belt and “buckle”, so I left them untouched for now.
The exhaust stack needs the Adeptus Mechanicus logo removing to make way later for a Dwarven icon that looks suitably Squat-like. Again, cut thin layers from this until you have removed most of the detail then shave it flat to finish.
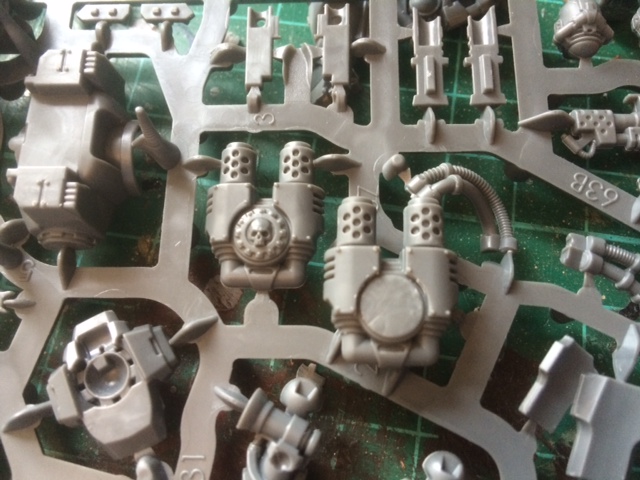
Games Workshops various Dwarf infantry kits are fairly festooned with dangly bits, icons and whatnot (at least the most recent ones). If you got hold of a box of Iron Breakers, Longbeards or just standard Warriors you will find more than enough decoration among the parts. For the absolute best option though you want to get hold of the back banner banner from the Ironbreakers set.
The three discs hanging from the bottom of the banner are ideal – the larger one fits the Centurion exhausts perfectly and the two smaller ones will also be very useful later. Below is a bad photo of the central disc in place on the exhausts.
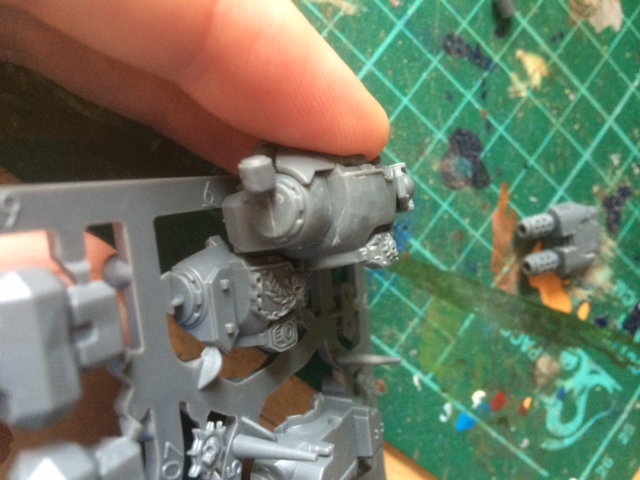
Next is one place where my conversion deviates slightly from Mikko’s. The lamp piece you see in these photos on the left side of the chest armour isn’t actually a lamp but is from the Centurion’s Grav Amp weapon. Mikko mounted one of these on the shoulder of each Squat. I decided to mount them as an integral lamp on the chest armour, partly because it seems to fit so well but also because I am approaching the conversion from the perspective that the suit is an industrial mining suit and in that context integrated lamps seem to make a lot of sense. In the photo below you can see how the shape of the lamp casing perfectly matches the profile of the shoulder plate. This is simply glued on and then you will need to use some putty around the edges, particularly the bottom edge, to merge the lamp with the armour.

This completes the torso for now. Next up, feet!
Neil Cook
Hi, great tutorial.
When will the next stages become available?
Admin
Hi Neil, thanks for the comment. I’m not sure yet, because the Squat project is on hold. As ever different shiny projects took my attention away. I definitely want to come back to it though.