Thanks to my amazing mum I received the Raging Heroes Manticore for Christmas. I’ve been away from home for a couple of weeks and every day has passed with me impatiently wanting to get back to the modelling desk and start assembling the model!
I’m a massive fan of most of the models put out by Games Workshop lately (witness for example the incredible Putrid Blightkings and the new Verminlords) but the Raging Heroes Manticore really puts the GW Manticore to shame. The pose and the quality of the scupt are fantastic with the GW effort just looking plain weird and amateurish by comparison.
(Note: I used to have links to the mentioned GW kits in this post, but Games Workshop has a very nasty habit of changing their URLs without implementing redirects, leading to broken links in my posts. As such I’ve removed all links. Sorry – I know how annoying it is to see something mentioned but not hyperlinked).
BUT, and unless you’re a reasonably advanced modeller this is a big but, putting it together is not particularly easy.
This photo illustrates the core issue with the kit, namely the Manticore is simply nowhere near lining up with its back legs due to the resin part coming out of the mold twisted:
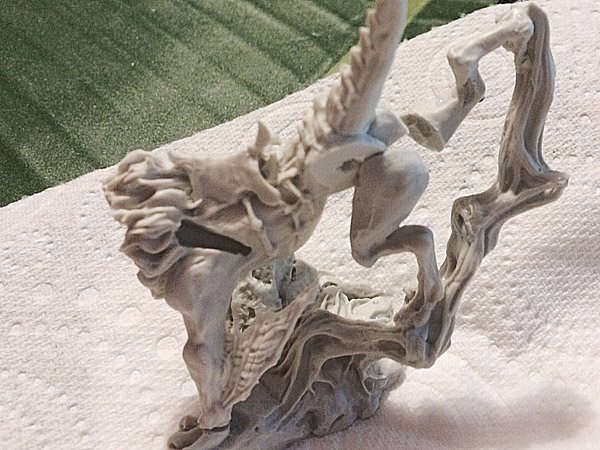
Bear in mind that this is after I’ve already made one adjustment to the resin, to begin with it was even further off!
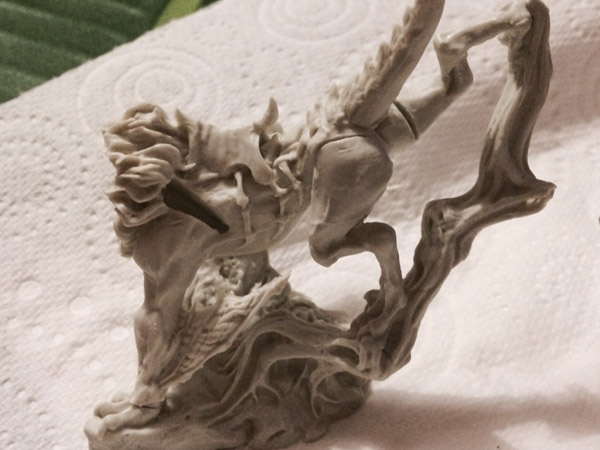
To fix this, I boiled a cup of water and dunked the tree trunk and back legs into it for 5-10 seconds until the resin was slightly soft. I then gently twisted it back in line. It took 3 or 4 dunkings to get it right. I took it slow as the last thing I wanted was to snap the part:
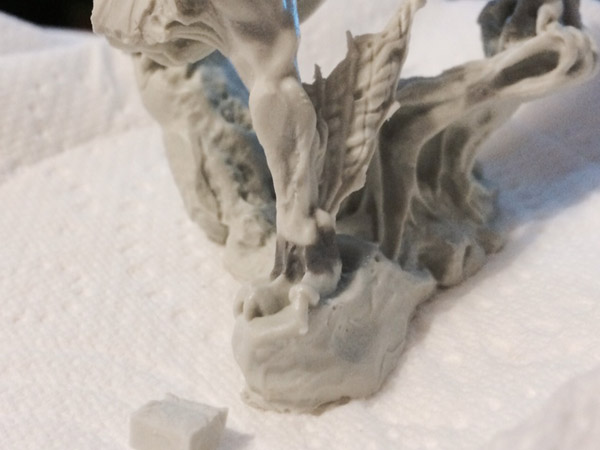
Once it was close enough that glue and putty would do the rest, I pinned the front legs to the front feet then glued the back leg joints. The second issue with the kit is that the fit is very far from being perfect. Extensive gap filling is required on all joints. Below I’ve gap filled the right rear leg. For this sort of gap filling where the shapes are organic and it’s essential to blend the putty in seamlessly with the surrounding there is only one tool for the job – a wet thumb. A sausage of Procreate is pushed roughly in place with a clay shaper followed by repeatedly stroking (with quite some force) the putty into the surrounding using your thumb wet with saliva:
On the front feet gaps some sculpting with clay shapers is required to retain the definition of the toe bones:
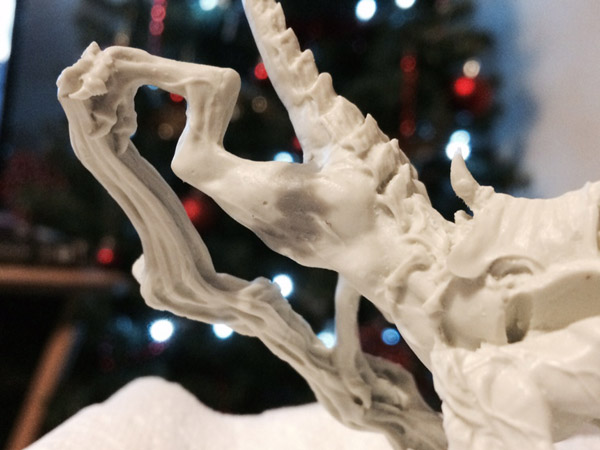
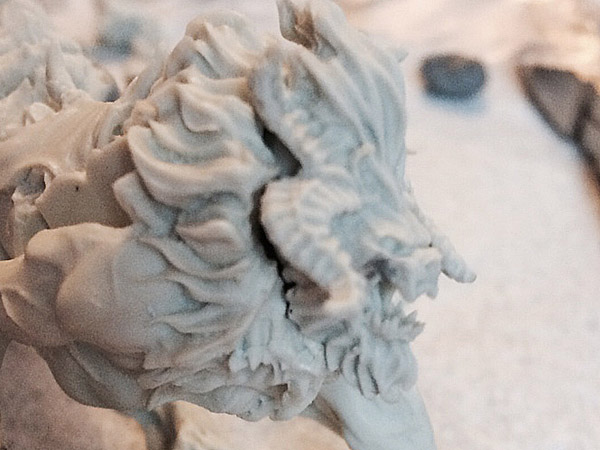
The other major gap filling task is around the head. Here you can see the extent of the gap:
Fortunately I’ve had a lot of practice with fur recently due to sculpting fur capes for my Chaos Warriors and Marauders. The Manticore has quite large, flowing clumps of fur sculpted. I’ve found the best tool for the job to be a simple wooden cocktail stick, again wet (with saliva). After roughly placing the Procreate in place, the motion is one where you stick the point into the putty to create a recessed round hole, then twist and extract the point in the direction of the flow of the fur. This will form a clump either side of the cocktail stick that you then refine and tease out into the desired shape:
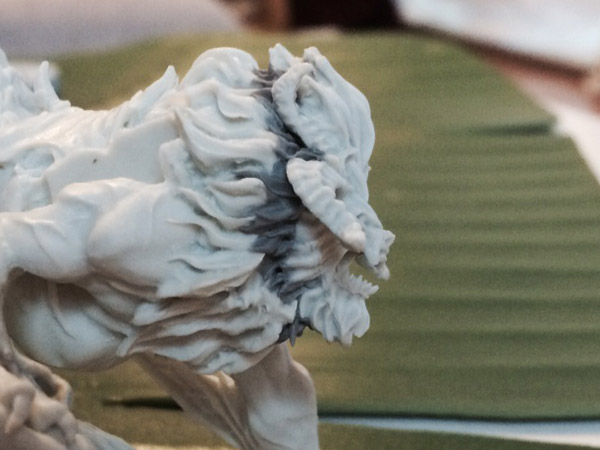
The gap on the other side was larger. Below I’m starting to roughly push putty into the gap using a cocktail stick:
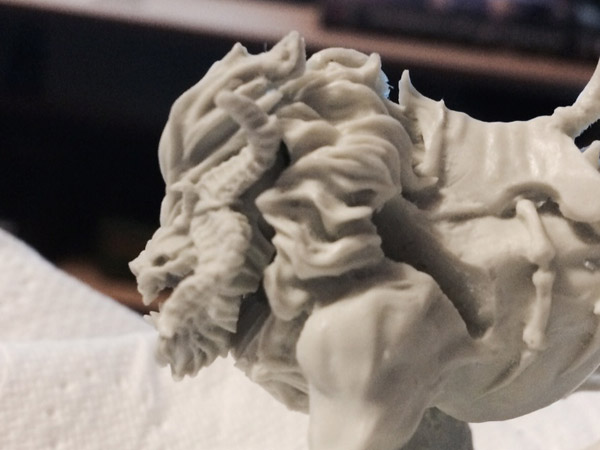
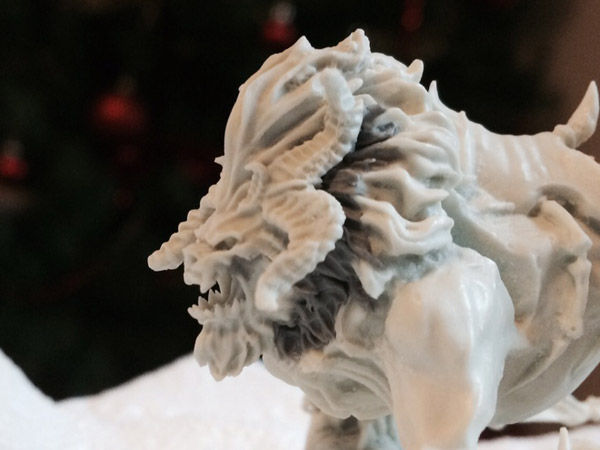
And with gap filling complete:
The next jobs will be working out whether to fix the wings permanently or if they can be pinned or magnetised so they can be removed for transportation. I then want to see if I can add a subtle hair like texture to the Manticores body before moving on to paint (the Manticore will be riderless, at least for now).