
I was lucky enough that my mother got me an airbrush and a compressor many years ago, although I still am just beginning to scrape the surface of what is possible with it. I don’t use it for any fine detail work like you see the pros doing, but the ability to lay down base coats and “zenithal” highlights (basically highlights that make the model look like it’s being lit from above by a light source such as a sun or moon) all in one go is reason enough to invest in one. You might then get out the normal brushes for detail work and fine highlighting.
So, as far as army painting goes, airbrush for base coats, overhead highlights, and if you are doing gradient effects. Using an airbrush like this uses up a lot of paint compared to detail painting so I would recommend a bottom fed airbrush as the little jars hold lots more paint. The good things is a basic airbrush, which is all we want for this type of painting, isn’t actually that expensive. If it comes to it even the horrible plasticy looking GW spray gun gets pretty good reviews from what I’ve read (don’t take that as a recommendation from me though as I haven’t used it).
The airbrush is, obviously, fast. It also makes a far stronger paint surface than a brushed on one which is more difficult to scratch and chip.
Applying this to the Necrons
My Necron army was conceived as an army I could paint almost entirely by airbrush. They can be pretty easy to paint quickly, obviously, if you plump for the standard metal colour scheme, but in my head I have something quite different, using a dark red brown, contrasted by ice blue/white “ceramic style” armour, and replacing the standard green glow with red.
I also set out to use chipping on a large scale for the first time (having experimented a bit on some Tau previuosly).
Because I’m using an airbrush for everything, I’m taking the sub assembly concept (rule 3) to an extreme and barely gluing anything together to begin with – it will all get assembled once everything is painted (except the red glow which will go last).
Stage one was to get all the parts done in my red/brown base coat, which will be the colour for some exposed “metal” parts and also the colour that is revealed under the chipped ceramic armour. I’m using Vallejo “German Red Brown” surface primer. It means there is no need to undercoat anything, which is good because it retains detail and I’ve quite a few airbrush layers to get through. So, I just stuck eveything to several strips of MDF and got to it. Here’s my station, shortly after completing the under/base coat.
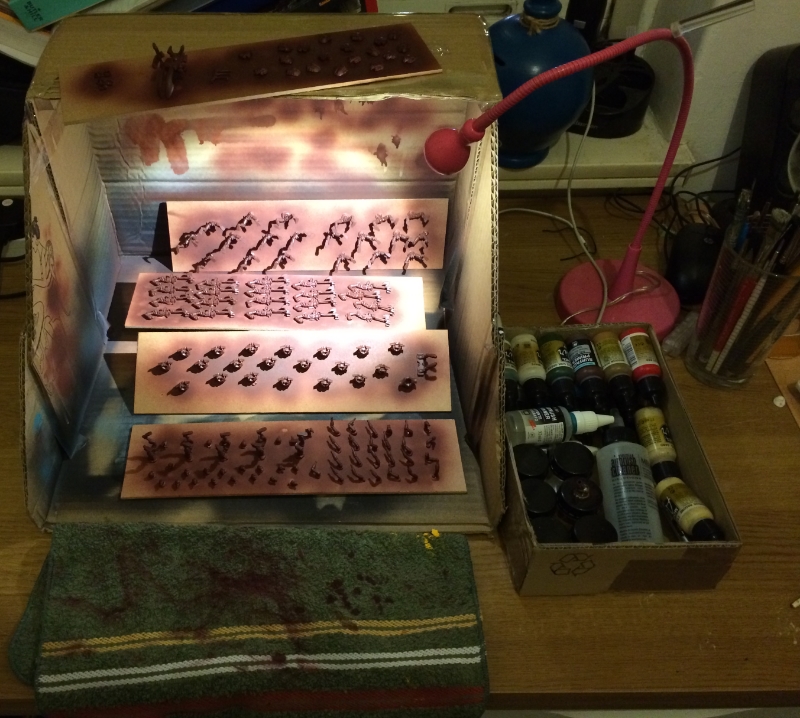
I need to add to this airbrushing station a breathing mask. One thing I’ve noticed with an enclosed box like affair like this is, while it’s nice and portable, it does condense the amount of paint in the immediate breathing atmosphere very noticeably compared to spraying in the open with lots of newspaper down. I found out what Vallejo surface primer tastes like, put it that way!
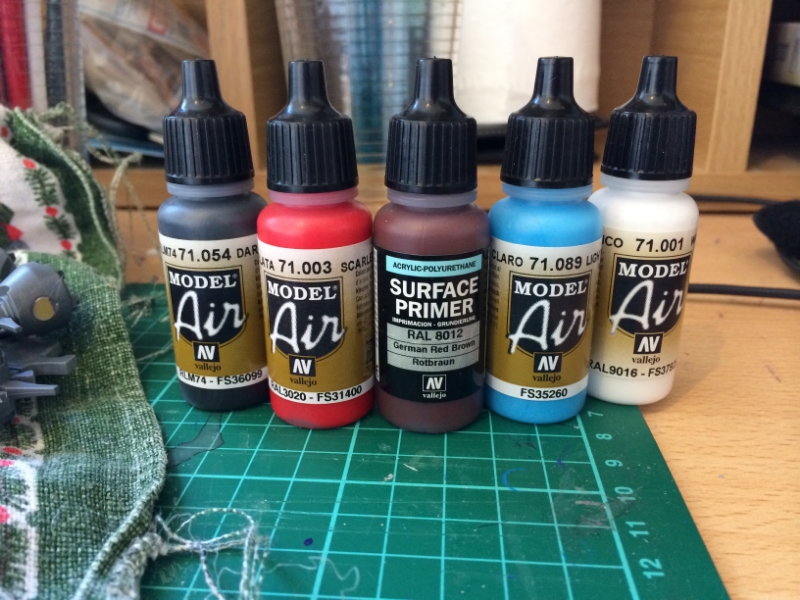
Here’s my colour range. It’s a nice limited pallete but with lots of contrast. I love the German Red Brown vs Light Blue contrast, although it’s only now I realise I’m creating Necrons in the colour of Aston Villa!
Sadly after this photo, I managed to get one fine layer of black wash on the parts before my airbrush packed in. I have ordered another one, but I’m not expecting delivery until Thursday. Very frustrating given I’m now up to the most exciting stages where I’ll be masking and then painting the ceramic armour.
I will have to find other modelling projects to tide me over in the meantime, which I suppose shouldn’t be hard when I consider my list of modelling tasks which now includes 3 40k armies, a blood bowl team and a blood bowl pitch!