Another “troubleshooting” type post today after my last one about fixing the canopy mould, for those interested in the technical details of the casting process.
I stole a march over the weekend by squeezing in a quick mould pouring session last thing on Sunday. That means I’ve been able to pour the first casts of the fins today. First out of the mould was this failure, looking more like the batman symbol than anything else:
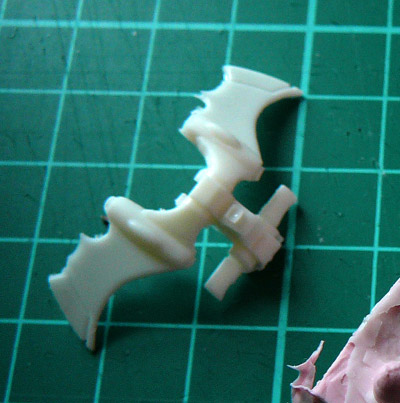
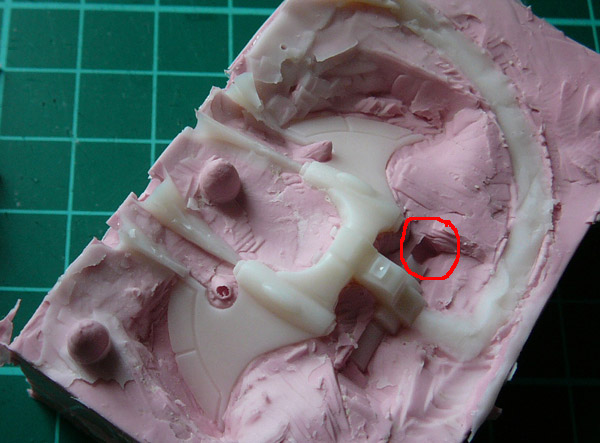
You can see some very big air bubbles at the top of the part making it totally unusable. After a short investigation I decided I hadn’t cut the air vents very well first time round (note, I have taken to cutting the air vents out of the fully cured rubber with a scalpel rather than trying to mold them using wire – the wire approach being far too fiddley). So, out with the scalpel and I deepened and widened the vents leading from the rear most point of the fins and the back of the EML ammo parts.
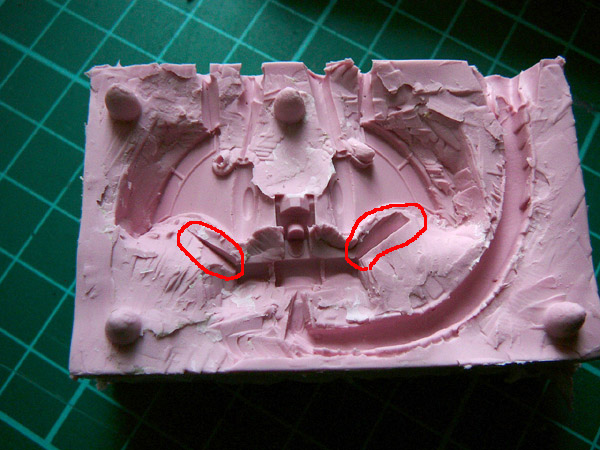
Next out of the mold was this, where you can see that part of the foot pedal is missing again due to an air bubble. This didn’t happen the first time, so its either an irregular bubble that will only sometimes appear (depending perhaps on the speed of pouring) or the fixed air vents have somehow changed the flow dynamics causing this new problem:
Either way we can’t allow it to stand, so I next cut some more channels extending from the pedals. These can’t really be called vents since they don’t lead anywhere so no “venting” can happen, but they should be big enough to ensure any excess air will be pushed away from the detail of the part leaving a full cast:
This seems to have worked ok. Here is the freshly de-moulded part, you can see the extra spur of the new channel on one pedal (the other broke off during de-moulding).
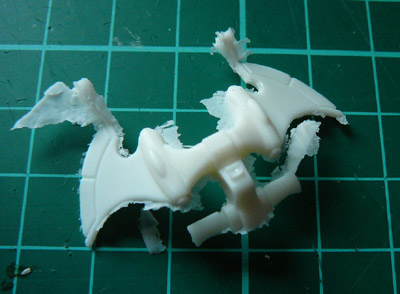
Side note – this is by far the most delicate part I’ve cast so far and also the mold is VERY deep so I’ve had to take extra special care when de-moulding not to bend or break the part. Although the resin is dry to the touch and allegedly cured and ready to de-mould within 20 minutes or so, for smaller parts it remains quite pliable for an hour or more so if you repeat this process yourself you’d be well advised not to de-mould too quickly.