I recently attempted a turn 16 one turn score in a game and was only able to work out how to push my Ghoul 3 spaces. After the game I searched the internet for the right solution to score with a MV 7 piece (needing 4 pushes) without Frenzy, but came up empty handed, so decided to work it out for myself (hopefully this way, I will actually have a chance of remembering the solution as well).
I’ve covered two scenarios here – a clumped up LOS of 3 defenders, and a spread out one. The spread out one is generally considered to be harder to achieve a one turn touchdown from, so many players will set up in this way when they think you might attempt it. As I learned however, it makes very little difference.
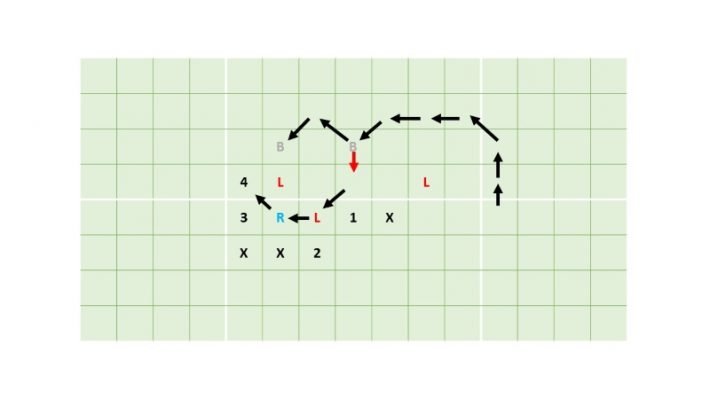
Move 7 OTS vs Bunched LOS
Set up as below. You need 9 players (plus someone to pick up the ball). B is the player doing the blitz – they will need to move 6 spaces. R is your receiver who will score. X’s are any other players (naturally, appropriate skills/strength will help). Red arrows represent blocks and black arrows movement/pushes.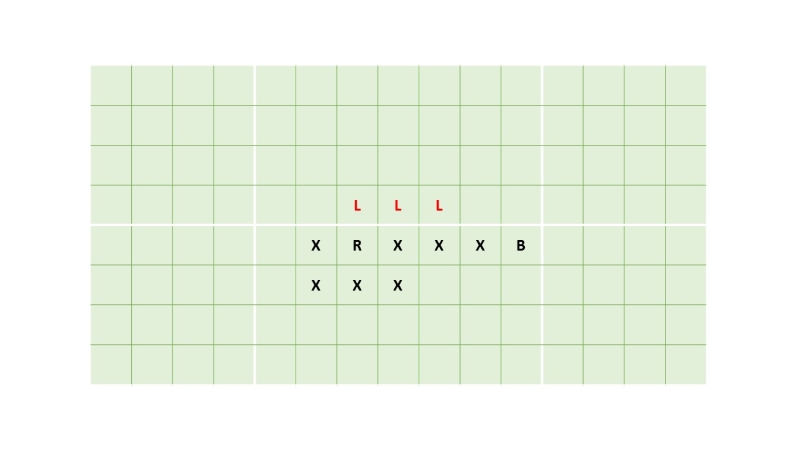 The blitzer hits the defender on the right hand corner, pushing him into your centre player who in turn pushes the receiver out of the pack 1 square forward. After the block, the blitzer should continue moving so he ends his turn in the square above the leftmost LOS defender.
 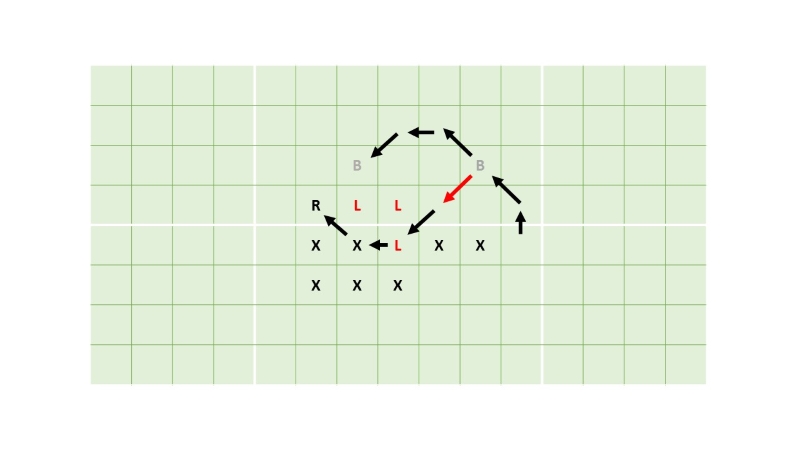 Block with the player to the right of the opponents player, again chaining a push into the same player of yours who pushes your receiver one square forward.
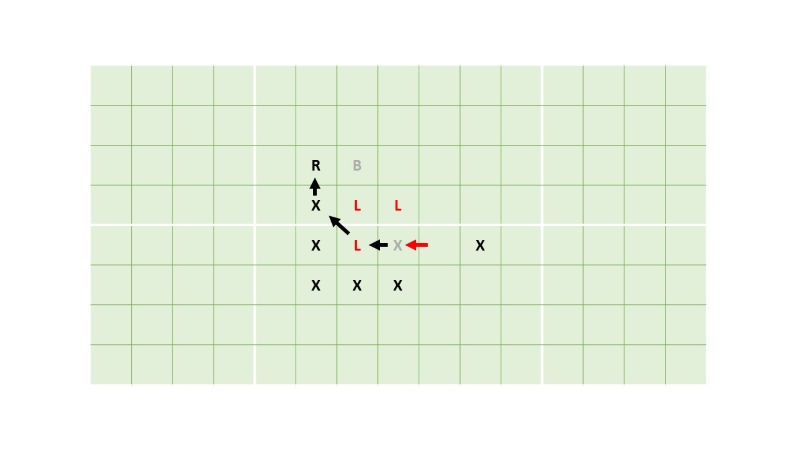 Use the bottom right player in your scrum to block again. This time, you don’t chain the receiver, but instead push your other player out to the top left where he can later throw the final block.
 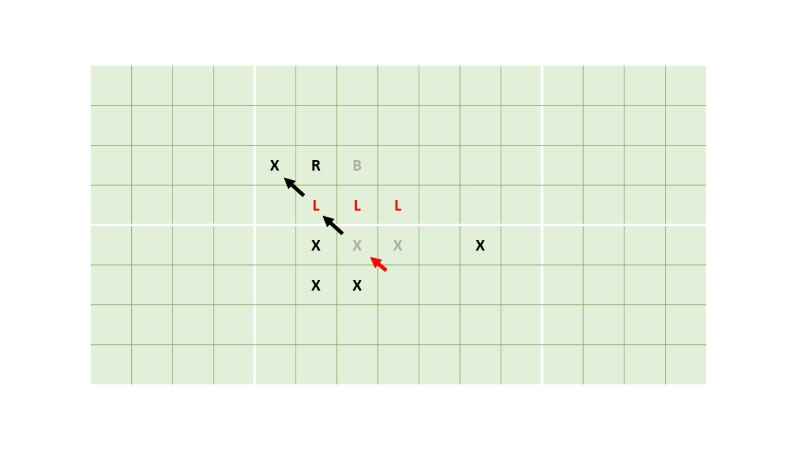 The leftmost player on your LOS throws block number 3, chain pushing the receiver a third time.
 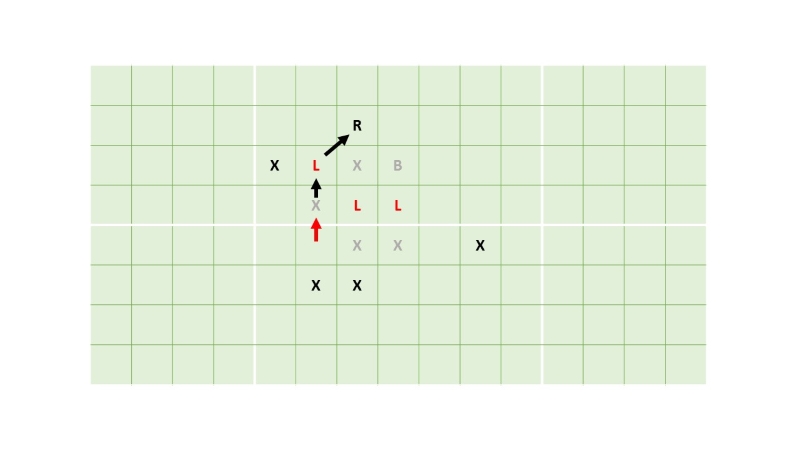 Finally your player who was chain pushed out to the top left throws the final block, hopefully knocking down the opposing player and pushing the receiver the 4th square. Please ignore the random greyed out X above the blocking player here!
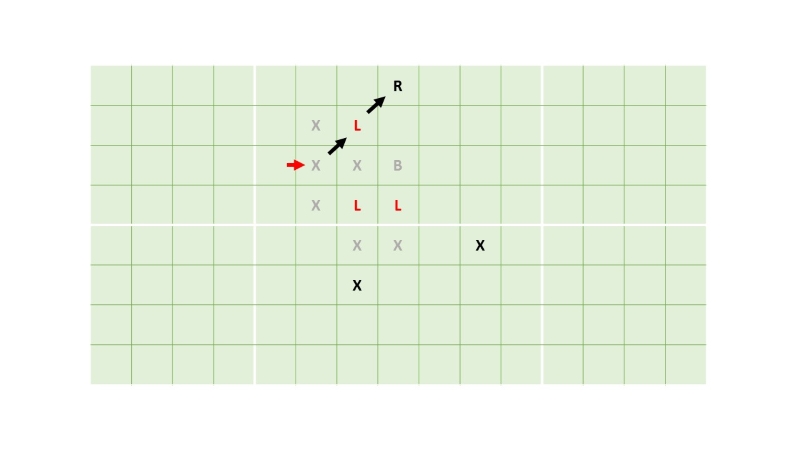
You have 2 spare players here who could be used as part of the play to get the ball to the receiver before he dashes off to victory, needing 2 GFI’s.
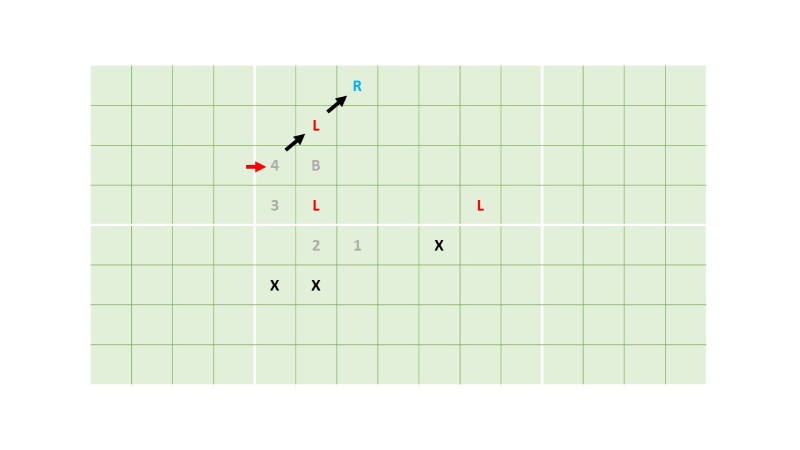
Move 7 OTS vs Spread LOS
I advanced my diagrams between the above play and this one. Now the blockers are numbered in the order they will throw their blocks. The receiver is highlighted in blue.
Set up as below. You need 9 players (plus a guy to pick up the ball). 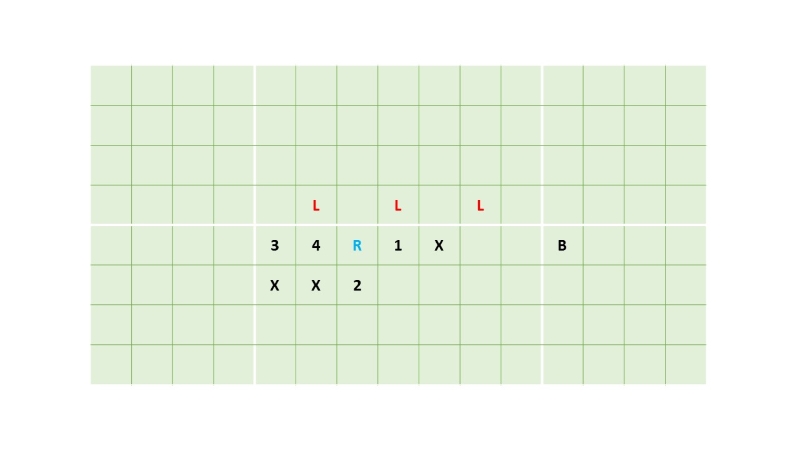 The blitzer hits the middle LOS defender and continues his move, once again to sit in the square above the leftmost defender. This pushes the receiver left and pops player 4 out of the pack and over the LOS.
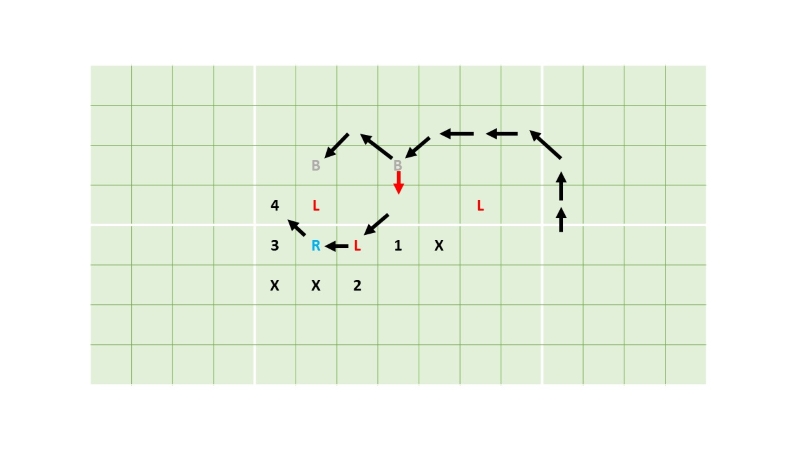 This is more spaces (9) so will probably require GFI’s. This is why this defence is marginally more difficult to OTS against (otherwise, both LOS setups need a blitz and 4 blocks, all of which can easily be made 2 or even 3 die blocks depending on your team and opponent).
However, if you cannot move that far with any blitzer (maybe you only have one mv7 piece left) your blitzer can set up one square left to provide an assist and your rightmost player X can try to knock down the rightmost LOS defender before the blitz, removing his tackle zones to cut down on the number of squares needed (it would then only be 7 squares of movement needed for your blitzer).
From here the solutions are very similar. Player 1 blocks, again chain pushing into the receiver who pushes player 4 into position for his later block. 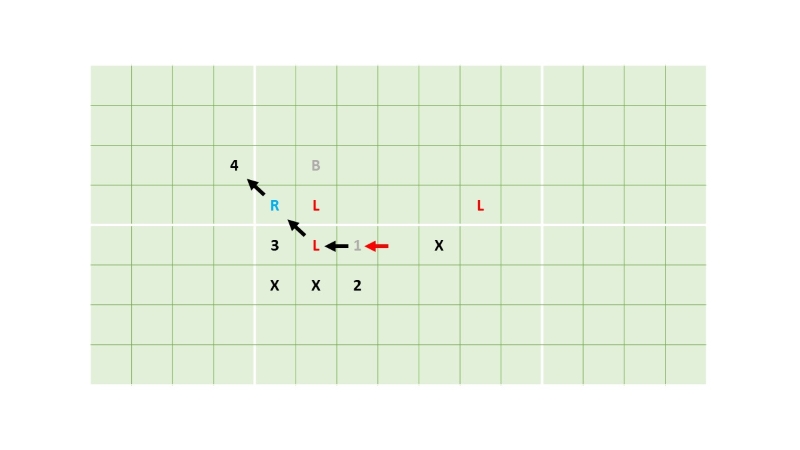 Player 2 blocks, pushing the receiver his 2nd square.
 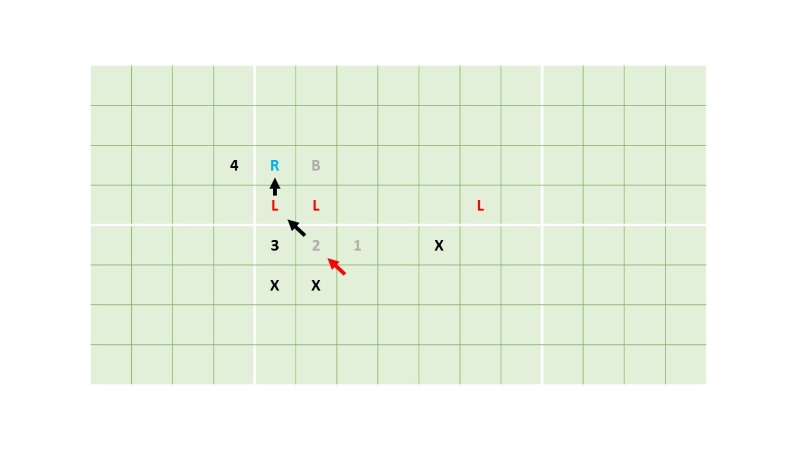 Player 3 blocks, pushing the receiver the 3rd square.
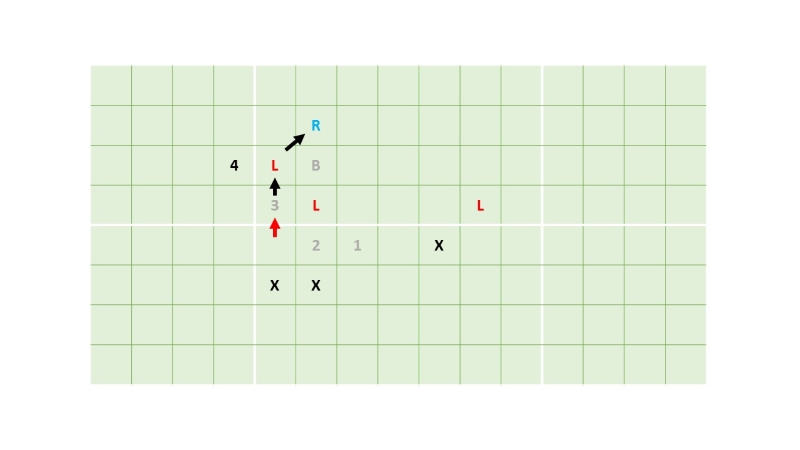
Finally player 4 blocks and hopefully knocks down the defender, while pushing the receiver his 4th square.
 Again there are 2 spare players who might be able to contribute to getting the ball to the receiver.