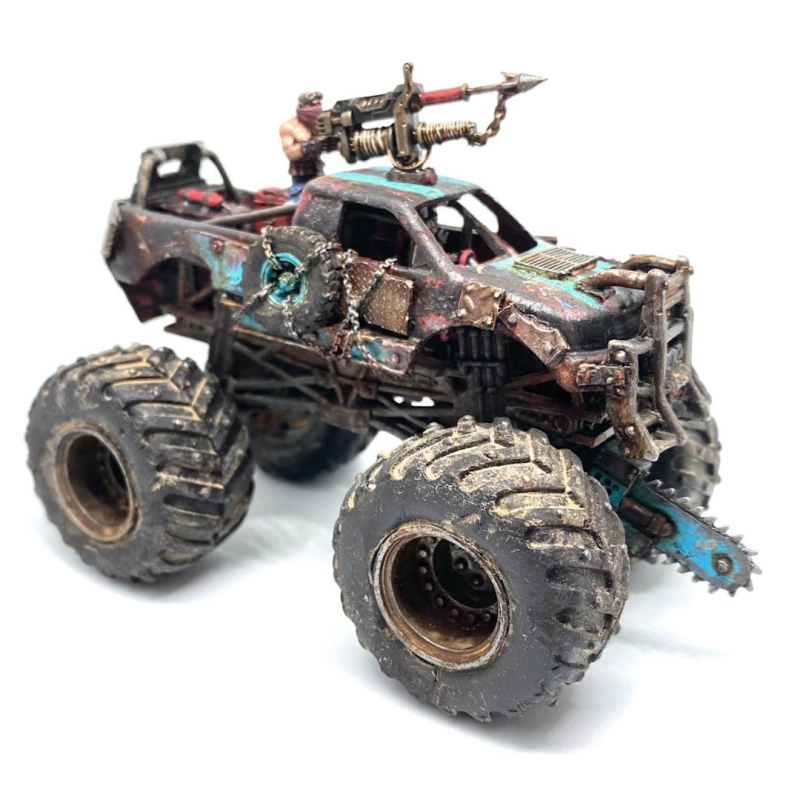
After the Porsche 911 from Deathrace this is my next well documented Gaslands build, though the 5th vehicle I’ve actually completed. I actually started this monster truck slightly before the Porsche but having not being built for a competition it’s ended up languishing built but half painted in my hobby backlog for a little over a year. After painting lots of Eldar recently it’s been a nice change of pace to paint something truly grotty and messy, where neatness and smooth paint application is the opposite of what I’m looking for. It took one day over just a few hobby sessions to finish off what is quite a big model, which is the beauty of painting in this style with the special paints I have on hand.
Truck Body
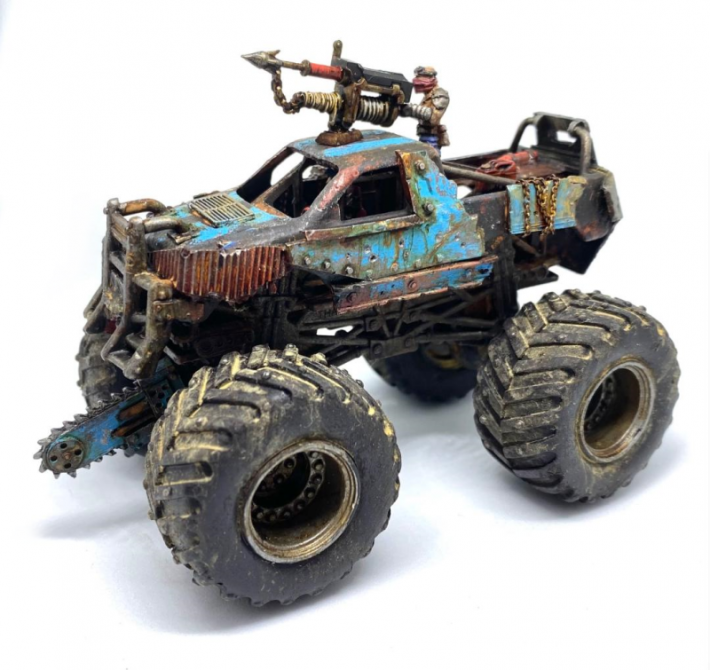
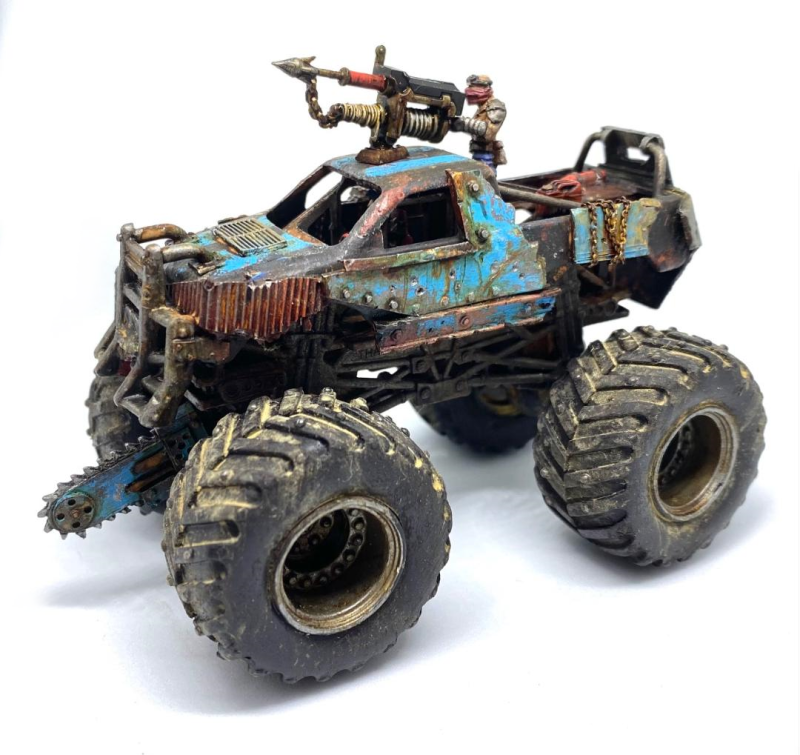
Various bits of plasticard/styrene sheet, strips, I-beam and whatnot have been roughly torn up and stuck on as improvised repairs and extra armour. These have been attached either via rivits or bolts cut from styrene rod, or by chaining them to the truck. The chain is this superfine brass modelling chain which can be difficult to find in the right scale and colour. Chaining a wheel to the side of the body as armour/impact protection is not something I’ve thought of before and I quite like it – definitely a good trick to have in the arsenal when it comes to building more Gaslands vehicles.
With the extra armour I just find you have to keep adding bits and push past the point where it looks a bit naff, and eventually you reach a critical mass of extra plates and it starts to make sense visually.
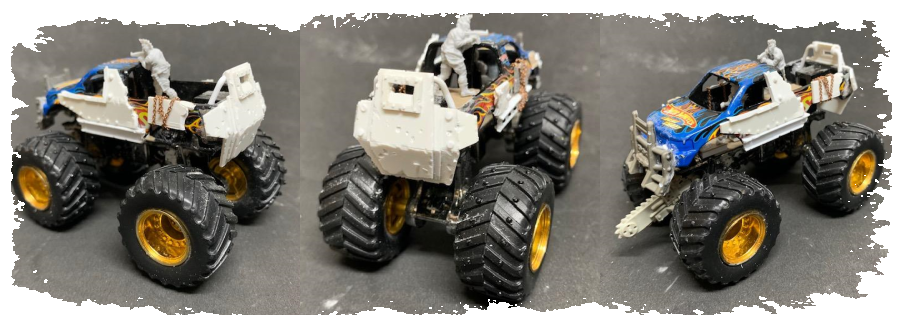
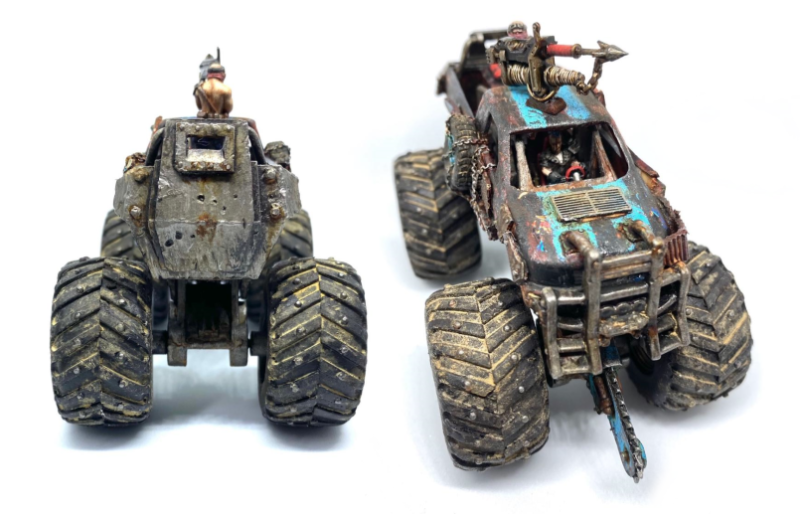
The front has a big set of ram bars. There are reinforced mounting points on the hood/bonnet and on the front wings/fenders, to avoid the ram bar looking “stuck on” (see the WIP image above right, before adding the mounting points).
The main build work at the back is the large armour plating/crew shield. This was built from 3 layers of plasticard contoured around the back of the truck, styrene rivits and rod. I particularly like the struts, as with the ram bar they help to make the shield look more of an integral part of the truck rather than just stuck on the back.
Truck Bed
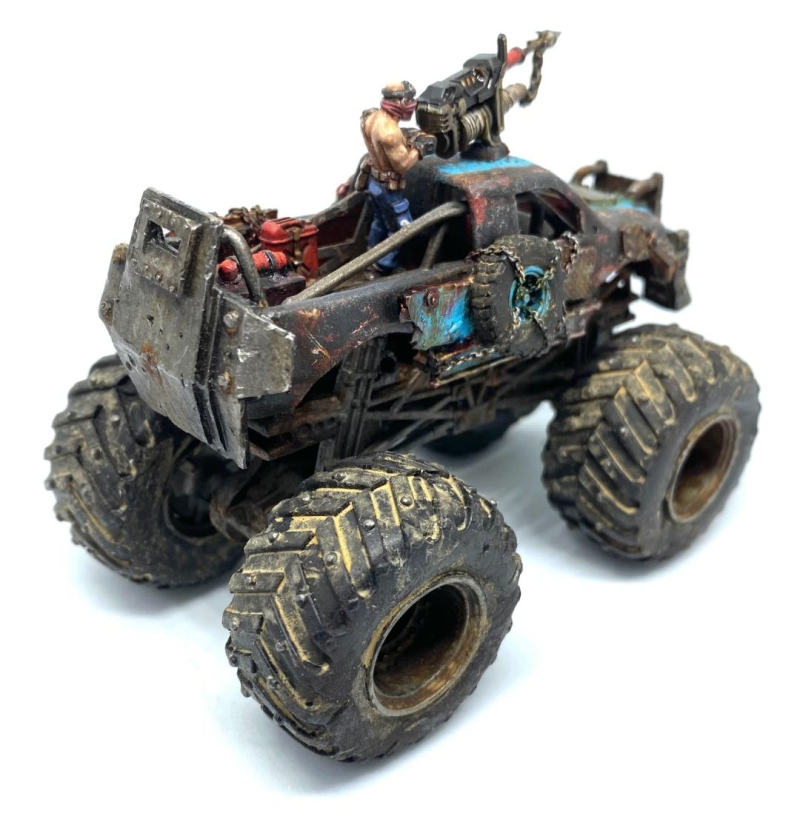
I don’t think the stock model had a deck in the rear flat bed. In any case, I built a platform above the engine with plasticard, and textured this with some diamond plate card. There is a scratch built NOS canister and a fuel can, plus a gunner from Northstar Miniatures wasteland warriors line.
Under the roof of the truck there is a thin disc rare earth magnet. This allows the roof mounted harpoon (which is taken from the Necromunda Orlock kit) to be swapped out for another weapon in future, and to be removed for transport and storage.
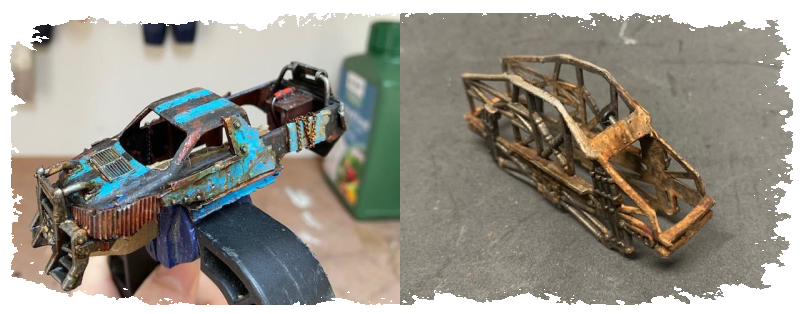
Wheels & Chassis
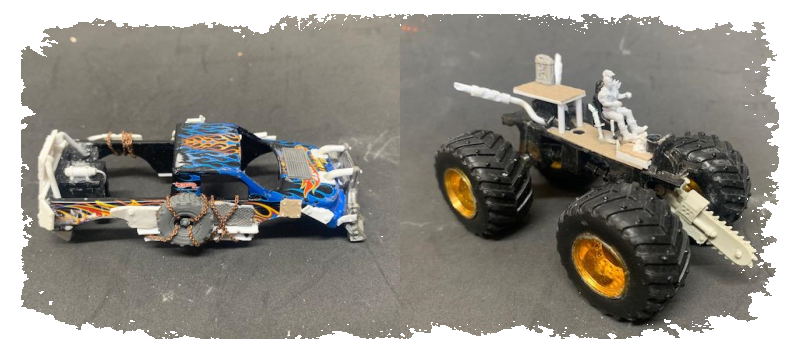
The wheels are the stock wheels, with studs added using 1mm half round nail art beads. The chassis is largely unchanged with the obvious exception of the huge chainsaw, which is a part I originally bought for 40k/Necromunda purposes (it’s designed for very big servitors) but found better use for it here.
Internal Detail
I cut off the moulded chair the car came with, added some treadplate plasticard to the floor and stuck the chair back, raised on struts so the driver could actually have half a chance of reaching the steering wheel and seeing through the window. The actual driver is from Green Miniatures excellent range. I also added foot pedals, a gear stick, a brake lever and a stowed shotgun in a scabbard on the side of the drivers chair! Most of this is lost to the casual observer of course (and proved impossible to photography) but is visible on careful study!
 Painting & Weathering
The monster truck was painted in 3 sub-assemblies then glued together once finished – the chassis, the roll cage and the truck body. This started out as a simple black paintjob in line with most of my other Gaslands vehicles – a rust base coat, then chipping fluid, then painted black and drybrushed before flaking off some of the paint to reveal the rust. I later decided to add the blue stripes and these were again applied over a layer of chipping fluid (using modellers masking tape to get relatively straight and evenly spaced lines). Once these were on it made some visual sense to paint more of the extra armour in the same blue – clearly the crew of this vehicle have above average artistic sensibility. A few details are red for contrast. The red/blue combo lends the vehicle a slightly incongruous sporty look.
The rest is pretty straight forward – everything is black, metal or rusty, and covered in huge amounts of rust, grime or dust. The rust is two specialist rust effects from modelmates which make realistic rust very easy. The grime is mainly black and brown washes. The dust is weathering powder (MIG “brick dust”) mixed with water and washed on, mainly on the tyres but also in a few other crevices. I often work wet in wet when applying these effects and use the brush to pull the effects around, streaking them down the model, and using the “wrong” end of the brush to apply scratches, and tissue to soak off and stipple the effects in places before they dry.