With two main halves of the man cave to fit out, the plan was the left wall would be mainly for storage and the right for modelling. For storage I had already begun to install kitchen units. By this point I had started watching a lot of furniture makers on YouTube and I thought I could design and build my own cupboards, drawers and whatnot. But in the end the convenience of flat pack furniture won out, and kitchen units are among the cheapest way to get lots of storage. I opted for two deep cupboards, a drawer unit and a wall mounted cupboard. A small gap between the units is for storing sheet materials.
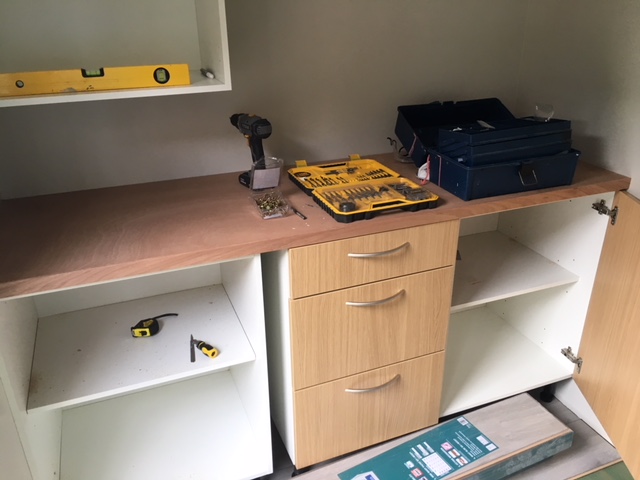
Instead of buying and fitting actual worktop (expensive and very heavy) I topped the units with a cheap internal door cut to size. Ply doors are incredibly light and cost about £20 so when it inevitably gets ruined it can easily be replaced. Another option would be to simply use plywood, though ply of the right thickness to make a solid bench top would be more expensive than this door, and heavier (remember my paranoia about excess weight in the man cave!).
Now, doors like this only have a thin (about 2cm) wooden frame around the edge. The rest (as I discovered) is filled with a thin cardboard honeycomb, like this:
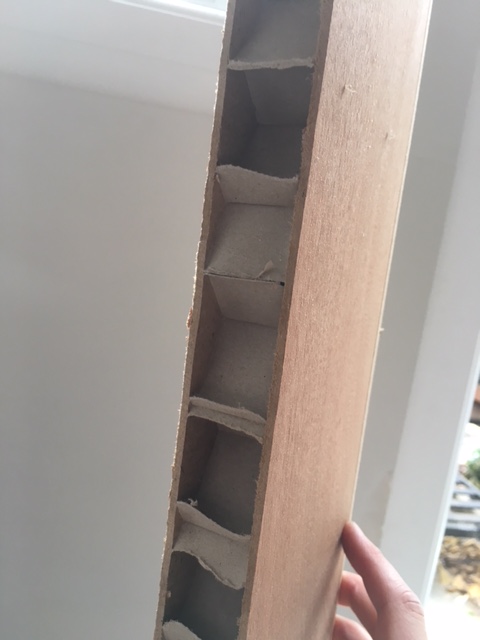
Due to the dimensions of the workbench, by the time I cut the door down only two of the wooden frame pieces were left (at the front and left of the bench). The rest is purely supported by cardboard honeycomb. So far, this seems surprisingly solid.

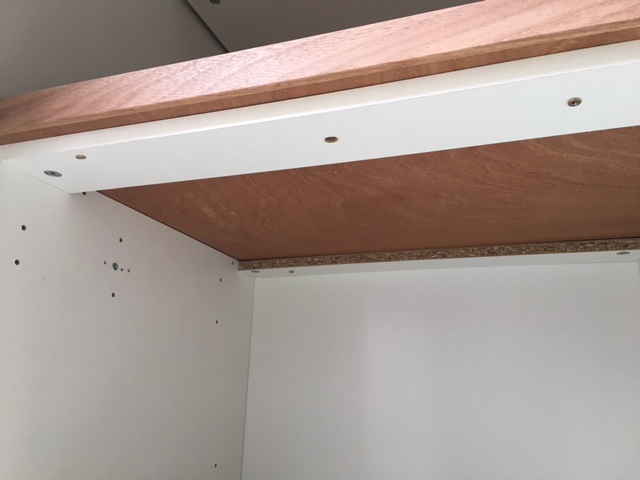
The door is screwed to the units from underneath.
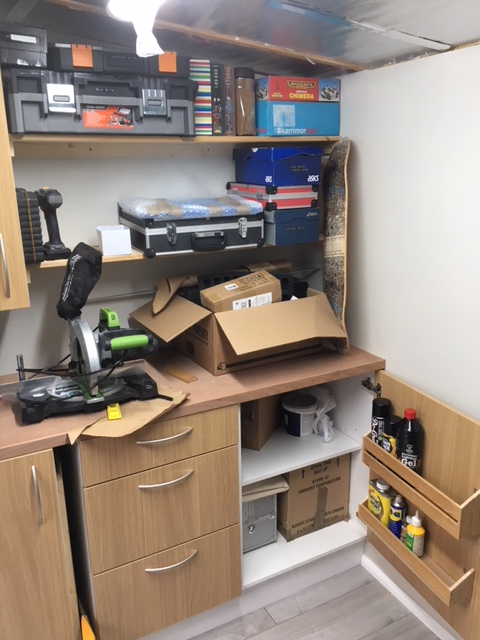
I built some simply shelves to the right of the wall unit, mounting shelf boards on a strip of 12mm thick timber screwed to the studs, and knocked together a couple of racks to go inside the cupboard doors to store bottles and cans. Then I attempted to move all of my stuff into the shed, quickly turning it into a bomb site. Clearly, I’m going to need to be ruthless when it comes to the final clear out and sorting of all my tools, models, materials, and supplies.
Still, this left the right hand side of the shed clear to start building the desk. I started by mounting a solid baton all the way around the wall to rest the desktop on. This is leftover timber from the stud walls, so it’s 38mm wide – more than enough for a good, solid contact.
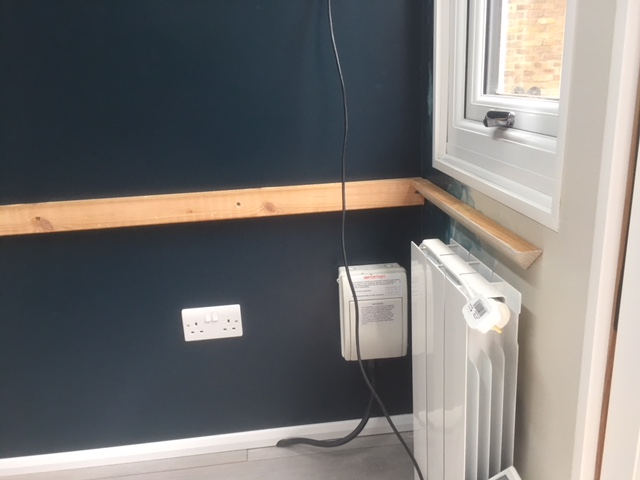
You will notice that the planned location of the desk means the radiator is underneath it, and quite close to the desk top at that. I guess this would lead to poor heat circulation in the man cave with the desk surface itself absorbing a lot of the heat from the radiator. To mitigate this I wanted to install an air vent in the desk, directly above the radiator. The desk itself is, you guessed it, another ply door, and a third advantage of these doors (after cost and weight) is how easy they are to cut. The jigsaw goes through this easily. Here you can see the hole I cut for the air vent:
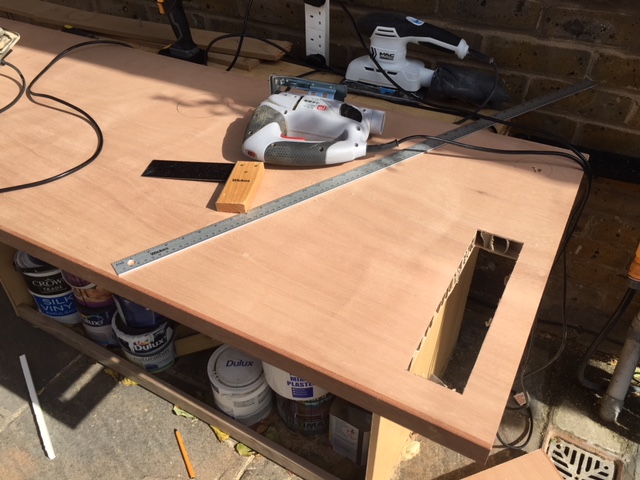
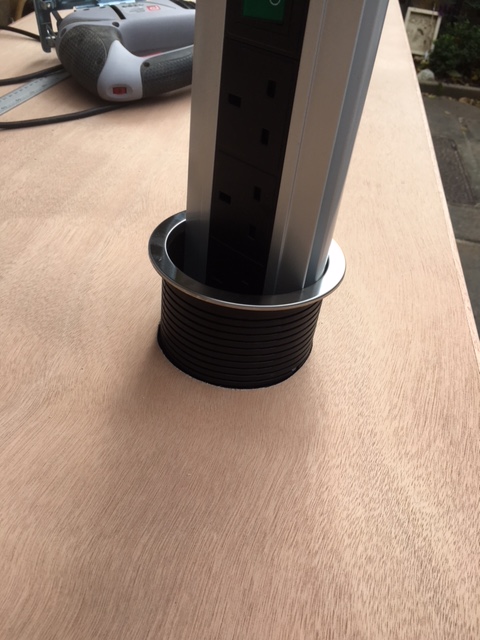
I cut two circular holes as well. One is for a cable port, to run computer power, speaker cables and so on. This was located discretely at the back corner of the desk. My idea is it wouldn’t get much use because the second hole is for an extending power socket that raises out of the desk. In my experience of past modelling areas, easy access to adequate number of power sockets is really important. At one stage in the plan for the man cave I was going to install a desk level socket in the wall, then a 45 degree angled socket on the desk itself, but this option is the neatest as it slides out of sight when not being used.
Then with everything installed, I screwed the door to the batons from below. With just the batons along the back and side edges of the door, there is some flex in the desk that makes it unsuitable for working on (and would lead to it bowing over time). To get around this you could install a baton along the front edge as well with an intermediate stud for good measure. I always intended to put a drawer unit in the centre of the desk, and with a piece of timber of the right thickness wedged between the drawers and the desk top, the whole thing is very solid.
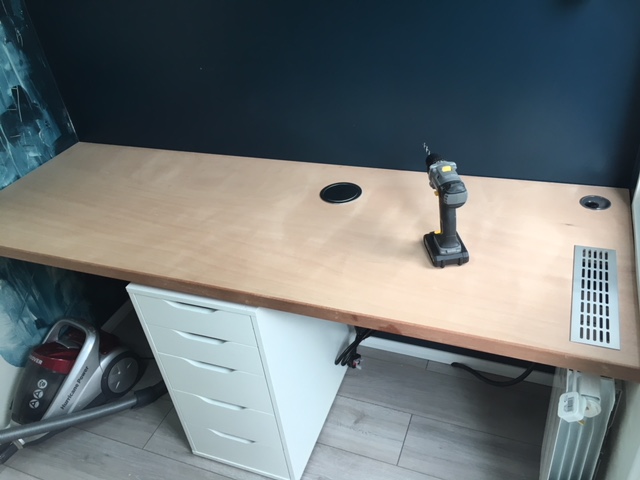
I bought a narrower (610mm) door this time, with the result being I only needed to trim the length and not the depth of the desk – so the wooden baton inside the door is intact on three edges with only the left hand side being without. The drawer unit divides the desk into the two planned work areas – “dirty” work on the left (building and converting), and “clean” work on the right (painting plus computer activities), with drawers easily accessed from either side. The shelves and storage solutions on the wall above the desk will be aligned with these work areas, too. It’s a slight shame that the weakest end of the desk is the one where I’ll be doing the “heavier” work but due to the location of the air vent I felt it was more sensible to leave the intact end of the door on the right (otherwise, the vent hole would leave the desk hugely weak at that end).
The next day was cold and while actually using the man cave for the first time (to write these very words) I’ve turned the radiator on. I’m happy to say for such a small thing it very quickly heats up the man cave, and the makeshift vent seems to work well to allow the heat to circulate. As a bonus this vent will double up as a pretty handy place to leave models to cure modelling putty or dry paint faster!
A note on desk height. Standard desks you can buy are in the region of 73cm high. For modelling and painting I find this too low – these activities are awful for posture anyway but a low desk encourages even more hunching because you usually want to rest your arms or wrists on the desk as you work, but you need to get close to the work, so you end up hunching really far down. So I wanted to make my desk higher to combat this – this one is 76cm high. This difference of 3cm doesn’t sound like a lot but it’s actually quite noticeable. I would have gone 2cm higher still, but my poor planning means there is a window frame in the way.