I got back from Spain to a perfect forecast of two weeks of April sun. This was incredibly lucky. I’d bought a big tarpaulin that would have covered most of the garden but I think the project would still have been miserable if it had been raining and I doubt I’d have got as far as I did.
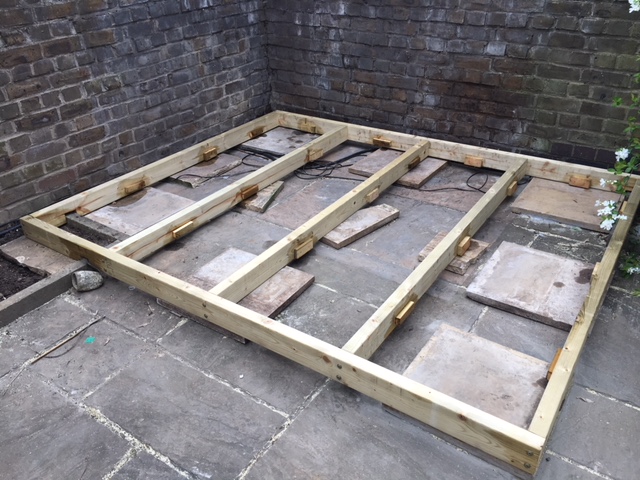
On the first day I built the floor. The construction method is very simple – a basic frame of chunky pressure treated timber with a few internal crossbeams, all screwed together with huge deck screws that are also coated to make them waterproof. I treated all the cut ends of the wood and the screw holes with liberal applications of stuff designed to prevent rot. You can see that I needed to cut notches from the beams to sit over the upright paving slabs at the border of the flowerbed. I made sure to treat these even more times as they are the biggest weak points when it comes to rot in the future.
The spacing of my crossbeams is not standard. There are generally accepted rules for this sort of thing that you can follow if you like. But this timber is very expensive and I would have needed another length to space the crossbeams according to the guidelines, and because I was going to use thick plywood for the floor I wasn’t concerned about the floor collapsing. Plus, having 3 meant one beam runs down the middle so only two sheets of plywood would need to be sized and screwed down.
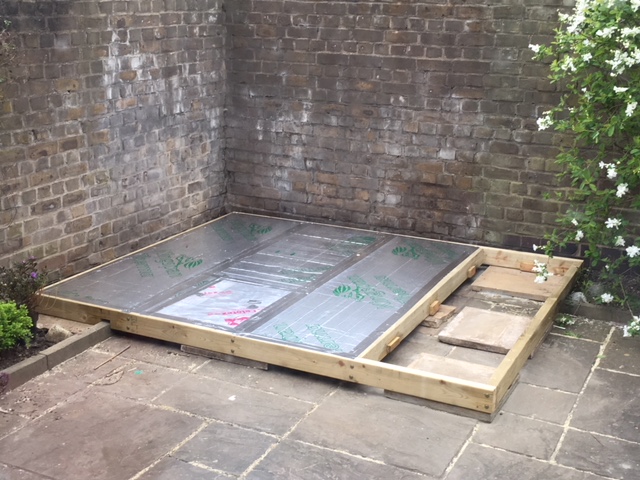
Note the small cleats which are nailed to the inner side of the floor beams. They are scraps of wood nailed 50mm from the top of the beams for the insulation board to sit on. Once in place the insulation board was cut to size and pushed into place. All the joins were covered with aluminium tape which isn’t necessary to hold anything in place but will act as a barrier between the floor beams and the plywood floor, hopefully preventing any moisture from the ground seeping up through the beams and into the plywood.
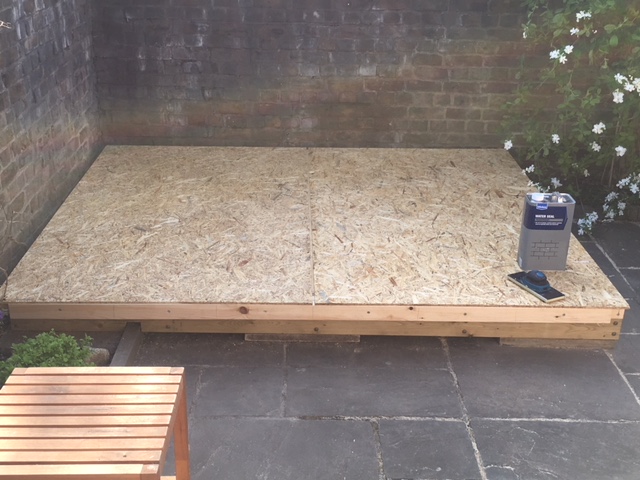
I then screwed the two sheets of 18mm softwood plywood to the beams and treated all the edges. The plywood was cut with a circular saw so that it sits flush with the edges of the beams. It’s worth pointing out at this stage that I left an approximately 10 cm gap between the floor and the wall for airflow around the man cave. Once the plywood is on the floor was now so heavy that its essentially impossible to move.
At this early stage in the build everything was timed with military precision. The cladding arrived that morning. As explained on the website it arrived still wet and swollen from the pressure treating and since I would need it very soon I laid it all out in the sun with bits of timber, pipe and insulation board between the layers so it would dry out.
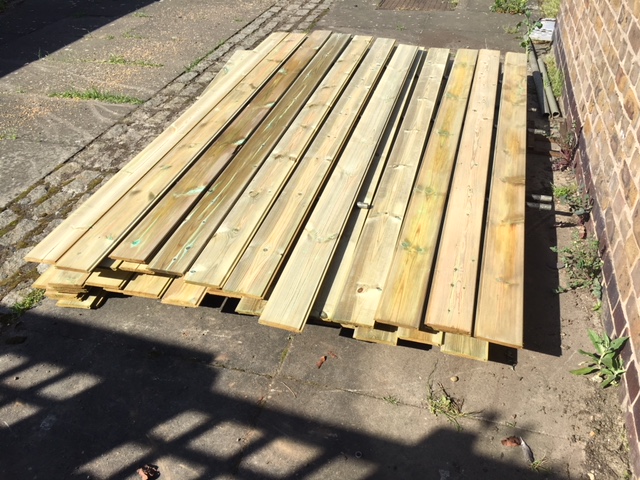
I spent an inordinate amount of time finding a source for tongue and groove cladding that was cheap, with a symmetrical profile and thin enough for my needs (I was constantly concerned about weight on the one hand and thickness on the other – not wanting to infringe into the garden any more than needed or get too close to the garden wall). If that sounds like the sort of cladding you need then you can find what I bought at Witham Timber.
nick reeves
Good work i’m abut to do the same and want to be as close to the neighbours fence a possible, How close to the fence did you get? Thanks
Admin
About 6″ I think Nick. With the method I used to raise the walls afterwards you could theoretically get it closer – the only limit being how much of a “skirt” of cladding you have sticking below the floor level and how much space you want for air circulation. Happy building!