In past plans for my modular Necromunda/40k Cityfight terrain and gaming table, I dreamed of one huge electrical circuit that would power 12-16 separate modular tiles, connected by sockets and jacks on each tile that I could plug together and with a suitably elaborate circuit design that would work under all possible arrangements of the terrain tiles, powering LED’s, old computer fans and so on. In my wildest fantasies the table also included a small dry ice smoke machine and a system of modular tunnels buried in the terrain that would again connect up in multiple arrangements and by which the “smoke” from the machine would make its way around the table to emerge from vents and tunnels, the light from numerous LED’s dispersing through the fog, lending a suitably grim, dystopian, bladerunner-esque feeling to proceedings.
Coming back to reality, I realised that A) my circuit design skills are non existent and B) the added complexity this would all add to the project meant it was exceedingly unlikely I would even start, let alone finish my Necromunda terrain tiles. I did still want LED lighting though, as I haven’t tried it before and there are few settings where it would be more atmospheric in my opinion. Also, the LED’s would serve the very practical purpose of actually being able to see your models and dice when they are near the bottom of the terrain – a very real concern for me considering how dingy and suffocating I want the terrain to be once all the upper level buildings, walkways, gantries and bridges are in place.
So I decided I would scale things back a lot and add a simple self enclosed circuit to each tile where I wanted to put street lightning, burning embers, lit up signs and shop fronts and huge ventilation fans looted from old computers. The plan is to bury the batteries and switches below removable floor panels so they are hidden but accessible.
—
Resistor Value & Battery Power in an LED Circuit
Resistors are very important as they stop your LEDs from blowing. There are online calculators for working out what resistor value you need but as usual, I made a spreadsheet for calculating LED circuit values. This also works out how many batteries of a given size you’ll need to power the lights in your terrain. Not that that’s a very complicated formula but since I was making a spreadsheet anyway why not?
I quickly worked out that powering these circuits with AA batteries is a mugs game – since basic white LED’s are 3.5v bits of kit, that’s already more than 2 AA batteries (which are each 1.5v), and adding more LED’s to your circuit rapidly increases the number of AA’s to impractical numbers. So I just ordered 10 x 9V “D” batteries; they will be overpowered in most cases, but who cares – that’s what resistors are for!
Wiring My First Circuit
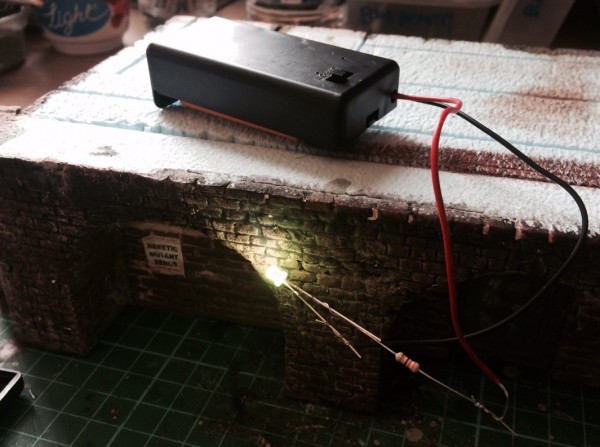
In my eagerness to make them light up I immediately blew 2 LED’s by touching them directly to my 9V batteries. Puzzled as to why they had only briefly flickered into life before no longer working, it took me a couple of minutes to remember about adding resistors to the circuit. If any more evidence that a simple circuit is the limit of my ability were needed, it’s right there.
I then added a resistor and with the LED still not coming alive I found out that LED’s only work when wired one way around. It is far from obvious which side of the LED is positive on a 3mm LED so obviously some trial and error is required.
I am pleased with the all in one battery holder and circuit switches I bought. They are the most expensive part of the circuit at around £1 each but switches themselves are also expensive and these neat little boxes will be good for burying in my terrain with the switches just below the floor or even poking discretely out of the floor.
Colouring the LED Lights
A wide array of LED colours are available but trying to buy them in colours presents a couple of problems. I wanted to bulk buy all the electronics in advance and had no way of knowing how many of what colours I would need. Also stock LED colours are just that – stock. They will restrict you to standard shades and I felt I would want to use some more idiosyncratic colours in my Necromunda terrain, like sickly yellow green, that are not commercially available.
More importantly, some LED colours have different voltages which then dictates you will need different resistors. Again, this complicates and increases the cost of buying the kit in the first place – and complicates your circuit designs.
Far easier I think to buy white LED’s and one type of resistor and worry about colouring later. I picked up 50 white wide-angle (flat top) LED’s and 20 of the more common domed LED’s, again in white. The domed LED’s have a more focused beam, and I figured I would need more wide-angle lights in the terrain for the purposes of street lights, illuminating signs and so on.
For colouring, I mix up the appropriate colour of paint simply using Citadel paints then add a bit of acrylic glaze medium and paint it on the LED tip. The coverage is not amazing but this doesn’t seem to matter – even a modest coverage with gaps in it where the paint is unable to hold surface tension colours the light from the LED very well. The results above show the painted LED.
Next Steps
The plan for this piece is to have a single street lamp located between the two brick arches of the front wall. I will need to tunnel the wires from the LED into the terrain piece and have the battery and switch somewhere near the middle. A suitably gothic-industrial light fitting will also need to be sourced and attached to the wall. If you want to carry on reading about adding LED’s to terrain check out part 2 here.