More progress last night and more illness today = more updates. Since the last post, I’ve learnt a lot about using masking fluid on miniatures.
Things I’ve Learnt About Masking
- Masked bits stick to other masked areas, even when dry. Then, if you try and pull the bits apart, usually the masking fluid on one will peel off. Consequently you have to be careful not to let bits get jumbled up once you start masking them or you’ll be remasking them all the time. They also stick to the desk surface if you allow the wet part to touch the desk while drying, with the same outcome.
- Sticking a masked bit into blue tac also pulls the latex off when you try and remove the part from the blue tac.
- You can clean a brush clogged with masking fluid by letting it dry then using a scalpel to repeatedly “comb” the latex out. It’s not perfect so you’d certainly still use an old brush, but it does mean a single brush has lasted me through masking all the bits so far.
- As most bits require multiple areas of masking and considering the aforementioned liability of the parts to stick to things, it is sensible to do the areas in stages letting the latex dry each time. On the scarabs, I did all the tails, then all the left legs, then all the right legs. Same story with the necron torsos. I was watching Oceans 11 on normal TV last night and instead of sitting through the ad breaks I took the opportunity at each break to do one section of masking. It’s a job that takes 5-10 minutes so you sometimes eat a little bit into the film, but that doesn’t matter too much if you’ve seen the film and overall this was a useful approach for both getting through the task at hand in manageable chunks and also not annoying the girlfriend by being at the painting desk for long periods.
So what progress have I made on the contents of the Necron battleforce?
- Necron warrior torsos – DONE
- Necron immortal torsos, right arms & guns – Not started 🙁
- Left arms – DONE 😀
- Legs – WIP, 50%
- Scrabs – DONE 😀
- Warrior right arms and guns – not started 🙁
- Heads – not started 🙁
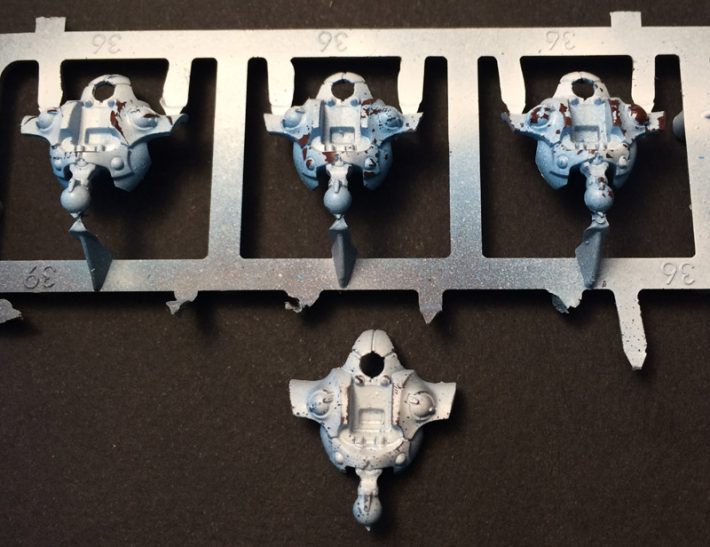
Here are all the parts I needed to mask on the torsos – neck, spine, underside, guts and arm joints:
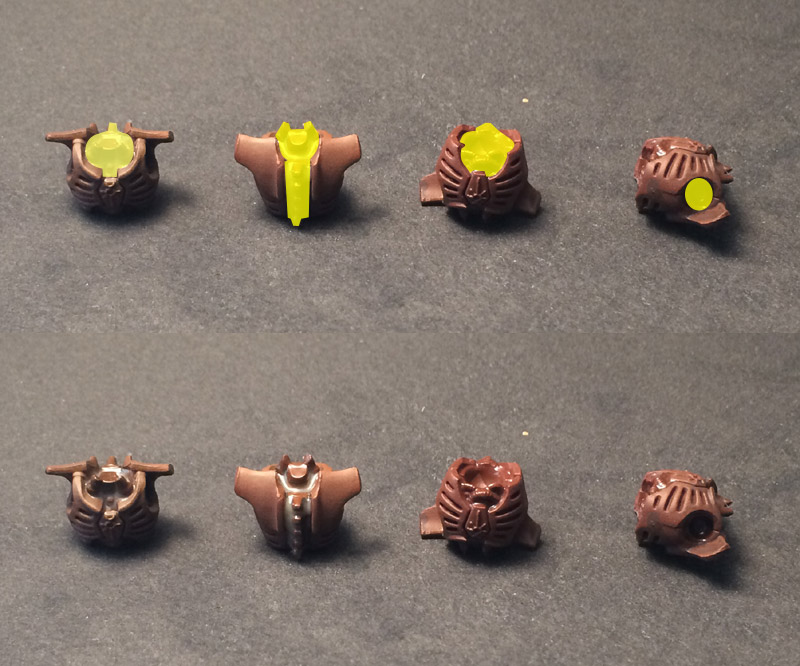
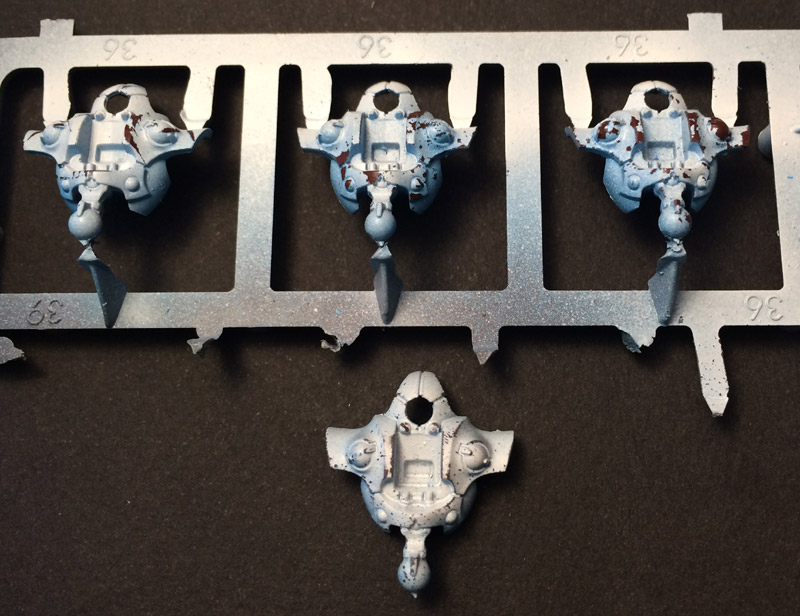
For those that are done I also need to apply the chipping/scratching/corrosion masking. I’ve not been entirely happy with using a sponge in the past so I tried out 4 approaches on some unused Deathmark bodies.
From left to right, top to bottom: hand painted with a single brush hair cut from a decorators brush; sponged using the scourer pad side of the sponge that has been teased out into strands; sponged using the normal side of the sponge; flicked from an old toothbrush.
- Single hair – nice variety of cracks/scratches possible. Not adequate on it’s own but definitely could be part of an overall damage mask.
- Scourer side – better than expected when I first applied it. Right hand side in particular looks effective
- Sponge – same problem as I usually get which is that high points tend to accumulate too much masking fluid leading to too big areas of damage.
- Flicked – difficult to aim and difficult to remove due to small size. Has potential though as it causes many small pock marks suitable for a corrosion effect.
I think I’ll go with a combination of 1, 2 and 4 to begin with and see how that works.
Also of note if I scrub hard enough with the toothbrush paint starts to rub off on the edges which is a useful effect in it’s own right. See the edges of some armour plates on the flicked experiment (fairly sure that damage isn’t the result of the fluid).