Approaching the finish line with this project (“this project” being the full Phoenix Court of Khaine with largely modernised converted Phoenix Lords). Baharroth is the 4th Phoenix Lord I’ve converted and the 5th to be finished (Maugan Ra is also done, but not in this project log yet as his model is stock so didn’t seem to justify a post all of his own). Here are the previous conversions: Asurmen Feugan Karandras.
Compared to some of the other Phoenix Lords I think the Swooping Hawk Lord has aged quite well, in fact my 1st attempt to convert him modified very little – I just altered the wrist angle on the sword arm to point it forwards slightly and accentuate the “to the skies!” pose, subtly bent the wings to give them a bit more volume and then mounted him launching from a large rock. For reasons now lost to the mists of time, that version of the model got broken up (I think what happened is in the process of trying to pin the right foot to the rock, I effectively destroyed the foot and lower leg, got frustrated with my attempt to sculpt or assemble a new one, and shelved the project for a few years).
When it came to looking at the conversion again, I had advanced in terms of tools and materials, and possibly patience. In particular I had discovered the jewellers saw, which enables very fine and intricate cuts in metal models. Because of this I decided to try something more ambitious. By now we know the common problem with the stock Phoenix Lord models, namely the fact that the model is almost stuck in a 2D plane. So my version really tries to do a lot to break out of this. Proportionally the model is pretty good – perhaps the head positioning is a bit squat (“no neck” syndrome). In the course of the conversion I ended up lengthening the neck. Because the conversion also lengthened the legs, I also slightly elongated the sword arm too.
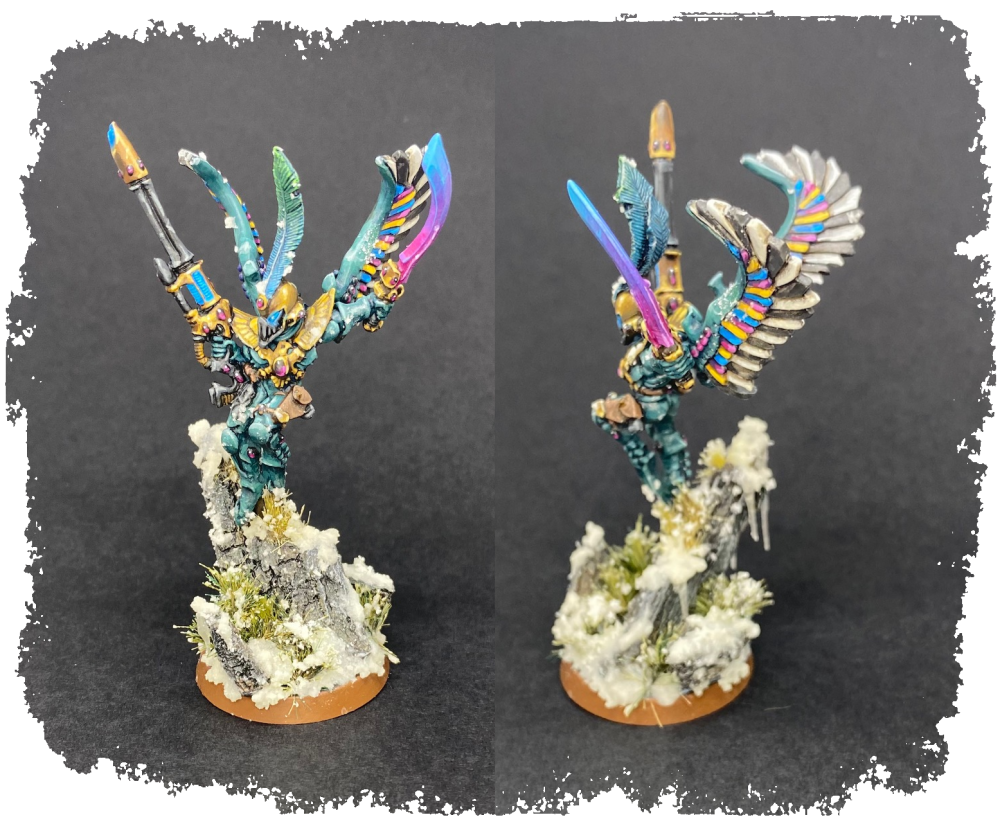
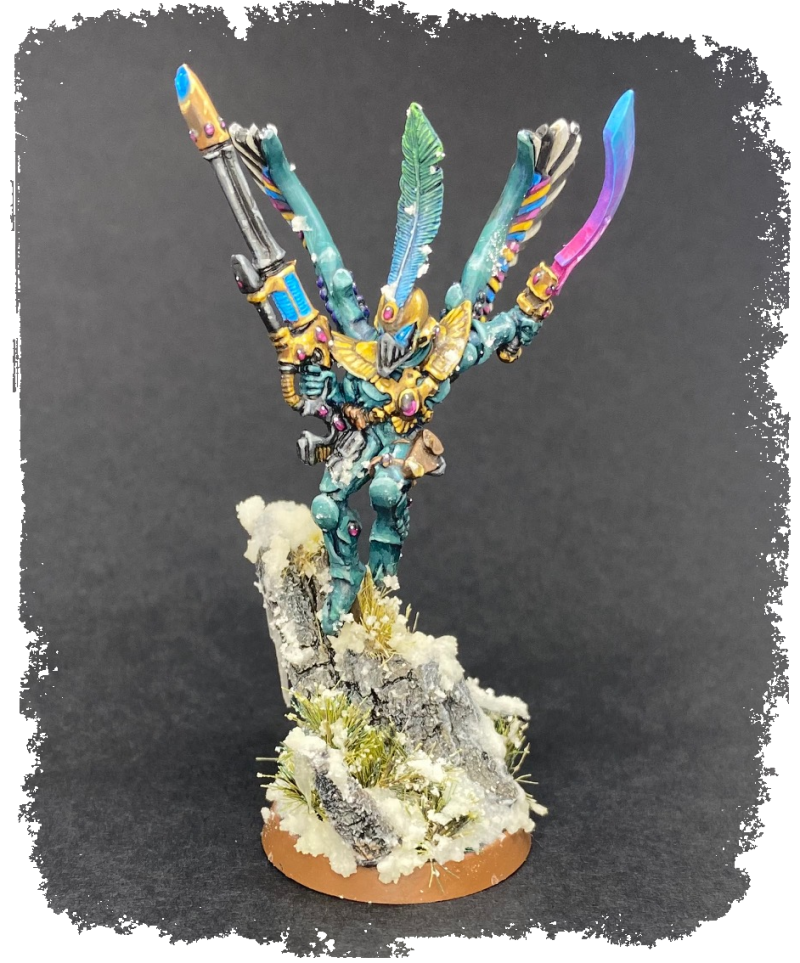
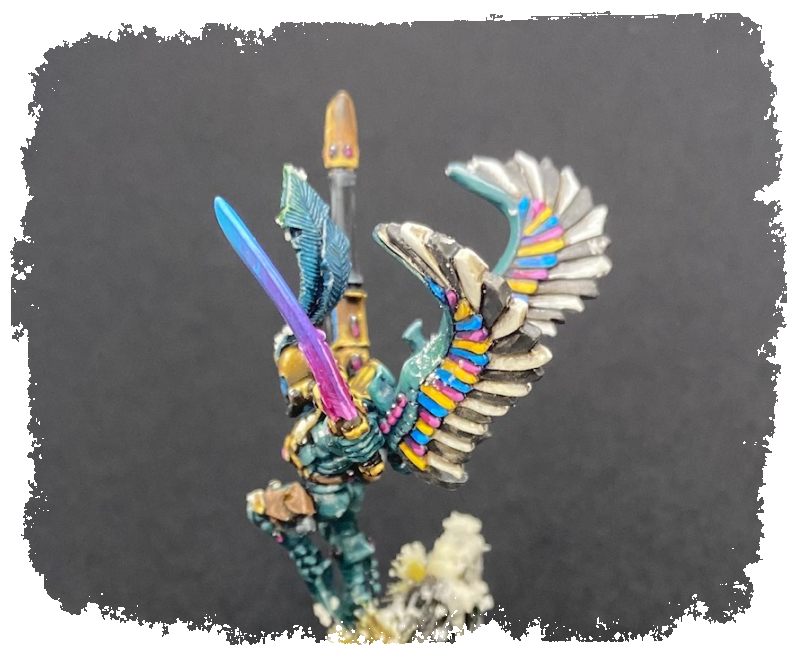
This is what I ended up with, with the intention that Baharroth is swooping down to land and about to make a decapitating strike as he does so:
At one stage it was a close run thing with an alternative pose, basically a modernised version of the “to the skies” original. As I mentioned above, this alternative was what I first tried to do with the pose and it didn’t really occur to me until quite late in the process when I was twizzling the head around. The difference here was literally just the head facing towards where the sword points, which goes to show how important the facing of the head of a model is in conveying what it’s doing.
It’s been so long since I was building this model that I’ve lost all the WIP photos that show more details of the build and the alternative, but in any case “Decapitating Landing” ended up beating “To The Skies 2” in a poll of my local gaming clubs and I preferred it if for no other reason than it’s a more radical departure from the original. Now let’s go through my usual run down of what I did…
Legs
Probably the weirdest part of the Baharroth stock pose is the left leg, which has a sort of ballet dancer quality to it. I chopped it off to reattach it to the hip at a more natural angle. This was really the genesis of the “coming in to land” pose.
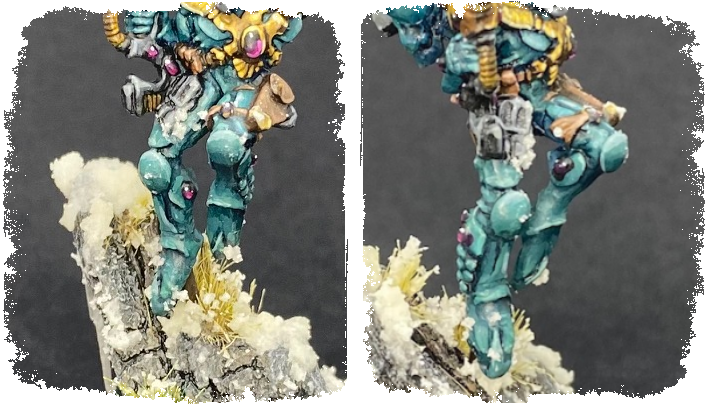
The lower right leg comes from a spare swooping hawk exarch (recall that his original leg was destroyed when I tried to convert the model some years ago). There is a continuous 1.5mm brass pin running right through the base, the rock, all the way through the foot, lower leg and knee and then deep into the thigh. Undoubtedly the most ambitious bit of pinning I’ve done and one I hope will give the model the strength it needs to last! When drilling, I used a small 0.7mm bit for a pilot hole then very carefully a 1.5mm drill bit. The wire being the same gauge as the hole means there is a pretty tight “interference fit” which I hope will stop the model coming loose and spinning on the pin. It is pinned in such a way that the thigh has more length, to give some more elegance to the model and match the newly positioned left leg.
Once everything was pinned I re-sculpted the joins and did a bit of work to make the Exarch lower leg look like Baharroth’s intact one.
Base
The rock is one big piece of tree bark, liberally soaked in thin superglue in the process of sticking it to the base (I actually could see fumes coming from the bark as the glue reacted with whatever organic compounds and fungal lifeforms were in it). As noted, a single brass pin runs through the base, tree bark and up into the leg. I also added some lead shot on and under the base to counterbalance what is a pretty top heavy model.
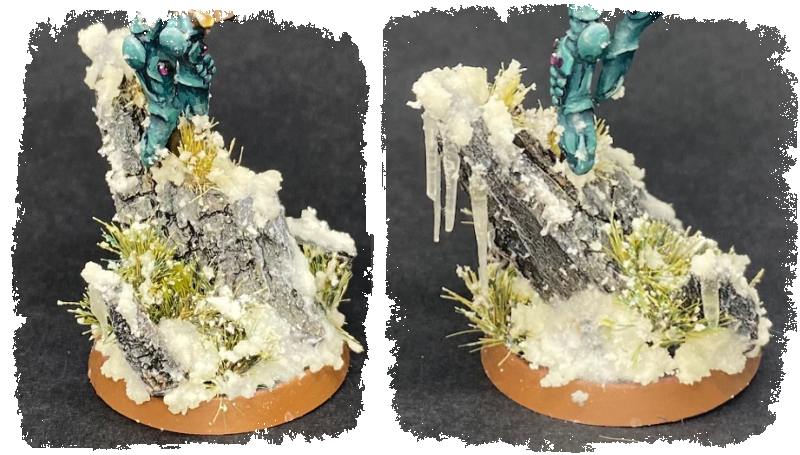
The pin is largely concealed by grass tufts and snow, and the large rock was a good opportunity to add plenty of hanging icicles, made from 1.5mm clear plastic rod stretched out under heat.
Fun fact – he started on a 32mm base (the proper size for my Phoenix Lords). Then I was looking at it and somewhow got it into my head that it was too small and the others were on 40mm bases, but I’d already built the whole rock formation and pinned it all together so it was too late to swap out the base normally, so I hacked off the lip of the 32mm base and sanded down the underside of it so I could stick the 32mm base he was already mounted to onto a 40mm base. Then I later realised that all the others were in fact on 32mm bases (of course), and so now. But I’d done a much too good job of sticking the 32mm base to the 40mm base so was left with no other option to clip the rim and some of the surface of the 40mm base off, sand the underside of that down, and then glue that onto a second 32mm base. In short, he’s actually on 3 bases!
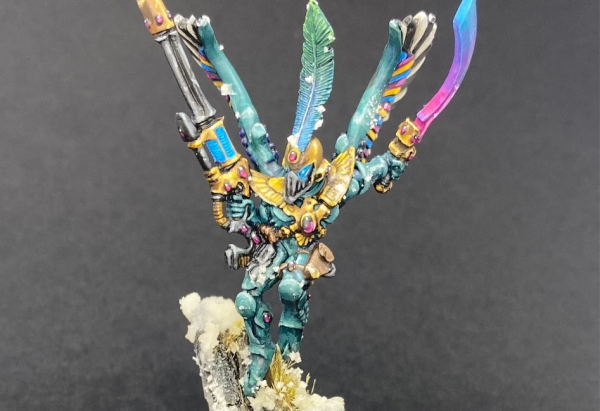
Head & Torso
I removed the head entirely. While the jewellers saw did a fine job, once removed it will still require a lot of fiddly sculpting work on the left side of the face, including part of the eye and a rebreather hose (the stock model doesn’t really have a full face as it’s partially hidden by the shoulder pad). Instead I used the head from the spare Swooping Hawk Exarch who had also donated his leg, this helmet being much more distinct from the body and so possible to cut off cleanly. I did keep Baharroth’s plume though, and cut and shaped (with files) both the plume and the helmet to get a close fit of the two pieces. The end result is basically indistinguishable from Baharroth’s actual helmet.
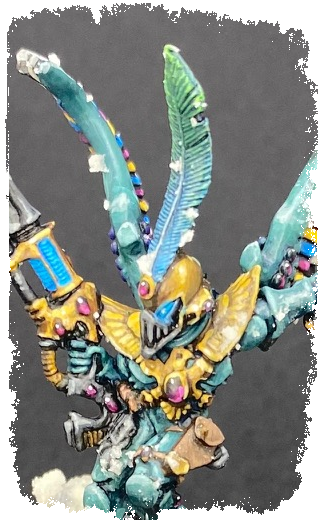
Then I pinned the parts without gluing allowing me to consider the direction he’d be looking in before making the final decision. For the neck, I rolled a very thin line of putty and wrapped it around the wire a few times.
No work was done on the torso except to re-sculpt the damaged left shoulder pad and some of the detail behind the neck where the razor saw had gone through.
Arms
The right arm is untouched (with a jewellers saw it is feasible to remove, but then it’s so integrated with the gun anyway that I’m not sure what you would realistically achieve unless you planned to completely rebuild or kitbash the arm and weapon).
The left arm was lengthened so the proportions of the model worked with the longer legs, and the rotational angle of the forearm altered by cutting at the elbow and pinning. I also cut away the sash that Baharroth has tied to his upper arm and then re-sculpted the upper arm and elbow. I also slightly enlarged the forearm armour which looked slightly puny compared to his hand.
Wings
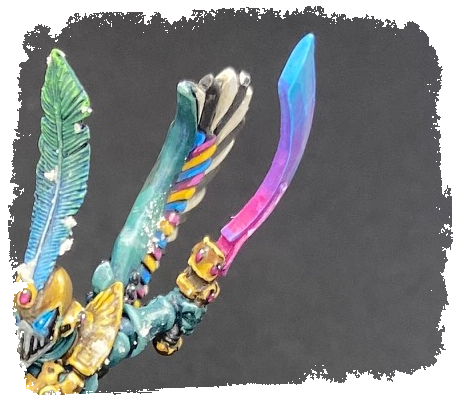
These received a lot of bending with pliers (with the wings suitably wrapped in a cloth so as not to damage the sculpt) – so much so that I actually broke them at the point they join to the jetpack and ended up pinning and re-sculpting the base of the wings. Apart from bending them both back, I also bent the bottom tips in and the top tips out, hopefully imparting a bit more movement in them. There was an aborted attempt to cut between the individual feathers and bend them individually – after cutting a few feathers I realise that the two sides of the feather don’t line up so this plan doesn’t really work. I mended the damage with putty and moved on.
The whole assembly was pinned into the back. Once again the part spinning on the pin is a potential issue so I used two pins, a main 1.5mm brass pin for strength and a small 0.7mm paper clip one to stop it spinning.
Painting
I didn’t enjoy painting this at all. I was working on it at a time when I wasn’t terribly inspired and also had been out of practice. Some areas were repainted a couple of times as I struggled to land on the right palette. It’s come out okay, and sits well alongside the others, but I do think the painting quality is easily the worst of the 5 so far (he just holds his own due to the ambition of the conversion and basing).